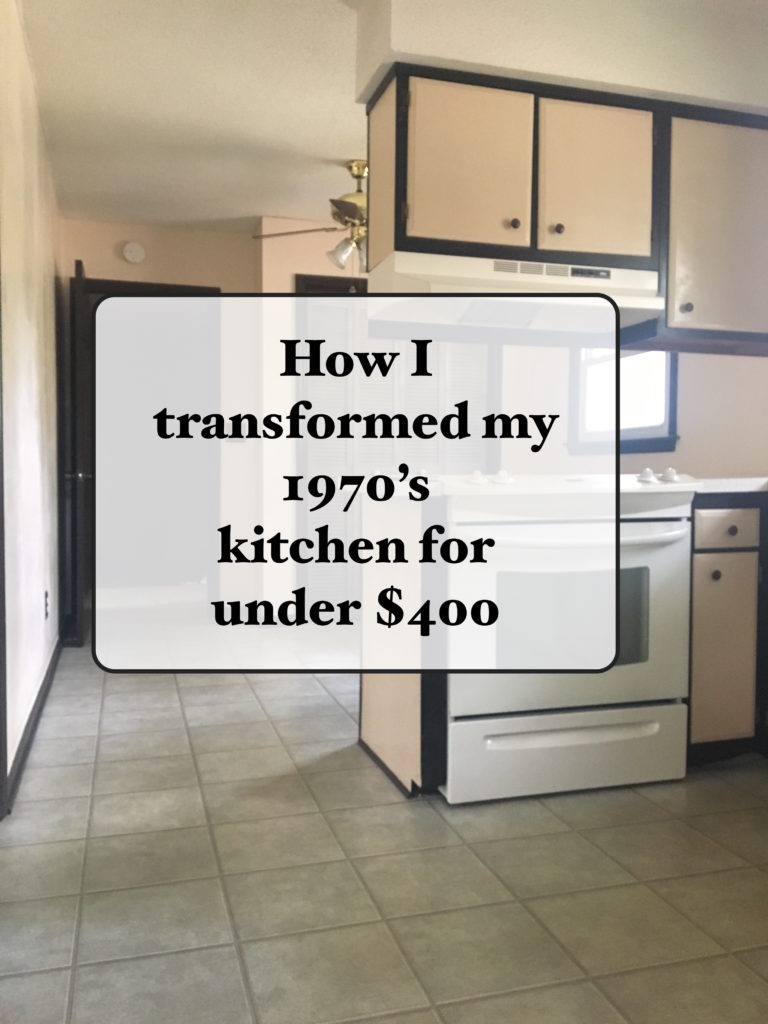
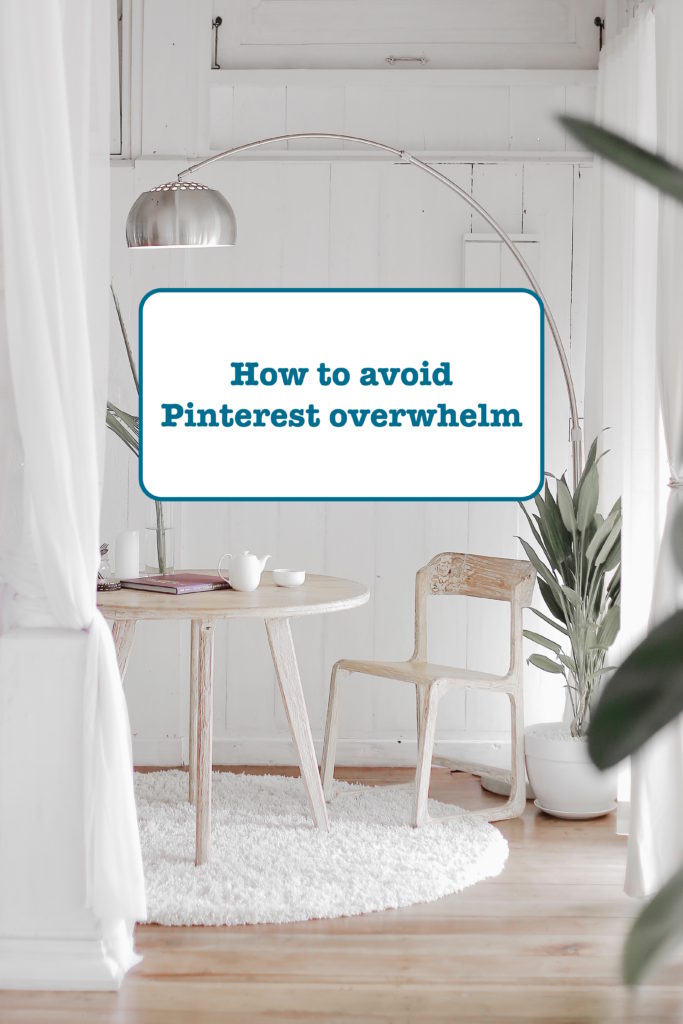
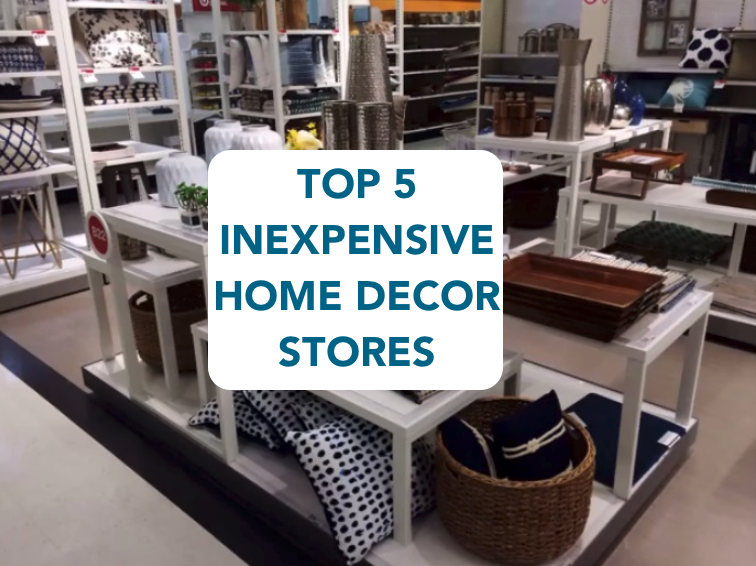
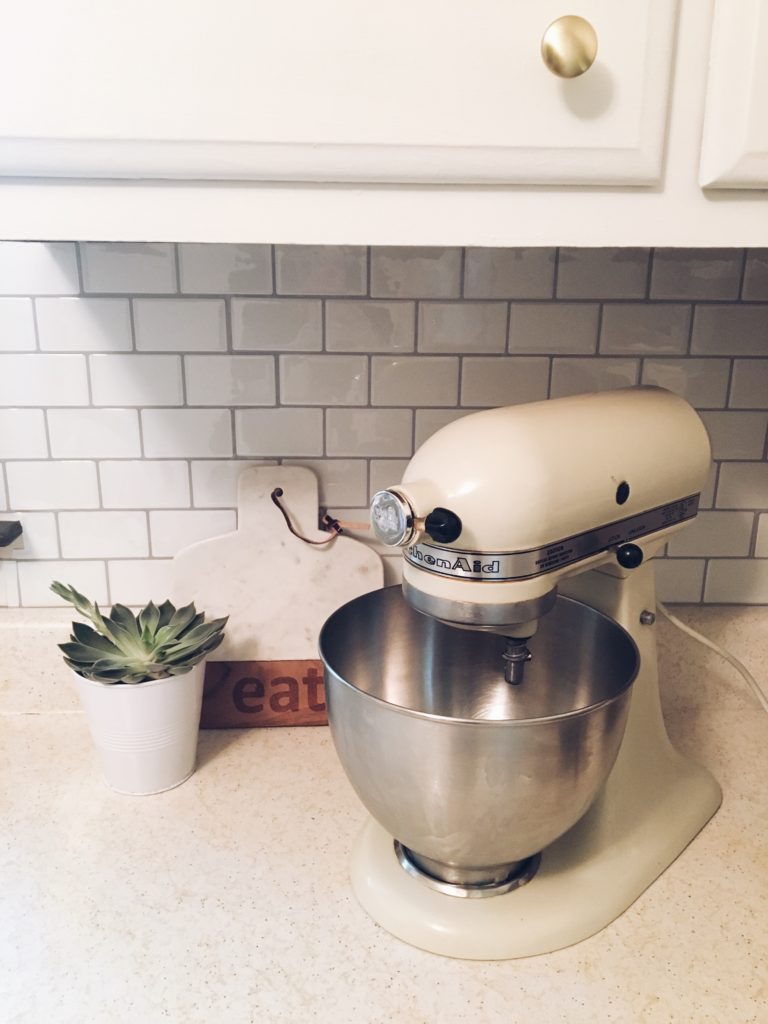
My $400 eclectic kitchen remodel
I wish I could sum it up in a sentence, the journey of my kitchen. I’ll start with prefacing that this is my first house! My boyfriend and I bought a home in the suburbs of Raleigh, and in my own words, it is fabulously 1970’s.
When we first walked through at the showing, I fell in love. Was it the original walnut wood moldings everywhere or the wood paneling in the basement..or the so-yellow-they-are-pink tiles in the master bathroom you may ask? It was none of those – actually I didn’t even notice all of that when I walked through the home. I noticed the layout, how much light flooded every room, and the gorgeous moss-covered backyard! I am an interior designer after all..any cosmetic issues in the home didn’t even phase me. If you know me, you know I always bite off more than I can chew, it’s kinda my thing. So the kitchen was no exception.
Oh..the kitchen! The cabinets were two-toned..and not the trendy kind you are imagining. The cream and brown paint that covered the cabinets made me want to shower immediately…but I also knew this was the first room that needed my love. Another thing I knew – being only 2 years of out college, and this being my first house, my budget was gloriously tiny. At work, I had won $300 in Amazon gift cards, so I decided that those gift cards, plus another $100 would be what i’d work with. I honestly didn’t know if I could do it for under $400 but there wasn’t really an option to expand the budget, and it sure wasn’t an option to keep the puke-esque colored kitchen the way it was. No ma’am.
Let me show you what we were working with.
As soon as I was in this kitchen, my wheels started turning. I knew it needed brightened up. There is a beautiful window over the sink that over looks the front yard, which was the best part of this kitchen, and I wanted to emphasize that. The counter tops are a creamy white laminate with gold flecks in it, and reminded me of a vintage makeup counter, but none the less, I knew if I painted the cabinets and actually added gold touches, the counter tops wouldn’t stick out like a sore thumb. My trick for budget makeovers is to play up something you hate but can’t afford to change – like the counter tops for me. I designed around them, and now they don’t bother me at all!
It’s not always easy for me to redo my own home, because 1) I am a deal finder, so I like to find everything for a steal, which takes time. Patience is a virtue, and I’ll be the first to admit, I have none. And 2) I can whip up a design for my clients in no time, but when it comes to my own house, I spiral. I love a lot of styles, so my house is pretty eclectic. Once I decided to just run with the eclectic look, things came together! I can also say, this kitchen is totally me.
My kitchen inspiration.
I knew I wanted white cabinets, because this space desperately needed brightened up, but I also wanted color. I’d been crushing on Farrow & Balls Pigeon color for quite some time. At nearly $70 a gallon though, I had to find an alternative, so I colored matched at Sherwin Williams, and ended up with Halcyon Green [which was even lovelier to me.] The house was built in 1974, and I didn’t want to get rid of all the character of that groovy decade, which is why I chose such a bold cabinet color! I wanted to add back in some vintage touches, and have always loved brushed brass, so decided to keep the brushed brass in the space. I also have always loved subway tile backsplash, because it goes with everything – every color, style and time period. Here are a few images from my Pinterest that sparked my design heart and were my initial inspiration for my own space!
The demo work.
I had never painted kitchen cabinets before, so trust me when I say I did hours of research. The last thing I wanted was to put a ton of time into this remodel, only to end up worse off at the end with a bad paint job! Since I’m lazy when it comes to sanding..well okay not lazy but impatient..I wanted to be able to JUST prime and paint. That’s why I went with Gallon Bulls Eye® 1-2-3 Primer Sealer . It cut my time in half! I primed all the cabinets with it, including the trim. It sealed the existing paint in, and covered the yucky brown in one coat, which was important to me. Because who wants to paint one cabinet 10 times? So just after 24 hours, I started painting with my actual colored paint. By painting my cabinets and doing all this work myself (okay my boyfriend helped A TON) I saved so much money. It’s not as scary as it sounds you guys..if I can do it, so can you!
A tip from yours truly: use painters tape to mark each inside cabinet with a number..and make sure it makes sense. Where did I waste time you may ask? I labeled some cabinets with numbers and some with letters [face-palm] so we accidentally painted some lower cabinet doors with the upper cabinet color. Let me save you the pain – label right the first time!
I also ripped out the decorative wooden trim above the sink – taking this down automatically updated this area.

Let’s talk colors!
Let me be the first to say..I spent the weeks between the first showing and our move in date obsessing over cabinet colors. I went back and forth what seemed like a million times about the colors I wanted. I was in love with navy for a while, then black, then all white..I even thought about knocking all the uppers down. I KNOW how overwhelming colors are..and that’s coming from someone who does handfuls of paint color consultations a month. Nonetheless, I went back to my original gut instinct – my love of the seafoam-green-blue. I ended up buying Sherwin William’s Bohemian Lace and Halcyon Green. Boho Lace for uppers and Halcyon Green for lowers! I just bit the bullet and did it. I debuted a sneak peak on my Instagram . My advice – go bold. I’ve only ever regretted being too safe with my decor 😉
Backsplash decisions.
Ever since I started thinking about a kitchen makeover, I knew I wanted subway tile. I’ve always loved the classic and clean look, and felt it went with so many styles. My style has changed slightly over the years, so I knew if I wanted to switch out the kitchen decor in the future, that subway tile would still look amazing! That being said, my $400 budget obviously didn’t allow for real subway tile and labor so I had to get creative. I knew about peel and stick backsplash, but was super skeptical…until I found Tic-Tac tile. This product changed my life (okay that’s an exaggeration..but I HEART IT) So I ordered a bunch of the subway tile product and slapped it up on the wall..and I have no regrets. Check out a more detailed blog post I wrote on this process and where to buy it here.
Brushed Brass everywhere.
I love brushed brass, aka brushed gold. My kitchen already had specks of gold in the 1974’s Formica countertops, so instead of fighting it, I just played it up. I bought a simple light fixture and brushed brass hardware from Amazon for the kitchen, and used the knobs everywhere, including the pantry doors. Check out the Brush-Brass Globe Light for $36.00 and the Brushed Brass Knobs
– they are holding up like they were a million bucks..and they were pennies!
It’s all in the details!
This kitchen came together very simply once I had a vision for a bright and cheery space. I didn’t want to fight the style of the house, but go with it instead. Ya feel me?
After painting, changing hardware, changing lighting, and adding finishing details, the older countertops and white appliances almost seemed intentional. The details that made this kitchen come together were the little touches, like the spice rack I hung on the wall near the stove, and the rug. I am a rug addict. I love a good rug – so I made sure to add a durable and pet friendly rug in my kitchen. I don’t care for the vinyl tiles – however neutral they are – I wanted them covered. I’ve always loved nuLoom rugs, and after much research, I found a perfect rug for our space. Of course – it’s from Amazon too! If you haven’t check out nuLoom rugs yet – I highly recommend them, especially if you have pets! Check out the nuLOOM Hand Woven Fringe Area Rug in my kitchen! (Best part – it was under $50)
I know you’re curious – how was this done all for under $400? Let me break the cost down for you:
- Paint & Primer $65
- Paint Supplies $20
- New cabinet knobs $30
- Light Fixture $25
- Backsplash $90
- Area Rug $48
- Pantry Doors from ReStore $5
- Woven Roll Shades $40
- Spice Shelf $8
- Accessories $40
Total: $371
Before & After

I’m not entirely finished- I am very happy with how much I completed however in one month. I still would like to paint the walls a brighter white, and paint the trim white, but for now, I’m pretty thrilled with my thrifty kitchen remodel. What do you think of it?
SEE MY KITCHEN REMODEL FEATURED ON APARTMENT THERAPY!
*Disclosure: This post contains some affiliate links, meaning at no additional cost to you if you click through and make a purchase, I will earn commission. The opinions are completely my own, and I only refer to products that I absolutely love and have tested*
Move-In day & Pinterest Overwhelm
If you are anything like me, you are a Pinterest addict. Before I even go to Google, I go to Pinterest, and I search for answers there. I mean..to be fair most of the things I’m Googling are home decor and food related, but I can easily spend an hour a day on Pinterest just going deeper and deeper into the rabbit hole of Paleo cupcakes and gallery wall inspiration. Even though Pinterest is by far my favorite website, and I use it for business, it also is super overwhelming.
As y’all know, I’m an interior designer. I own Honey Bee Interior Design and I often ask my clients if they have a Pinterest board or inspiration images to help me better understand what they are dreaming of for their space [a picture is worth a thousand words, am I right?].
However I also know the extreme overwhelm…let me explain. You want a farmhouse style living room, so that’s what you search. Two hours later, you have 100 “Pins” of what you like for that space, and no real direction on where to start. It’s not like the pictures say “Here, buy this sofa first, then do this to your walls, and the paint color is _____, and the budget for this room is $2,500″. It’s just a picture, sometimes linked to a blog post…but still it’s just a starting point.
Now let’s get real.
I tell my clients something I started to tell myself..and actually had to practice what I preach – stop “Pinning” and just start. But don’t go hog wild and start buying something for every corner of your house – start in ONE space. Even if it’s tiny.
This brings me to my story..my real and honest narrative of move-in day to my first home in Raleigh. I love my house – it needs work, it’s vintage fab, and its style is completely undefined [it’s eclectic ok?] but I moved in and immediately lost my mind. The week after we moved in and unpacked (for the most part), I wanted to redo the house..like all of it right away. I had already painted the kitchen and basement at this point, but I was so eager to jump in, but I didn’t have a clear vision yet. I started in the kitchen, wanting to set it up and make it perfect, but got discouraged and went to my office and started to set that up. Then I wanted to hang pictures in my bedroom. That’s when I realized that my house looked like a tornado, with half done spaces and no heart and soul in it. That’s when I just stopped, and regrouped.
So you may not being moving into your house [gosh, many of my clients have been in their houses for over 5 years and are just now starting to decorate] but if you feel like you need to redo EVERY room at once. Stop. Pause. Breath!….and keep on reading chica.
Start in one space. Pick a space you spend the most time in and that seems easy enough to tackle. It could be just your breakfast nook, or it could be your entire master suite. Focus on one space, focus on your budget, your style, and take baby steps to make things how you want them. Don’t buy anything for your home except for that space you are redoing currently, just fight the urge, it will only add to overwhelm if you pick up a bunch of stuff. (So just avoid Target…) Pick THREE inspiration pictures for your space MAXIMUM and stick to your gut. Finish your space completely, then move on. This does a few things for you: First it gives you a sense of accomplishment – you will see the finished space and KNOW you CAN do it. Secondly, it will be simple to keep going – if you complete one space; you then will have your style and vibe nailed down, so you will have something to build off of for the rest of the home. And lastly, you will now have a precious little space that is all you; a new haven to enjoy.
You don’t have to create a masterpiece in one weekend. Haste makes waste – that’s my new motto to keep me from rushing my home decor journey folks, so let it be yours too.
Trust me, I’m right there with you on wanting to redo your whole home at once.

Together, we got this!
[ PS – if you do want some amazing Pinterest inspiration – follow me here! ]
[wpforms id=”57″]
My 5 favorite (cheap) home decor stores!
I’ll preface this by saying, there is a difference between cheap and inexpensive, and honey there is a fine line when it comes to home decor! If you follow me on Instagram then you know I love shopping and finding deals. I’m a certified bargain-hunter. That’s why I decided to create this list of my top 5 favorite places to find home decor. These are 5 places you can walk into; I have 5 top online retailers for home decor, but if you like to walk through a store with a heart full of design ideas – this list if for you girl!
Hobby Lobby
Hobby Lobby is one of those stores that I walk into and immediately have to hone in and remember what I came for. Why? Because everything is always on sale – and if it’s not, they have a permanent 40% off coupon on their site. You’re welcome. From candles, kitchen decor, office trinkets..not to mention their enormous selection of faux plants (for those who are plant murderers like me).
IKEA
Okay so maybe you don’t have an IKEA near you. This is what you’re going to want to do: Get in the largest vehicle you have access to, and drive. Keep driving. Until you reach IKEA. Welcome to heaven. (click here to find the closest one to you)
Now you know how I feel about IKEA. There are some people out there who seriously hate IKEA..but let me tell you WHY it’s actually amazing (from a designers stand point).
- The pieces are classic – I bought something from IKEA 10 years ago that they still sale today. And it still looks amazing!
- It’s customizable. Have you ever seen all the fabric options they have for their upholstered furniture? And don’t even get me started on my IKEA hacks.
- It’s inexpensive…like you can sip on $0.99 coffee while you buy $1 wine glasses. Needless to say – you can furnish your home from IKEA for a fraction of the price.
Now if you are just looking for decor – IKEA is great for that too (not just furniture!). I love their lighting, bedding, rugs, and dinnerware. (And everything else. I love you IKEA.)
World Market
World Market is amazing for several reasons – first, they support small communities worldwide by selling handmade goods from those regions. (so you can feel good spending money there!) and their items are unique, affordable, and quality. They have beautiful throw pillows, rugs, and wall hangings – but just about everything from here is amazing. It’s on the higher end of inexpensive home goods, but the quality is there, and trust me, you’ll have fun perusing this store. (They have candy from around the world..and somehow I always end up in this section…)
Target
You didn’t think I was going to make my top 5 list without Target…did ya? If you have seen my Instagram live stories in Target, you know I have major love for this store. But I also rarely pay full price for anything at Target, because…well it’s a bit overpriced. Things are trendy, even ahead of trend, so if you go into a well styled Target on any given day, it’s going to look like a beautiful Pinterest feed and you’ll want it all. (Or is that just me?)
Target has some amazing lines out by top designers (Threshold, Magnolia, OpalHouse, Project62) – all of which I have used in my own home and my clients homes. They have sales all the time, and if you really want something, it won’t break the bank. They also have super easy-to-use collections of home decor so if you aren’t sure how to pull a space together, you could just buy the whole collection. Favorite items from Target – throw pillows, mirrors, office decor, small furniture (side tables, chairs).
BigLots
This one may come as a surprise! But BigLots has become a go-to for me after buying my first house. Not only do they have a big selection of dinnerware and $5 mugs (for those of you who collect mugs) but they also have quite a big selection of artwork. Now you’re not going to find original artwork that looks like it was hand painted for your house, but you will find inexpensive artwork, wall clocks, shelves, etc. for your home. They also have frames, knick-knacks, and even outdoor furniture worth checking out. BigLots also has a rewards program – so the more you shop, the more you save! Win win?
As you can imagine – it’s not easy for me to narrow it down to just 5 places. These ^^^ are my top 5, but below are a few more honorable mentions! [Some may be local stores]
Want to follow my shopping trips? Head on over to www.instagram.com/myeclecticgrace to watch the shopping magic go down!
[wpforms id=”57″]
Why and How to buy-second hand home goods!
*Disclosure: This post contains some affiliate links, meaning at no additional cost to you if you click through and make a purchase, I will earn commission. The opinions are completely my own, and I only refer to products that I absolutely love and have tested*
Let’s talk second hand goods for a moment. Specifically for the home. Maybe you are thinking “ew” like a lot of people i’ve encountered have, or you are thinking, “yes let’s talk about it!!”
Either way, I’m going to tell you why you should be buying them, and how to shop for them like a pro.
The funny thing is, many of my interior designer friends who design luxury homes have their own homes filled with thrift-found pieces. It’s no secret among designers how valuable an older piece or second hand piece of furniture is, but it can be challenging to know what to buy second hand, what not to buy, and how to look for them.
That’s why I’m going to break it all down for you. I am not the expert in antiquing, but when it comes to filling my home with second hand items, and thrifting my home together, I feel like a queen at it. When I go to an estate sale, thrift store, or flea market I get in a zone that you couldn’t shake me out of. My boyfriend actually prepares when he “assists” me at these, because he knows I will be zipping all around, completely in my element, and tuning the world out. I guess you could say the thrifty-life is my forte!
Let’s start with why you should buy second hand.
- It’s eco-friendly. This is a no brainer. Buying furniture used means you just eliminated a carbon footprint. It’s already manufactured, the energy was already used, there is no packaging or shipping required (typically). Reduce and reuse folks
- Construction is better. This is for the most part – buying a piece of solid wood furniture or something built even 20 years ago means you’re going to get quality construction [more on this later]
- You can customize it. Found a dresser you love, but it’s a yucky yellow-maple? You can literally do whatever you want to customize it: paint, stain, varnish, etc.
- It’s budget friendly. Buying second hand usually means there is room for negotiation with seller, and even if it isn’t, the price is astronomically lower than buying new.
Now to the fun part…How to buy second-hand home goods
WHERE TO BUY
- My go-to quick place to buy second hand home goods is Habitat for Humanity restores. (Check link to see if you have one near you!) They have locations all over the US and Canada. I like going here because no only am I getting a good deal on used furniture and home goods, but the proceeds are going to Habitat for Humanity. Another cool thing – they have huge sales! Yeah..sales on used furniture. That’s unheard of.
- Estate Sales – this is essentially a liquidation of a families house. Wether it be because they are moving or selling for a loved-one, I always have a lot of success at them. This is where you can find a lot of antiques and unique treasures, and the prices are usually very negotiable. Win-win!
- Flea Markets – I feel spoiled because here in Raleigh, we have a huge flea market every weekend where there is literally a sea of used home goods. If you don’t have one near you, they are usually worth the drive for larger ones! Make sure you go prepared with a vehicle to transport items, and cash at hand. This is where you’ll need to use those sharp negotiating skills babe!
- Craigslist & Facebook Market place – this is usually my last resort, because people can be a little unreliable on these platforms in my experience. But if you do find a cool find, make sure to jump on it quickly – in my experience, when an item is priced right on Craigslist or FB, it goes faster than hotcakes.
- The Curb – Yeah, you read that right. Now before you think i’m a bum or a trash digger, hear me out. I have found quite a few amazing pieces on the curb. Usually people don’t want to deal with dragging furniture to consignment shop, sell it online, or there is a minor thing that needs fixed and they don’t want to hassle with it. One man’s trash is another man’s treasure. #amiright? Word of the wise – make sure it’s actually trash and not lawn furniture…been there done that.
Like what you’re reading? Sign up for my newsletter to get even more DIY tips and lifestyle hacks! Promise, I hate being flooded with emails as much as you, I will never bomb your inbox. Just some love every once in a while ♥
[wpforms id=”57″]
WHAT TO BUY USED
So when I first starting thrifting my home together, I was in college, so it made sense. I couldn’t afford furniture, but I noticed other students also had no clue what things were worth. For instance, I’m currently typing at a desk that my neighbor in my college apartment put out on the curb after spring semester. It is a 1940’s solid mahogany desk with dovetail construction and a stamp with the original furniture manufacturer. I got it for free [ picture is at bottom of post! ]
After redoing this desk, along with some other small items I picked up at the Goodwill, I found my new love. Realizing I could make things look like new again, and just how I wanted for a fraction of the cost made me instantly addicted! Let me tell ya…there is something insanely rewarding about putting your own blood, sweat and tears into your home.
YES: Solid Wood Furniture
It’s no secret that construction of today’s furniture is crappy. Unless you are shelling out the big bucks, and I mean like $1,000 or more on a piece of furniture, chances are it’s particle board or plastic. So if you come across a piece of furniture that is real wood, and in good condition, that is a solid investment. Solid wood furniture can be sanded, refinished, and even if has been painted once, it can be repainted. It is also easy to tighten bolts or repair wood furniture
YES: Upholstered furniture with good bones
I added “good bones” in there because not all upholstery furniture is created the same. If you find a chair or sofa that is a beautiful shape or ideal size, sit in it. You’ll be able to feel if the frame is still strong and springs or foam is in tact, if those things are going, it’s best to pass it up unless you are fully confident you can fix it without spending a ton of money.
Another thing to watch out for is bugs – yes I had to go there folks. Upholstered furniture can harbor fleas, mites and bed bugs, so if you are going to buy something, steam it and scrub it clean before bringing it into your house. Better yet – if you can reupholster it, do it. You can can a beautiful new living room piece with brand new fabric for 1/4 of what a new one would cost.
YES: Artwork & decor
I’ve bought some pretty incredible frames and artwork from flea markets. This includes paintings, milk glass for my kitchen, an old Pepsi crate, and some mid-century ceramic pieces. Sometimes you need to look past certain features. For instance, if you find a really creepy clown painting, but the frame is drool-worthy, don’t pass it up. Throw that picture out and repurpose the frame.
YES: Dinnerware
You’ll definitely need to inspect the dinnerware for chipping, chipping paint (that sounds safe to eat off right? that’s sarcasm by the way) and of course wash the crap out of it before you use it. But I have some insanely adorable green milk-glass glasses I found at an estate sale that I snagged for $0.50 each…only to see Target selling the same kind for $4.99 a glass. Ha! If you can find a set of dinnerware, that’s even better. Dinnerware includes anything copper too..think old copper pans (display purpose only) or apothecary jars. This is where you definitely get your savings worth!
YES: Wrought Iron and outdoor furniture
Don’t let a little rust make you run. There’s amazing products like Rust-Oleum that will protect products from further rust, remove rust, and cover up rust to make your furniture look like new. Outdoor furniture is extremely overpriced (in my opinion) new, so outdoor furniture fly’s off the shelf, so to speak, used. So if you see it and need it, snag it. Plus how fun to spray it a funky color!
WHAT NOT TO BUY USED
Let’s face it – you don’t want everything used..and here is my list of hard NO’s to used home goods.
NO: “Assembly required” furniture
If something was assembled at home, like IKEA furniture (I love you IKEA, but you are cheap enough to buy new) This furniture is usually particle board, can’t be repaired, and isn’t going to be able to be refinished. Unless it’s brand new and being sold that way second hand – like a new dresser out of the box that someone decided they didn’t want anymore – then pass on it!
NO: Mattresses
This shouldn’t even need to be said – but just no. No. Mattresses are homes to so many germs. As tempting as it seems to want to buy that Tempurpedic mattress from your neighbor, I’m telling you, just pass.
NO: Children’s furniture
This isn’t necessarily a hard no – but buying a vintage crib or rocking chair may seem innocent enough, but recalls could’ve been made, paint could chip off, or something could break and there is no manufacturer warranty to fall back on or number to call for new parts, so it’s best to steer on the side of pass and just be safe.
NO: Chipped Laminate and Veneer
Laminate and veneer furniture can be beautiful and is definitely making it’s step back into our homes again, but if it’s peeling majorly or a large piece is chipped, it’s not worth it. It can not be repaired, will not hold it’s value, and can’t be refinished at that point. Sorry Mid-Century dresser with chunk of veneer missing – you belong to the junkyard now.
I hope this helps you in your quest for used furniture. Don’t let a project intimidate you; refinishing or fixing furniture is way simpler than you think, and chances are you already have the tools needed!
Here are some of my favorite thrifty re-do’s!
[ Each one of them cost under $40 ]
P.S – Sharing is caring! Like this article? Share to Facebook or repin on Pinterest for future reference!
[wpforms id=”57″ title=”true”]
how to get the space you want on a budget
*Disclosure: This post contains some affiliate links, meaning at no additional cost to you if you click through and make a purchase, I will earn commission. The opinions are completely my own, and I only refer to products that I absolutely love and have tested*
We all want to look like a million bucks..and a $100 budget. It’s not to different when it comes to ours homes. As an interior designer, I have clients who want the same thing; they come to me with a low (realistic in my opinion) budget and want a room that they see on Pinterest. Instead of saying “Yeah goodluck with that!” I say “challenge accepted”.
I grew up pretty humbly. Instead of buying new things, I would make something if I wanted it. I guess you could say i’ve been honing in on my DIY skills since I got my first hot glue gun and set of paints! So it’s no surprise that when I was 8, I painted the inside of my Barbie dream house, because I believed Barbie needed a blue bedroom wall instead of pink.
How does this help you? I’ve been making things look like a million bucks for pennies for years now, and I want to share my tips with y’all. If you want a space that’s stunning on dime, you must be open to putting in a little elbow grease, using your investigation and negotiation skills!
If you want a piece of furniture that is totally out of your budget, find something similar and create it. Put your own spin on it!
When I moved into my first apartment in North Carolina I really wanted a Mid-Century modern bedroom. Like I dreamed about. I was obsessed with the Acorn dresser from West Elm..but I have the budget for an IKEA dresser..which is when I realized, I could probably create the look from an IKEA dresser.
I’m sure your Pinterest feed is or was at some point flooded with IKEA hacks for your home. I used to be so annoyed by that, but I embrace it in all it’s glory now! IKEA hacks essentially are creating expensive looking furniture from the inexpensive IKEA pieces. I especially love the TARVA series from IKEA because it’s basic Pine, and is literally a blank canvas.
So here is my advice: If you find something you LOVE and need for your space, wether it’s a sofa, dresser, or light fixture, buy a basic item and create it into what you want. It’s so rewarding to do it this way, especially for your wallet..and you can put your own spin on it, which in the end makes it your own.
Buy that ONE expensive item that makes you happy, and cherish it!
This may sound a little counter intuitive, but it’s my favorite piece of advice when putting together your house or just a space together on a budget. Sometimes I feel restricted when I can’t buy everything I want at the store..it can feel defeating at times, I get it. Truly. So instead of telling myself I CAN’T buy something I want, I decide what it is that I can’t substitute or recreate.
For instance, I am working on my bathroom facelift right now, and I can pretty much thrift the whole thing together on a reasonably small budget, but I couldn’t find a crocheted lace shower curtain for cheap anywhere. One day I was walking through Target and I found a stunning shower curtain. It was from Opal House, which I was hardcore crushing on, but it wasn’t on sale. It wasn’t expensive, it was only $25.00, but I’ve bought pieces of furniture and redid them for less than that, so it seemed like a lot. But it was exactly what I was looking for, I knew I couldn’t get it anywhere else, and it would be the one thing in my small bathroom that I bought flat out, and would love.
So if you are redoing your space, and there is that one item that just totally struck your fancy, and you can’t stop thinking about it. Buy it, love it, cherish it, and work your budget around it.
Upgrade the small stuff too – ’cause it’s all in the details.
When we are making over a room, sometimes we get so caught up in the decor and colors and vibe of the whole thing that we forget about the ugly yellow light switch cover place that sticks out like a sore thumb.
Maybe you have an older home that is dated in every sense [like mine!] or you have a newer builder-grade home that is were beige and boring go to die. Either way, don’t forget about these simple things.
Here are the little details you mustn’t forget. They cost barely anything to upgrade but they will make your space look expensive and new!
- Light switch plate and outlet covers If they don’t all match, make em’. If they are yellowed, replace them, and if they don’t go with your new look, switch them. Details count y’all.
- Air vents and returns: Same rule of thumb – make them match. If they are rusty or bent, buy new ones. Promise it’s worth it!
- Blinds or lack of: Sometimes we don’t realize the power of putting up window treatments, or removing them. Don’t abandon the windows when refreshing your space. Plastic blinds can easily be upgraded to faux wood 2″ blinds for the cheap. [my favorite inexpensive blinds
here!] Add curtains, or repaint the window trim..just refresh it and you’ll thank yourself.
- Light fixtures: Now this can be expensive, or not. It’s how you go about it. Outdated light fixtures can be totally transformed with spray paint and some now glass covers. If you can afford to just buy a new (or new to you) light fixture, I always say go for it. It’s something that instantly updates your space and will make it look polished.
Before – oversized and not my style After – for only $70, the impact is huge!
Take baby steps..and enjoy the process.
Wouldn’t it be marvelous to just be able to go to all the stores in one weekend, and buy everything and anything you want to complete your space? Then come home and just decorate and have a beautiful new space that’s completed in just a few days or even hours? Yeah, that’s not my reality either. It used to frustrate me to no end that I had rooms half put together..empty shelves, an unpainted thrift store find, bare floor…but then I started to enjoy this process.
Haste does not make waste folks! Piecing rooms together as my budget allowed actually made me appreciate the end result, find the best pieces, and truly make the room what I wanted. This little tid-bit may seem like a no-brainer; like duh you have to buy as your budget allows, but I also feel like it’s an important thing to reiterate, because creating a room of gold doesn’t happen overnight.
Last few tips from yours truly:
Shop for deals! This means flea markets, estate sales, online auctions, and waiting for sales at your favorite places!
Perfection isn’t the goal – having a space that”s 100% authentically you is. Make the space your own..anyone can copy an inspiration picture. Put your spin on it babe!
Think outside the box. Maybe you want a marble coffee table, but can only afford a plastic IKEA one. Buy some marble contact paper and DIY the hell out of it. Thrifty and tacky and not the same thing.
[wpforms id=”57″ title=”true”]
DIY peel and stick backsplash!
As you all know – I am all about budget makeovers in my home. So when I redid my entire kitchen for under $500..I knew I had to share. But even more so than budget, I like simple and easy [I mean who doesn’t?] so when I decided to add backsplash to my fabulously 1970’s kitchen, I knew I wasn’t going to shell out the money on tile and labor. That’s when I discovered the magic of Tic Tac Tiles!
The past few years I’ve been dreaming about a subway tile backsplash. That might sounds pretty basic, but Subway tile is amazing for so many reasons. First, it’s completely versatile! It goes with all styles: modern farmhouse, vintage, contemporary, eclectic..just to name a few. It’s kind of all encompassing, so I knew even if my style changed over the years, Subway tile was the way to go! Secondly, it looks clean and simple, which is what I’m all about. I like my colors and patterns in my textiles and dinnerware (let’s be honest..my mugs) so I kept it simple on backsplash.
If you are lost on what Tic Tac Tiles are…let me fill you in. They are peel and stick wall tiles that come in pre-sized sheets of 10″x10″ or 12″x12″. I know what you’re thinking..tacky, cheap, and unsanitary. That’s what I was thinking too when I thought about putting vinyl on my kitchen wall (I mean..I’m trying to move AWAY from the 1970’s) , but I did my research and was thoroughly impressed! They are thick, realistic looking, and when they are up you really can’t tell the difference between real ceramic and vinyl tile. Literally all I did was wipe my wall down with all purpose cleanser and stick these babies up! They can also go over existing (smooth) backsplash if you had some you want to cover up.
Tic Tac Tiles are:
- Anti-mold & anti-bacterial
- Heat & Humidity resistant
- Easy to cut (I used scissors!)
- Eco friendly (made of non-toxic material)
- removable with a hairdryer (won’t damage walls…rental property perk!)
- Save time and money – no labor costs
If Subway tile isn’t your thing – no worries, they have 40 tile options!
(If you want the official installation guide – click here) Word of caution – if you have outlets or other obstacle to cut around, measure twice & cut once! I didn’t take this advice and had to order another pack because I messed a few up – but that’s because I’m impatient. If you want to finish off the edges, you can buy white caulking and seal it in. This will give it a complete and polished look.
Time it took total:
- 2 hours
Level of Difficulty:
- beginner
I’ll check back in with y’all in a few months for an update on how they are holding up! I’m just as curious as you!
Want to see how my whole kitchen turned out? Click here!
[wpforms id=”57″ title=”true” description=”true”]
*Disclosure: This post contains some affiliate links, meaning at no additional cost to you if you click through and make a purchase, I will earn commission. The opinions are completely my own, and I only refer to products that I absolutely love and have tested*


