
I took my ugly carpeted steps and turned them into smooth wood steps with a sisal runner of my dreams cascading down…and it was a lot of blood, sweat and tears. Quite literally. If you have carpet and want to rip it up, I say just go for it. The worse that can happen if you have to tack it back down if the floor sucks underneath. Luckily when I started pulling the carpet off my steps (and it didn’t resist at all. yay old carpet) the treads underneath were a beautiful pine that was in great condition. I guess the layers of thick carpet and padding kept them nice all those 30 years they were covered. Step one – remove the nastiest of carpet from the steps… It took me and my fiance about 12 hours total to rip all the carpet off our 13 steps, pull the tack strips up and painstakingly pull out hundreds..possibly thousands of staples. The wood was still in good condition after that, miraculously. Please don’t be fooled thinking that redoing your stairs is a one day project. This took weeks, and we worked really fast! If you did have a ton of holes from nails and staples, you can use wood puty and sand over it. I am notoriously lazy and like to cut corners with home improvement, so I didn’t do this. I also knew the carpet runner would cover most of it, so why do extra steps? Sand + Poly Next […]
2 Year House Tour
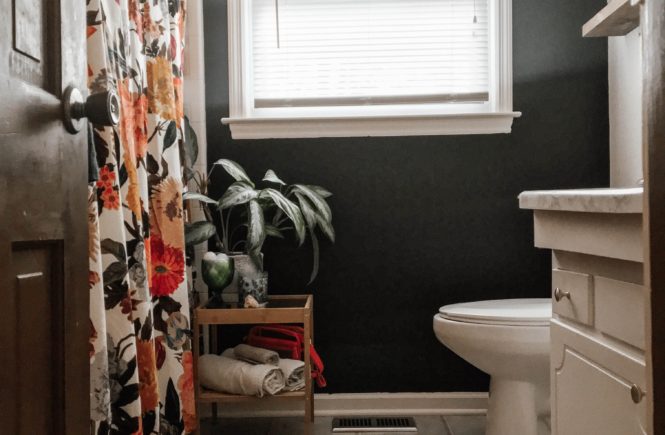
I can’t believe it’s been two years since we’ve moved into our Raleigh home! On one hand, two years seems like forever ago, and on the other hand, it seems like we’ve been here for a week. When we bought this house, it was as if the house has been wrapped in plastic and was a blast from the past from 1970 [the year it was built]. The wood paneling was freshly polished, the wood trim newly stained, and of course the speckled gold countertops untouched. Because the house was in such good condition (as dated as it was) it was misleading and led me to believe I could cosmetically flip the home in no time! Boy was I WRONG. If you’ve followed along for any amount of time on my Instagram, you’ll know the trials and tribulations we’ve gone through with the house. The never-ending painting of brown trim, uneven walls, and floors throwing everything off..and oddly placed windows (like the window sandwiched between two walls?) Nevertheless, every month the house is getting to a more acceptable state. It’s a house I’m proud to call home, and the progress we’ve made for money spent makes me feel extra proud. House Tour Break Down I’ve written a post on almost all of the makeovers individually, along with the paint colors used in my house..but I’ve never done an evolution post of my home! I’ve redone some of the spaces twice now, and want to show how my style has evolved […]

I ordered from an online paint company and this is how it went.
*this post is not sponsored in any capacity. I just wanted to provide my truthful review* Let me start by saying, like most Americans, lock-down had(s) me going stir crazy. I’ve never spent so much time looking at the interior walls of my home..which got me to thinking that this is an excellent time to paint my walls. The only problem is, I can’t just go grab paint at the hardware store right now. That’s when I turned to my trusted friend, Instagram! I posed my issue of wanting to repaint some rooms in my house, but not being able to get back. Well ask and you shall receive! Over 20 of my followers recommended Clare paints. Being a designer and home decor blogger I was shocked and slightly embarrassed that I didn’t know about Clare or that you could order paint online. I mean it’s 2020 but I just didn’t think that was a possibility! First things first, I perused their website. Automatically I was entrigued and pleased because I saw this. (screen shots directly from their website!) Finally! Paint I can feel good about using and that my fiance won’t complain about smelling up the house for days. I ordered a few swatched from the website and for less than $8 I had a few very large peel and stick “swatches” with paint colors I was interested in in my home! I left them up on the walls for about 10 days before I decided which color to […]

Simple Hack To Find Your Style
Full Disclosure: I am weary to ever write about finding your style, style quizzes, or giving advice on home design styles. I am an interior designer and editorial stylist by day, but I have struggled deeply with how I want my own home to appear. One factor is my budget and the layout of my home, which greatly detracts from the look I really want. If I had unlimited funds, I would have a very light and bohemian beach inspired home. That is what I discovered when I was deep in thought this past weekend anyhow. I could go on a whole speel about how life is too short to not eat the damn cake, but you get that. I am here to say, if you want to do something in your home, you have a specific style you love, even if it’s opposite of everything you own…go for it. Let me break it down a bit more. Deciding Your Style..when you’re totally not sure. I infamously go between wanting a dark and moody, hygge inspired Scandi-clad space. You feel me? I like the idea of being wrapped in twinkle lights and big chunky knit blankets and dark painted walls..and then the sun comes out and I’m over here pinning beach home pictures. I’ve gone between painting my walls black and then white and then back so many times in my house I think my fiance is going to take my paintbrush privileges away (I kid.) I was driving him […]

How my $397 kitchen is holding up 18 months later
The big boom that launched my blog was my $397 kitchen makeover! If you haven’t read it – you can see it here. Since completing that makeover, I’ve had so many people inquire about how the products I used are holding up, and how my unsanded painted cabinets are holding up..and I’m going to answer all of that! I will also cover some updates i’ve done since! Right after the makeover! My kitchen looked like this (above) after the makeover. I painted my cabinets without sanding (see how here) and added a peel and stick backsplash from Tic Tac Tiles all along the exposed walls. Peel and Stick Tile Update It has been 18 months this month since I “installed” the vinyl backsplash and it’s been AMAZING. I would 100% recommend and use it again. Not one corner has started to peel up, it’s not fading or yellowing, and there are not surface issues from me cleaning it. It looks as good as the day I put it up. Over a dozen of my Instagram followers have boughten Tic Tac tiles after seeing mine and have all had positive results. They peel off clean, are super affordable, and come in really chic tile patterns! If you want to reach more about them – I reviewed my subway tile ones here. You can also buy them from Amazon Prime here! For your own reference – my kitchen gets very humid as I live in North Carolina and I cook a ton. […]