
Full Disclosure: I sought out a partnership with cutting edge stencils because I was truly interested in using their products for my makeover. I received a free wall stencil in return for a 100% honest review. Please see my affiliate disclosure for products listed in this post HERE.
Makeover Time
When I first decided to redo my guest room, I started like I started many projects..gathering inspiration. I started scrolling through Pinterest for ideas when I came across a space with a beautiful statement wall. I thought “wow, I would love to wallpaper the wall behind the bed..but wallpaper is expensive and messy.” I clicked on the picture anyway and was blown away when I read that it was a wall stencil, not wallpaper! Immediately I was intrigued!
I started Googling wall stencils, and time after time, Cutting Edge Wall Stencils came up. Then I started noticed that many people I follow on Instagram were using wall stencils..and I was smitten with the idea. I had to try it!
Why I chose a wall stencil over wallpaper (and would again)
- First of all, the cost of using a wall stencil is significantly less than using wallpaper. I had to do my guest room makeover on a tight budget, so using a stencil only made sense.
- You don’t have to measure for an exact amount (one stencil can be used over and over again to fill as much wall space as you need)
- If I ever wanted to change it, I could paint over it – wallpaper is much more permanent
- That being said, if I mess up applying the stencil, I can easily fix it with paint as well
- I could chose any colors I wanted for my wall – any combo you can imagine – you can do!
- I can use the same stencil over and over again, and even in a different space or on a piece of furniture.
Cutting Edge Stencils
+ Their Options
I spent a long time perusing Cutting Edge Stencil’s site..they have so many stencils!! Think of them as your one stop shop for unique and beautiful stencils for your home. They have it ALL;furniture stencils, flooring stencils..wall, ceiling, outdoor, holiday themed, tiny to huge stencils..and all the essentials you need to get the job done simply and efficiently.
Ultimately I decided on the Brush Strokes Wall Stencil..it caught my eye immediately and I kept coming back to it, so I knew it was perfect for my boho guest room!
After deciding and placing my order, I received the large wall stencil, along with an edger stencil (for the top + bottom portions of the wall) and the essentials kit.
The essentials kit included:
- 1 high density foam roller (this is a must! It was so quick with it!)
- 1 clip on level (to make sure your stencil is level and lines up perfectly!)
- 1 natural bristle brush (perfect for getting in the corners and for small details)

DIY
(the simplest wall transformation you’ll ever do!)
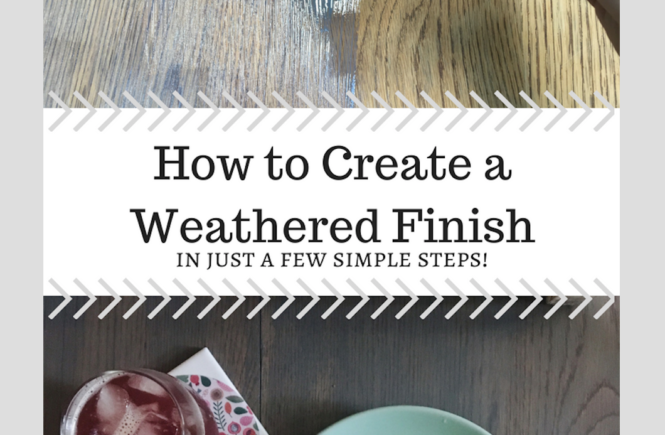
I started by painting my walls all White Moderne by Behr in eggshell for a clean slate. It’s best to start with a clean + smooth wall. The stencil will not work ideally on a textured surface.
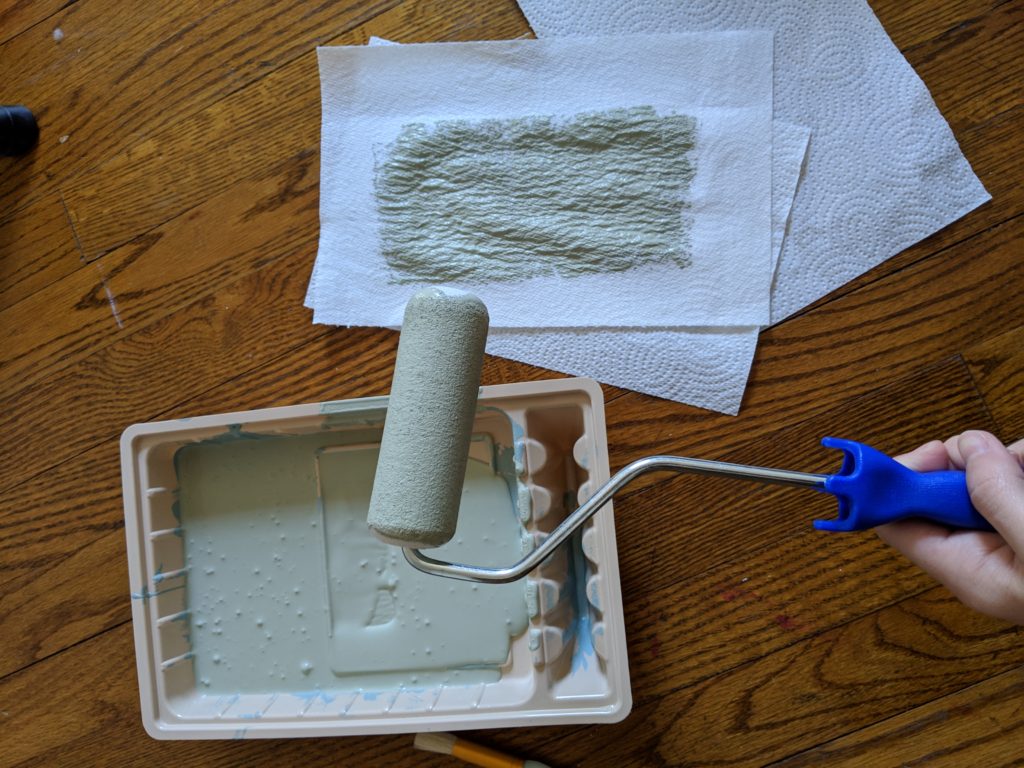
After waiting 24 hours for the paint to dry, I started with the stencil. I used paint I had from my front door – Simply Sage in satin by Behr. I wanted the look to be organic and botanical feeling, so I did green over white for a simple and refreshing look. That’s the coolest thing about using Cutting Edge stencils – you can completely customize it and use any color combo you want!
I simply lined up the stencil in the bottom left-most corner of the wall I was stenciling and used a few pieces of painters tape to hold it in place.
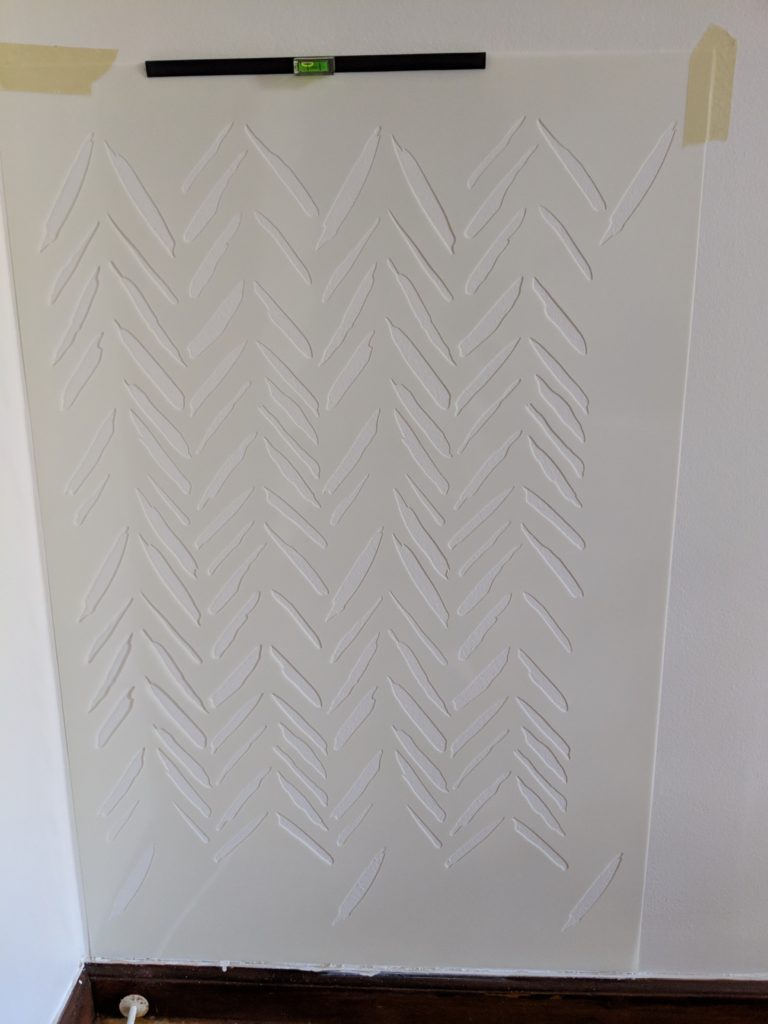
I used very little paint – which was different for me people I am one of those people who globs paint on the walls! I got just enough paint on the high density roller and then rolled it on a few paper towels until it almost looked dry. Then I started painting right over the stencil – not pushing too hard to avoid bleeding. It was so simple! Once I finished the first one, I peeled it off the wall and was astonished that there was NO bleeding. It looked perfect!

I kept going in a horizontal line across the bottom, then went up a row. It took three rows vertically to complete the whole wall and took me under 3 hours which is pretty fantastic for a one of kind statement wall!

The stencil itself had to be cleaned once during the process – halfway through the wall it started to get tacky. On the direction sheet that comes with it, it says this will happen. I took it outside, hosed it off, and it dried in a few minutes so I could keep going.
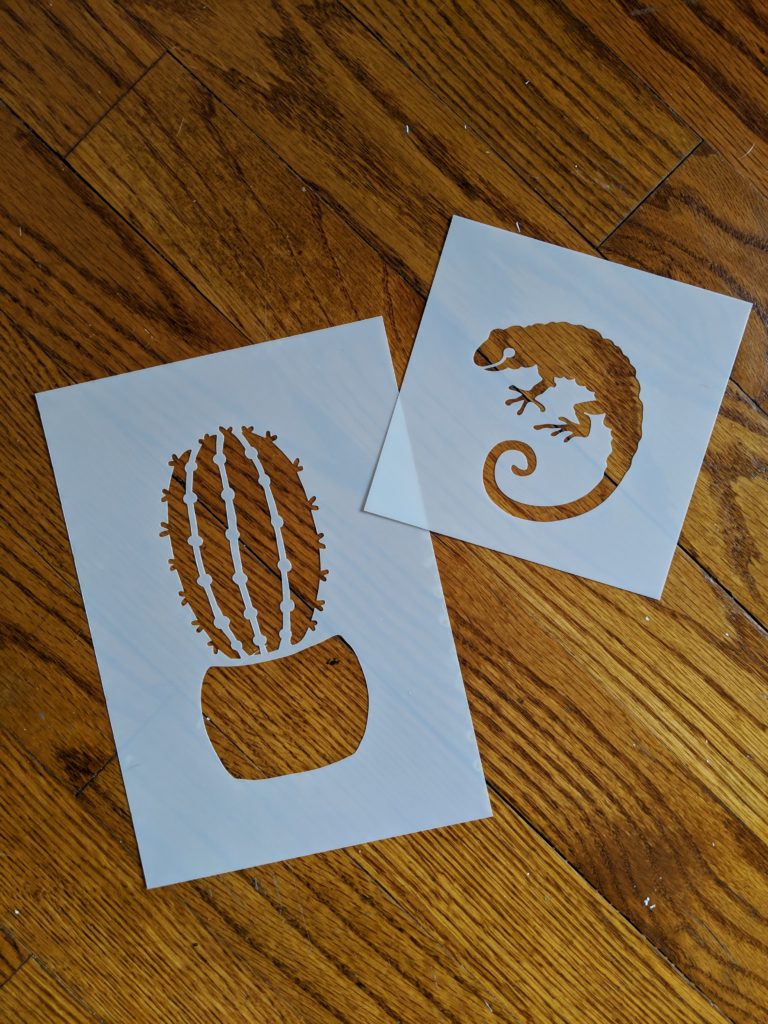
The stencil itself is a thick but pliable plastic. The quality is way better than I expected. The package also came with two small surprise stencils which will be so fun to use for little projects!
Overall..if Cutting Edge Stencils was a movie I would give it 5 stars. The stencil arrived quickly after being ordered, the direction sheet was super comprehensive and thorough, the quality was better than expected, and truly it was simple to use. Did I mention it was my first time EVER using a stencil…and I think I nailed it!
Want to try a stencil on your wall!? Check out all that Cutting Edge has offer!
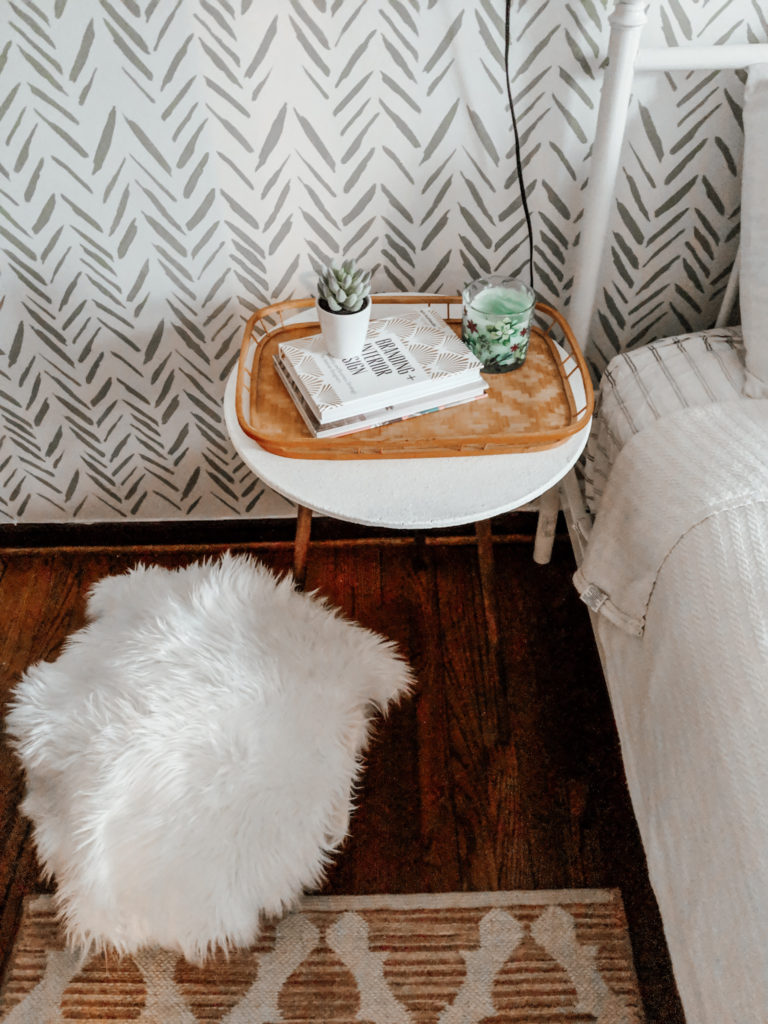
Room reveal!
This is what I started with…

And thanks to Cutting Edge Stencil + a thrifty makeover, I now have this!

*GIVEAWAY*
(FEBRUARY 25- WINNER CHOSEN MARCH 1)
Don’t forget to enter the giveaway for a $50 credit to use for anything on Cutting Edge Stencils site!
Here is how to enter!
1. Visit their site (here) and pick a stencil you’d love to use
2. Comment ON THIS POST with the name of the stencil that you’d want to win
3. (optional) comment on my photo of this room on Instagram and tell me what you think about my budget makeover!
That’s all!
On 3/1 I will be randomly selecting one winner! I will reach out to via email so if you enter make sure to check your email on Sunday 3/1!
20 Comments
Love love love what you did with your guest room! Stenciling is such a fun idea that I’d never really considered but you made it look so approachable. All their stencils are gorgeous but this one is my favorite!
https://www.cuttingedgestencils.com/prosperity-mandala-stencil-yoga-mandala-stencils-designs.html
Oooh!! So beautiful! I want the brush stroke stencil too!!
My faaaaavorites are the olive branch and the tree stencil
rain all over
I love this room transformation! The beside light and the baskets on the wall are my favourite decor aspect of this room. And the stencil worked incredibly!! I’ll definitely be using one on my own wall. My favourite pattern is the acacia all over stencil as it looks so retro ✌🏼
I love the Serenity Allover Stencil. It would be perfect in our master bedroom makeover. Love your finished room, it is amazing what you can do on a small budget!
I love this project so much! So much inspiration! I never thought to use a stencil! If I won, I would either get the same one you used or Retro Flame! I love how they both have that hand painted look! I’m wanting to finally set up our guest room now!
Your wall turn out great!
Santa Ana Title Stencil caught my eyes!
I love your room! It looks awesome! The stencil I really like is the birch wood pillow stencil!
Loved that stencil you used!! I’ve also been searching for the perfect one and the Hand Drawn Cheveron stencil is my FAV!! Great inspiration, girl!!
I loveeee the Nola Tile Stencil! And love how you transformed this room, definitely inspiring me to step up my guest room game!
What a beautiful guest room! My favorite stencil is the jewel tile stencil. I would use it to stencil my stair risers.
You did an amazing job! I just bloody love this room makeover! I’d go with Beads, Anatolia or one of the mandalas.
✖️🖤
Lona (@cup_of_hygge)
Hand drawn chevron! Or the one you used.
I love the Brush strokes stencil that you used! It would look amazing on my paneled walls!
I love The Rain Allover stencil. Prefect for my reading nook.
I would totally get the same stencil that you used!
The zinnia grande stencil is calling my name!
Ok I seriously love how this turned out with a stencil!!!!
I love the Nola tile stencil!!
The brushstrokes stencil is beautiful! I love what you did with it!!