
If you don’t think lighting is important in your home’s decor – think again. Especially in entryways, lighting makes a first impression, and you want it to be good! I have been eyeing up beaded chandeliers for months now, trying to find one that wasn’t going to break the bank – to no avail. That’s when I decided to DIY one (okay this is a partial DIY!)
Entryway design
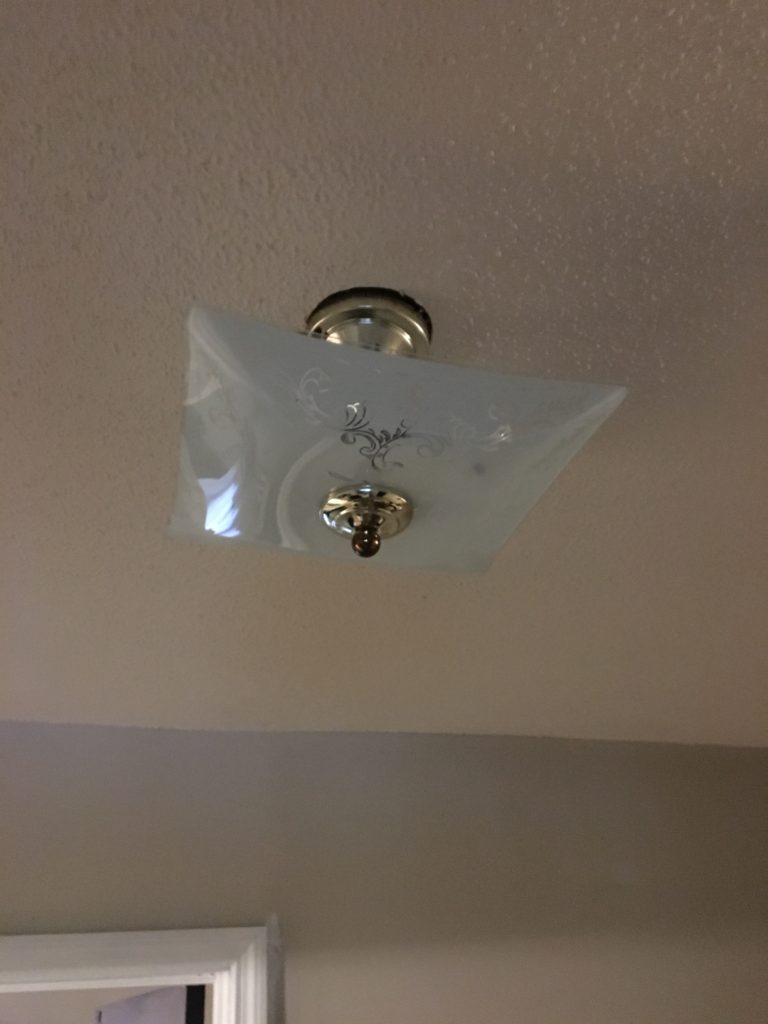
My entryway was like the rest of my 1970’s house – bland and beige. Wood trim, brown doors, peachy-brown walls and brown carpet. Makes me itchy just writing that! I have big plans to brighten and lighten the whole space – but at this stage, I am working on the lighting.
I love mixing elements – smooth and textured, light and dark, etc. That’s why I LOVE beaded chandeliers. They work with a lot of styles as well – eclectic, coastal, boho, even classic. Since my house is a little bit of everything, I figured this was a style I could live with even when I change out furniture and decor.
Inspiration
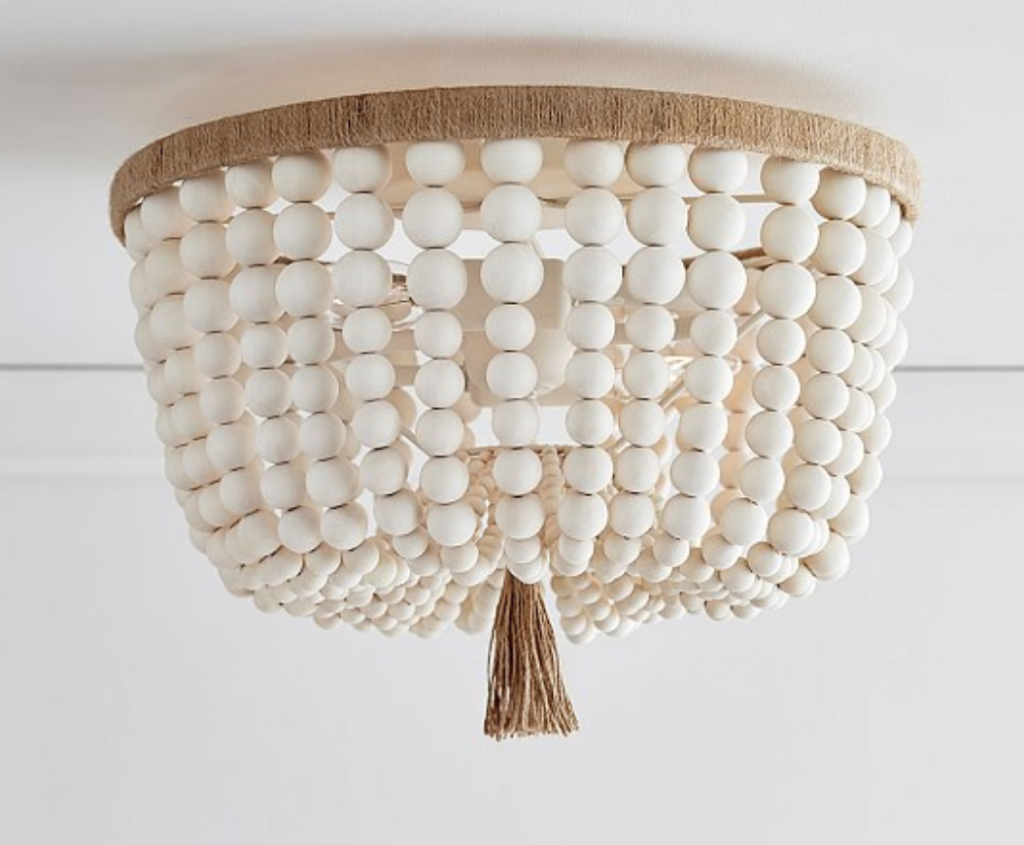
My inspiration was this $299 beaded chandelier from Pottery Barn Kids.
I loved the flush mount style – which is perfect for a room with low ceilings where you still want to create a dramatic impact. I also loved the twine and tassel – it makes it a little more casual and bohemian.
However, my budget for my entryway is only $400, so spending $300 on the light fixture alone was not an option.
Amazon to the rescue
No need to even explain my love for Amazon – if you’ve read my other posts about my budget friendly makeovers, you know that Amazon is my favorite place to find inexpensive pieces.
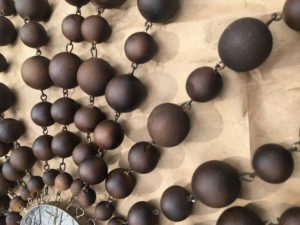
I searched high and low for a chandelier that I could “upgrade” or add to to make a beaded chandelier light fixture. I considered buying a lighting kit and completely making it myself, but after adding it all up, it costed the same as just buying one from Pottery Barn..but then I found this beaded chandelier from Amazon for $58.00!
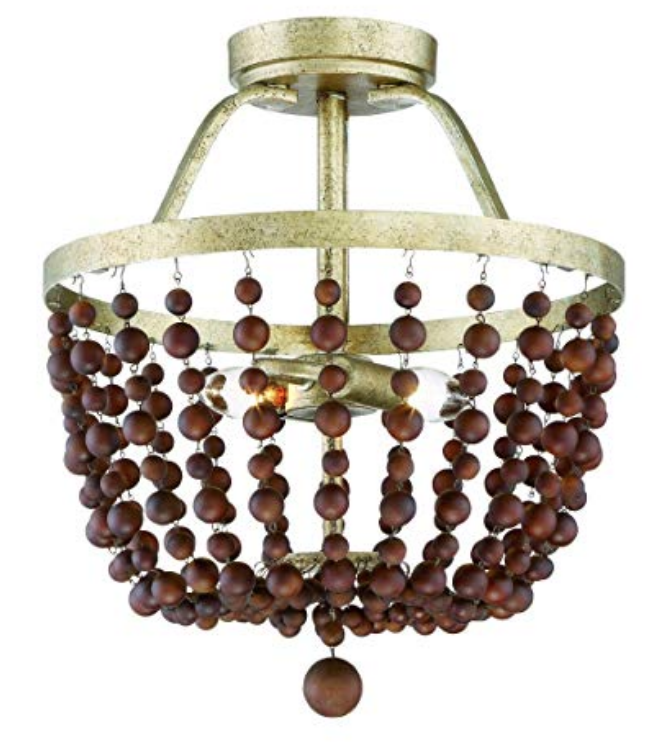
The coloring of it was less than ideal, but the elements were all there. I knew it would only be a few simple steps to turn this into exactly what I wanted! (PS – this one is currently out of stock on Amazon – but a bronze one is still in stock for $20 more, which still makes this an affordable DIY) link here
DIY steps
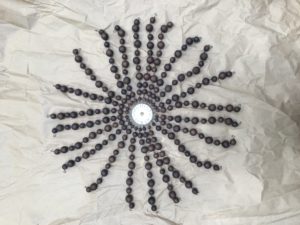
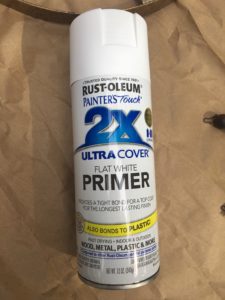
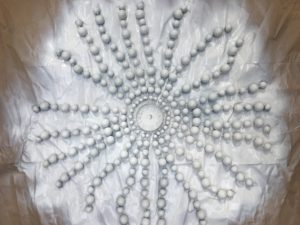
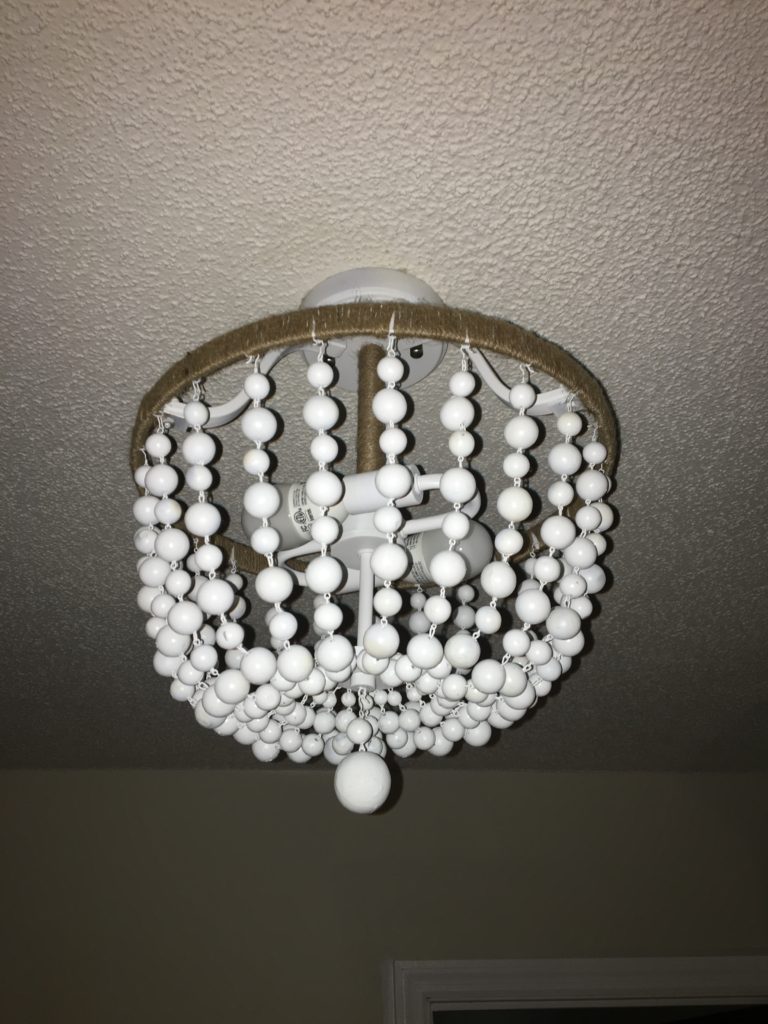
This was a very simple DIY and pretty self explanatory! The chandelier came pretty much assembled – all the beads were together – so I simple splayed them out, sprayed them with my favorite spray paint. I use Rust-Oleum in flat white primer because I wanted a matte look, but couldn’t find a white matte spray paint that wasn’t chalk paint, and that was too matte. It only took one coat of this to cover everything! I sprayed everything (cover the electrical parts with painters tape!)
The beads were a bit tricky to get all sides – so if I had to do it over again, I would hang the light fixture outside and spray it – this would be easier to get all angles. I took the harder route, but it still worked out for me!
Once the paint was 100% dry (I waited 24 hours so it wasn’t tacky) I used jewelry twine and wrapped the rim and stem of the pendant. I have no idea if that’s the technical term – but you can see my the picture’s that it is pretty self explanatory where I wrapped it.
With a tiny bit of hot glue to secure the ends of the twine, the chandelier was then finished and ready for install!
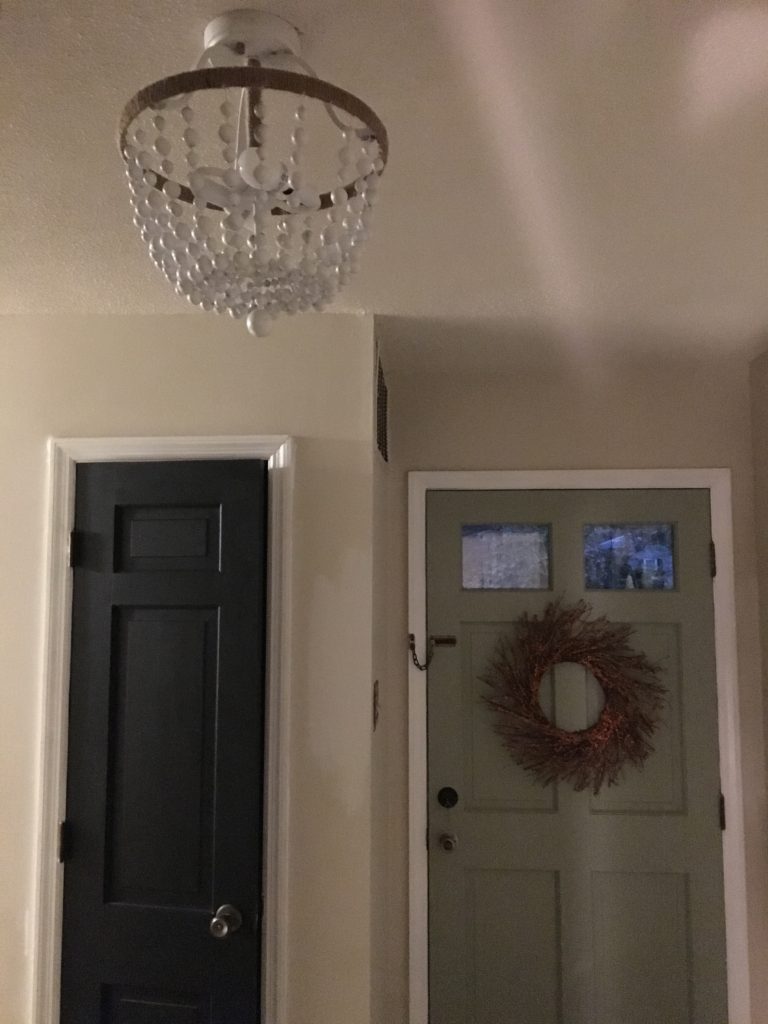
Finished DIY Beaded Chandelier
All in – I spent $80 on this entire project.
That’s a $219 savings from my inspiration chandelier, which is a #DIY-win in my book!

Check back for my full entryway reveal in a few weeks!! ♥
Like this DIY – Pin it for later!!
1 Comment
Amazing content, the article can be easily understood. Thanks.