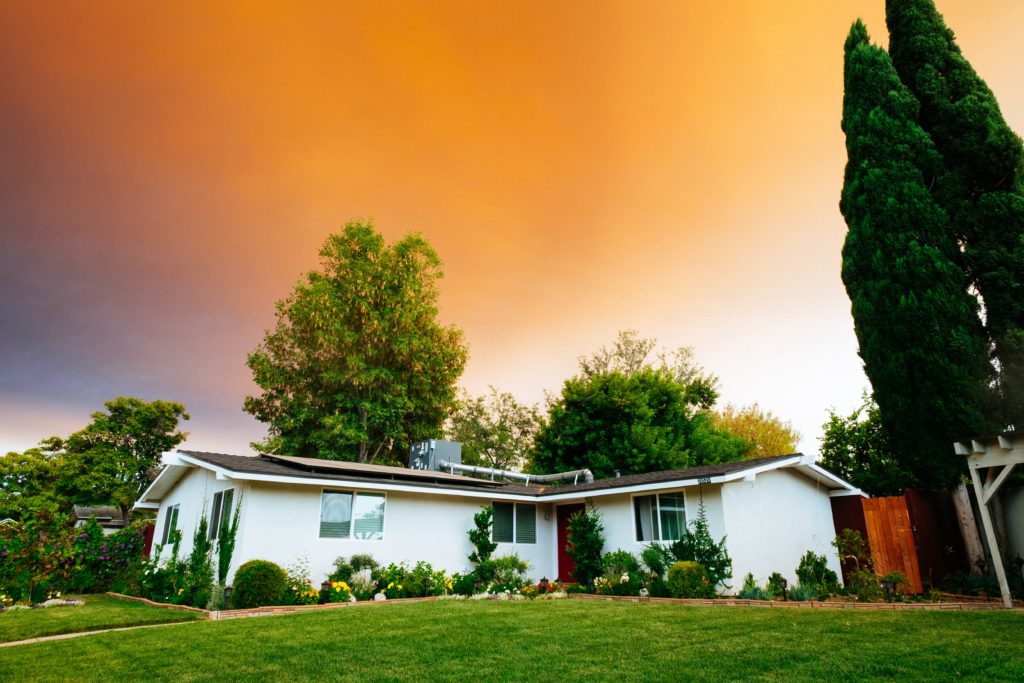
How to be a successful influencer without 10K followers
When we start navigating the waters of influencing, it seems like getting to 10,000 Instagram followers is that milestone every influencer sets out to achieve. (For the sake of ease – when I say “influencer” I am grouping bloggers into the category as one collective meaning.)
I’ll be honest, that was my goal too. I mean Instagram doesn’t even allow you to have that nifty “swipe up!” feature until you have the 10k badge. A lot of brands and collaborations require “10k plus followers” to even apply to campaigns. When I was first starting out – and I started with 3 followers in February of 2018 – I joined all the collaboration sites I could find, only realizing that collaborations and getting paid for any real influencing would be a goal for the future. I had to obtain the status of 10k first. Let me be really honest about something too. I grew fast in the beginning, I was over 1,000 followers in just a few weeks, however I felt like in my first year of Instagramming I was watching everyone else sky rocket while I just inched.
I was moving, always forward, but it seemed everyone else around me was hitting 5,000..10,000…20,000 and here I was pouring my heart and soul into everything I did. Every picture I took I tried my hardest, every caption I wrote and rewrote. I studied the algorithm, I took courses, I engaged with true heart and intention. I grew, just slowly. It’s easy to get discouraged, especially when you believe the lie that “nothing really matters before you hit 10,000”.

The lie that we believe.
I remember taking an Instagram course early on in my influencer journey and the “guru” told us that you can’t even charge until you have at least 10,000 followers because brands won’t take you seriously. At first I was disappointed because that number was far off for me. Then I quickly said “nope, I’m not going to play by those rules.” First, who made that rule? Is it really written anywhere or it is just “what people believe” like many of the ominous Instagram rules. I wasn’t going to wait until I had 10,000 followers and the swipe up to start being a “real” influencer and earning money and making a name for myself. I didn’t wait..and a year later I’m still not at 10k followers. However that doesn’t determine my worth, and I didn’t let brands determine that either. Also, I’ve completed over 18 sponsored campaigns in the last year..all while being well under 10,000 followers so if you’re doubting yourself, you need to reconsider! So maybe you’re thinking…great, I can earn money and get collaborations before I hit 10,000 followers but how?
First, get your mission straight.
My mission has evolved so much over that last year and a half since I established My Eclectic Grace. At first it was purely a DIY blog, but as my blog grew, so did my voice. I honed in on my niche which is showcasing + inspiring real life DIY’s and makeovers. I also am a vocal environmental + feminism advocate and throw that into my message because those things mean something to me. You may not know you entire message at first – trust me it will change as your grow – but having a general idea of what you stand for, what you want to influence and who you want to inspire is essential. Evolve, be true to you, and find your voice. There are a million “influencers” out there and many copy each other’s voices. Sure it will get them some likes, follows an collabs, but they will nonetheless plateau because people follow people…not robots.
Did you know…81% of influencers are actually considered micro–influencers. Micro–influencers are a great marketing choice for small businesses because they have a more dedicated following than macro-influencers, which is demonstrated through their high engagement rate
Engaging audience + quality work is more valuable than inauthenticity and rushed content!
Prove yourself.
You may want to start getting collaborations right out of the gate. Maybe you want to get paid instantly..but that’s not how it works. You need an audience..and a real one. Connecting with people in your niche and people outside is essential to building a group that supports you and even more importantly you support. You have to build up some type of trust, an Instagram feed that is somewhat consistent (if you scroll back to the beginning of my account you’ll see that my pictures were not cohesive until I started using presets and posting at the same time every day) and a following that is involved in your mission and actively engaging with you. If you have that, followers don’t really matter (ok you should probably have more than 10..).
If you are still searching for your “tribe” I encourage you to reach out to other people in your niche and connect. They will know other people and that is how you network. Get involved with engagement/support pods on Instagram or Facebook (but don’t rely on these solely), participate in some follow trains and do not be afraid to REACH OUT and talk to people. In the beginning I fearlessly reached out to accounts with hundreds of thousands of followers in my niche just introducing myself, letting them know I looked up to them and was inspired by their journey and work. Every single person wrote back to me with appreciation, words of encouragement..and guess what? Most of them even followed me. Sometimes we put these huge influencers up on a pedestal and forget they are just human beings with the same daily needs as we are. Don’t be afraid to reach out..the worst that can happen is you get no response. Best case, you make a new connection and friend!
Start small, and give it your all.
Chances are that when you first started walking as a young child you walked a little different than you walk today. You probably couldn’t walk in a straight line, let alone run. This is no different than being a successful influencer. Sure, it helps to observe what other “successful” accounts are doing, how they are styling shoots, posing, and writing caption. It’s great to be able to see what someone else is doing that is “working” for them. But the KEY you must never forget is that it what works for THEM. They do not have the same exact followers as you have. They don’t have the same journey, voice or life. If you act like you are them, you are going to get nowhere. You will only ever get somewhere if you are you and no one else. A brand wants you to be authentic. I speak from experience here…and this was not an easy lesson to learn.
So how do you start small when you don’t have 10,000 followers…maybe you don’t even have 1,000 yet? (news flash..everyone started with ZERO. Everyone.) You build your way up..one post, story and share at a time.
Before paid collaborations are possible…
Maybe you aren’t sure how to get them (don’t worry that is coming later in this post) or maybe you just don’t know how you’d go about posting about a product. Start small..start with your OWN brand. Let me explain what I mean.
To build up your “portfolio” in a sense and hone in on your caption skills, you have to practice. Start by posting about a product you love (genuinely love). For instance, if you are a beauty blogger and you love a product you use (say it’s your favorite brand and would be your DREAM collaboration) post about the product. Talk about why you love it, why you think your followers would love it, do a story about the product and tag the company. They may see it, they may not. Best case scenario; they see it and maybe they reach out to you or even share it on their page which would expose your account to more people in your niche. The worst case – they don’t acknowledge it, but you gain your audience’s trust and you start to become more comfortable in your own “influence”.
I can’t count how many times I’ve purely just shared my enthusiasm for a product (usually home decor!) and the company has either reached out to me just to thank me – opening up a line of communication – or has reposted my images which exposes me to to my target audience. There is no way this can hurt your account or influencer credentials, and is the best way to start when you are just starting out. PS – don’t stop this habit even when you’re a large account. Even once you start getting paid to promote and collaborate, talking about items and services that you’re not being paid for will keep things genuine. Nobody, and I mean nobody, likes a sales pitch. People DO like being educated about quality items that will improve their life however – just remember that.
Free product collaborations!
Some influencers will turn their head up at this saying “free products are nice but they don’t pay the bills!” This is true…but it’s also true that you don’t walk into a company demanding to be the CEO when you only have intern-level skills. It’s the same with being an influencer. Many of us start with receiving free product in exchange for posts and shares.
Of course you don’t want to just receive free product forever and eventually you will be able to to start charging for your time – however getting the experience in and learning how to do sponsored posts is worth that free product.
Free products + collabs
Other than following the rules with #ad and #sponsored and disclosing that something is a collaboration, you also need to serve the brands well who are trusting you to advertise on their behalf. They chose YOU because they want you to put your spin on things [while following their guidelines too of course.]
I have received products ranging from flowers, wine, coffee all the way to awnings for my yard and a wool rug shipped to me from Turkey. I didn’t get paid for most of those sponsored posts, but I did gain a few key things that will help in the long run:
- I gained experience + confidence in my posting skills of sponsored content and how to creatively showcase brands
- I got awesome products – all of which I loves and actually wanted/needed
- I gained exposure because I put a ton of effort in and the brands saw that and appreciated it. I got shared on Instagram accounts + blogs with thousands more views than I had which helped me grow.
- I added to my portfolio aka my Media Kit.
If you don’t have a Media Kit, or even know what one is – you can start here at Zine. You can create a free media kit and learn all about them! Click here to get started on your Media Kit from Zine today! [not sponsored, I just love Zine!]
My list of go-to collaboration networks:
Pitching is still my favorite way to approach a collaboration, but when I was just starting out I was scared sh*tless of pitching. I didn’t understand it and I wanted someone to just hold my hand. That’s when I found HeartBeat. HeartBeat is a network that you can join for free. They connect influencers with top brands and it’s as easy as pie! I have completed several campaigns (sponsored posts) through HeartBeat and they helped me gain the confidence I needed to get out there and pitch myself to companies.
Working with HeartBeat is great in the beginning (I still work with them when I come across a campaign that really gels with my mission) because they walk you through how to create a successful sponsored post, how to get brands attention, and they pay you. You know that lie that you can’t charge for collaborations until you’ve reached the 10,000 follower title? Heartbeat values mirco-influencers and see’s the worth in loyal and engaging small audiences and will pay you for your job well done.
I did my first collaboration through the HeartBeat network at 600 followers. I received a bouquet of roses in the mail to style, I took horribly lit photos and had some cheesy caption with probably the most generic hashtags..and I made $10 on top of that. Cringe right? It was the best thing i’ve done. It launched me into understanding how HARD it is to be a content creator. I realized this was no joke and that it takes time and A LOT of creativity to be a serious influence making serious money. And even though it was just $10, I was and am still really proud that I put myself out there and earned that $10.
Go-to list for influencer collaborations:
These are just a few that i’ve personally been a part of!
The scary part – pitching!
When I first started this blog in June of 2018, I had no idea I would be doing anything other than showcasing my cute little DIY projects. When I learned about all the potential my blog and Instagram account held, I was truly overwhelmed. It is a lot to understand and navigate and many many people try and give up. Many people succeed too. One thing about success though..you have to be willing to be vulnerable.
Vulnerability is a word that has been thrown out there a lot recently. It means something slightly different to everyone, because we all in fact have different ways of being vulnerable. If you haven’t already watched Brene Brown’s Netflix special, then go do that right now. You can thank me later.
Pitching is simply defined one of many ways by Google as “Simply defined, it’s a line of talk that is designed to persuade someone, such as a presentation to sell a product or service. But it can also be about selling yourself, to gain new clients or to promote your business.” As an influencer you are selling yourself. To brands. And that means you are opening yourself up to a lot of rejection. If you aren’t ok with hearing a bunch of no’s…or even worse for me is just silence…then you are not in the right game my friend. Being an influencer is not a linear smooth journey. There are going to be a lot of no’s and rejection but it will all make it worth it for that one YES. That one yes will erase the sting of the no’s.
How do I pitch myself..and to whom?
I want to say one thing – I am not an expert. I am a novice at best with pitching myself to brands. Before I even go further, I want to say that I learned a lot from podcasts about pitching – namely Jules Soloman’s podcast “The Influencer Podcast”. Her podcast is so sweet and simple and has helped me navigate the scary waters. You can listen here!
When you “pitch yourself” you are just selling yourself to a company or brand or person that you want to collaborate with. You may just want to open the lines of communication – if influencing was an actual “job” than pitching would be “getting your foot in the door”.
For example, I wanted to work with a company that supplied a product that I was planning on using in my upcoming renovation. I had a plan for how I was going to use the product, how I would talk about it and photograph it, and I really admired the company. I had been following them on Instagram for some time and engaged with their content. I wrote them a formal “pitch” which is simply just a letter explaining your purpose. I emailed it to their social media rep who’s contact info I found on their website. I didn’t hear anything for a week. Then I received an email back, and it was a kindly worded exchange, but alas a “no”. I was slightly disappointment..however I still purchased their product and talked about it. I still showcased it and told my followers about it, and guess what? They reached back out to me, offering a collaboration the next time I wanted to use their products in a makeover. A no isn’t always a no – it might just be a “not right now!” And even if it doesn’t result in anything down the line, every time you send that scary pitch to a company, it will get less and less intimidating, so think of it as practice.
What goes in a pitch letter?
A pitch should be about two things: Who you are and what you can do FOR the company. It should never be about what you want/what the company can do for you/ why the brand should work with YOU. A good pitch will showcase how the influencer can HELP the brands mission – not the other way around.
Elevator Pitch Elements:
+ Who you are
+ What you offer
+ How it serves others
+ Why it’s important
My super simplified pitch template:
“Hello so and so,
My name is ____ and I [admire/love/am a fan/subscriber, etc] of brand/company name.
Tell them how you found them, how long you’ve been a loyal customer, and why you admire what they are doing. Mention a current event or new project they have. Show initiative that you’ve done your research in a way that connects to your own mission.
Mention something they do that you want to support them in. IE: “I admire the work you’ve done to campaign for shelter adoptions in the recent years. Being that I just adopted my dog Spot from our local shelter, this is a cause near and dear to my heart. I’d love to know how I can support you in this mission!”
Tell them in a simple and to the point way how you could help/idea you have.
Would this be something that aligns with your mission? I would love to work with you on this, please let me know how I can help!
Thank you,
your name + your social handles so they can see what you’re all about!
Don’t get discouraged.
It may seem everyone is running past you into the finish line while you are chugging along. Life will always seem this way if you focus on everyone else! Focus on your mission, being the best influencer you can be and really honing in on your own voice and messgae. There is no rule book, so you have to do what feels right for you. It’s ok to say no to opportunities if they are not right, but don’t say no just because you’re scared or think you’re better than that “free product” or small amount of money.
After I started collaborating, things got easier. It wasn’t so scary, and truthfully I have to turn away half of the opportunities that come my way because I just don’t have the bandwidth to do them all. I still reach out to companies, and still am at about 70/30 as far as paid collaborations go. 70% are product exchange and 30% are paid. However when I do hit that golden 10,000 follower mark, I will be that much more prepared and my portfolio of sponsored posts will be that much heftier. So do not wait around!

Tips to working with brands:
- Make sure brands KNOW you’re open to working with them. Either have something in your Instagram bio about collaborating (I have a simple but to the point “Collabs” with an arrow pointing to my email in my Instagram bio letting brands know they can email me if they want to work with me) *See what i’m talking about here*
- Create a cohesive feed with pictures that flow and styles that make sense to your niche. It can take some playing around to get this right.
- Be clear about who you are and what you offer. Your bio on Instagram and your blog shouldn’t be a mystery – it should be somewhat clear about what you bring to the table.
- Be kind and clear. Be kind to the people who work with you and always be transparent. Also a simple follow up thank you email or letter goes a long way!
- Don’t delete your posts right away. I archive old Instagram posts to keep things clean, and most brands will ask you to keep posts up for a certain amount of time. Even if they don’t, keep it up for a bit to honor the work you did!
- It’s ok to say no. If something doesn’t mesh with you, politely decline the offer. It’s ok and will not hurt you in the future if you are honest and explain that it’s not the right time/fit for you.
I could talk about this topic all day! If you have more questions for me or just want to say hi please connect with me over on Instagram @myeclecticgrace!
And remember sharing is caring! If this blog post helped you in anyway, would you pass on the favor and share it? Thank you so much!
how to travel on a tiny budget
When I started my debt-free journey, I knew I wouldn’t be able to go a whole year without traveling, which lead me to scrounging up all my tips for how to travel on a tiny budget.
There’s a common theme among people these days, especially millennials..we all want to see the world..and we are all broke (cue tears + laughter). Good thing is, with a little extra work, and help from blogs like mine, it’s possible to travel and save money. I haven’t figured out to how to travel for free yet*** but I have figured out how to do it on a realistic budget, which is good for now!

MONEY SAVING TIPS + TRICKS
AIRLINES
I almost always prefer flying over driving..but the price of flights can deter most people. Finding inexpensive flights may seem like finding a needle in a haystack, but I promise it’s simpler than that.
Here are some budget travel tips I’ve learned when booking a flight: Tuesdays have the cheapest fares. This is when airlines post tickets on “sale”. They are snagged quickly, so if you’re trying to book a flight, try around 6-8am on a Tuesday morning for the best fares.
January and February the the cheapest times of the year to travel via airplane (domestic flights). April and October are the most budget friendly months to fly internationally. Traveling during the summer and around holidays is always going to be the most expensive, so being flexible with your dates will help you tremendously.
If you can, buy your ticket 3 months in advance (the 42-100 day range), because you’ll get the lowest fare.
Let’s talk budget airlines…yes they can be rough. I once flew across the country on a budget airline and not only did they not serve water or snacks, but the seats were about as comfortable as a concrete block. Nonetheless, I saved about $300 both ways, so in the end it was worth it!
TRANSPORTATION
Traveling to a new place can feel daunting, and to feel more secure, most people want a car to get around. However, if you’re serious about traveling on a budget, ditch the rental car.
Everywhere I go, if it’s doable to do so, I walk. Walking may take a bit longer, but you don’t have to worry about parking and gas..and you actually experience the new environment. If the destination has public transit, invest in it; meaning buy a metro ticket or learn to use the subway system to get from A to B. It truly saves a ton of money and headache!
And if you must get a car because you’re going to a more rural area, consider using a less common company. Costco, AAA, and even Priceline all can get your cheaper rental car rates than the big guys like Budget and Hertz. I’ve been wanting to try out AutoSlash – which compares rates and pulls all the current coupons for rental cars. Also double check that your insurance covers rental cars – most of the time it will, which means you can forego the hefty insurance fee’s rental companies tac on.
The last 4 vacations I’ve taken were all Air-bnb stays. If you want to feel like you’re immersed in the culture of your location and don’t mind figuring things out a bit on your own (assuming the alternate would be a hotel with a concierge, etc) then an Air-bnb is the way to go.
What I love about it is you can book a stay for less than a hotel in major cities, and at the same time you could have an incredible experience staying in a unique place. For example, I stayed in a studio apartment Air-bnb 2 blocks from city center for $80 a night when the hotels on the same block charged $400 a night.
If you travel with your pets (or kids!), having a whole condo or house to stretch out is invaluable. With Airbnb’s you may get amenities that you can’t find in a hotel, like a full kitchen (cook your food and save money), washer and dryer, and personal outdoor space. If you book last minute for Airbnb’s there is usually a rate cut!
I use Groupon a lot. If you don’t, I only have one question. ARE YOU CRAZY? Groupon gives you the best deals, and when it comes to travel, they really can’t be beat. Last year I went to the Dominican Republic by booking an all-inclusive trip through Groupon. This means that airfare and resort stay were included in the price. The entire trip cost me $800 (40% off through Groupon)..that’s an all inclusive resort, and round trip airfare at a luxury resort in the caribbean for 5 days.
If you like to plan activities ahead for your trips, you can use Groupon to book dinners and excursions. I’ve bought restaurant vouchers and booked tours for my vacation through Groupon and saved hundreds. But you know me, i’m all about saving even more. So when I checkout through Groupon, I activate my Ebates. Which means I am getting a refund on my already slashed prices. I got $120 back 3 months after my Dominican trip because I used Ebates. Tell me that isn’t the best travel hack!
PACK SMART
When I studied abroad in college, I was allowed one backpack and one carry-on. Let’s just say I mastered the art of packing efficiently and learned how to style a cardigan 10 different ways!
So skip the hefty checked bag fees, and pack light. Chances are you won’t even end up wearing everything you would’ve brought, and traveling light IS way less overwhelming, especially if you have to trek your luggage around for a bit.
Buy one case of reusable plastic TSA approved bottles and fill them up with your products from home (don’t buy travel sized stuff..it’s a waste of money and plastic!)
SKIP THE “MUST EAT HERE” LIST
I’ve made that mistake way too many time. On my first trip to Charleston SC, I ate at every trendy, Instagram-worthy restaurant…and paid the price. I blew over $400 on food alone that weekend. Next time I went, I savvied up, and now I know how to eat on a dime!
Find the hole in the walls and the markets. If you are staying near a farmers market, grab your breakfast, lunch and snacks there. Visit a grocery store to grab things like sandwiches, fruit and water instead of going to the touristy cafe that will charge an arm and a leg.
SKIP THE SOUVENIRS
Don’t feel obligated to buy something for people everywhere you go..even yourself. Instead of buying yourself a tacky shot glass or oversized t-shirt, get a really nice picture taken of your or of a landmark of your destination and frame it once you get home – you’ll cherish that way more!
TRAVEL REWARD CREDIT CARDS
As most of you know, I am on a debt-free journey, which means I am not using my credit cards at all. However, using them wisely, when it comes to travel is well worth it. I do not have experience using credit card rewards for travel, but it is something I fully intend to look into and do.
The basis of it is there are certain cards that give you cash back rewards on travel, or miles for airlines. People have boasted that they’ve saved over $5,000 just from using their CC’s for travel. This holds especially true if you use a certain airline, for example, if you open a SouthWest credit card and spend a certain amount of money in a certain amount of time you will be rewarded X amount of points to redeem for plane tickets. It definitely works for people and if you are savvy with CC’s and read all the fine print, I believe it can be a great cost saving strategy.
More about this here. https://www.moneyunder30.com/best-travel-rewards-credit-card.
COMMON SENSE TRAVEL HACKS:
- Bring food with you – you can bring sealed food on an airplane and avoid those $43 a sandwich fees (I kid..kind of)
- Uber/Lyft or get a friend to drive you to the airport. Paying for airport parking almost always outweighs the cost of getting a ride. Even if it’s $50+ to the airport, you won’t get burdened with $30/day parking fees..plus if your plane gets delayed a day or two you don’t have to worry about additional fees.
- If you can stay at a hotel that offers continental breakfast, factor that in. Breakfast out can cost $10+ a person a day, so if you add that on to the price of the hotel, it may just be worth it! (I always grab extra fruit and granola bars from the breakfast buffet for snacks on the go to save extra!)
- Going somewhere you know someone? See if you can stay with them! Staying with friends or family will slash the prices tremendously, and chances are they can help you find all the cool places you would’ve have known about!
I hope this helps! A small budget should never keep you from exploring the world..with some smart tips and tricks you don’t have to slow down. And if you want some help with paying down debt and saving for those dream vacations, check out my debt-free tips!
Dollar Store Organization Hacks
I think my love of dollar stores started when I was a little girl. My nana would take me to the one near her house and I could pick out anything I wanted..and I would always get a doll. One dollar Barbie dolls were kinda my addiction at that age!
Decades later and things haven’t changed..I still love the dollar store. I am not going to sit here and pretend that you’re going to get top quality things. Personally I would rather have thrifted items or vintage pieces, but when it comes to organization, nothing beats the dollar store.
I recently collaborated with the Dollar Tree (this post IS NOT related or sponsored, just relevant) to revamp my pantry for Spring cleaning, and it was actually very fun! How I let my pantry get so unkept or why I didn’t think of the dollar store for my organizing needs is beyond me..but now it’s going to be my go-to spot! Let me show you my FAVORITE dollar store organization hacks!

Pantry Makeover
- Plastic bins (spray paint them in ANY color to match your decor!)
- Mason jars (think of storing small things like toothpicks, cupcake liners, rubber bands, etc)
- Large round bins for bottom of pantry (kid snacks, pet food, household cleaners, etc)
- Labels (they have cute labels for all your stuff!)
- Contact paper (pack a punch in your pantry with pretty + cleanly lined shelves)
- spice jars (pour spices from plastic containers, print or make cute labels)

Under Kitchen Sink
- Plastic bins (organize cleaner by type)
- Bins with lids (not child proof, but still safer!)
- Shower caddy (store stuff you take around the house with you!)
Laundry Room
- Cloth bins (to sorta colors)
- plastic bins to store detergent
- rope and clips for socks
Bathroom Counter
- jars with lids (for q-tips, cotton balls, bath-bombs)
- Mason jars (toothbrush, toothpaste)
- tall bottles (bath salts)
- DIY tiered tray (super glue plates on candle holder)
- Makeup holder (candle jar glued on candle stick holder, add beans or sand for makeup brushes!)
Simple + Inexpensive
The way I think about it is this: When I am shopping and I see something I’d like to buy to help organize my home, I think “Can I DIY this myself or buy it cheaper?” The answer has been yes 99% of the time.
These are just a few examples of how you can organize your home with dollar store items! I have many more hacks for the dollar store, but I wanted to show you the places i’ve personally used these hacks – and frankly the most common places we all struggle to keep organized!
I hope this helps! Feel free to tag me on Instagram if you use any of these hacks – I love seeing all of your work!
The truth behind social media and mental health
“You can not pour from an empty vessel”
There are many conversations about mental health and social media..and yet they are brushed under the rug. It’s no shock to anyone that social media, and technology in general takes a tool on people, yet it’s a part of our everyday lives. The scariest part is, I believe most of us don’t even realize what it is doing to our psyche.
The big companies who run social media brainstorm and implement ways every single day to make us more addicted. And if you don’t believe me, go into to public and count how many people are looking at their phone verse talking or watching their real life take place in front of them. It’s a cold truth, one that makes me truly unsettled. People are more concerned with getting a picture of their favorite outfit, snapping a picture of a scenic view, and immediately posting. Did they even take it in..or did they just snap the picture to show off and walk away?
I don’t think social media, namely Instagram is evil. I do think though it has become a place that fosters negative things however.
Can you live without it?
Having a blog and hoping to make my living with that and Instagram..I had to have a real heart to heart with myself. The ugly + scary kind. I had to look myself in the mirror and ask a question that I have been terrified to answer. “Can I walk away from this?”
It struck me..the fact that I even had to ask myself this meant there was an issue already. The constant checking of my phone, the comparison of “likes” and followers, even though I preached that I didn’t care and I truly felt like I didn’t. Subconsciously..it was creating a realm of anxiety and panic. I’ve dealt with depression my whole life, and let me tell you, it’s easy to slip back into it. The endless scrolling and “keeping up with the Jones’s” demeanor of social media doesn’t help.
It took me a year of these icky feelings..of these ups and downs, of feeling like something was off to finally bite the bullet and admit, social media is anything but healthy for me.
My week long experiment.
Last week, I had a breakdown, or rather, a break through. That week at church, they had talked about listening and truly listening to yourself and God. They spoke to the fact that we as human beings go through life putting bandaids on things, on giving our selves a pep talk when we should give ourselves a break, on saying yes when we should be saying no. It hit me and it stuck with me. I couldn’t shake it, and I couldn’t shake the feeling that THAT is how i’m dealing with social media.
I decided to take a week off from social media, and truly I had no idea if I would ever return, I just knew I needed to breath. I posted a huge collaboration i’d been working on and been ecstatic about on Monday..and then I disappeared.
I deleted the app off my phone. And instantly I felt a weight lifted. On the surface, I didn’t have to stress about keeping up with about 100 notifications an hour..but it went much deeper than that.
Something shifted in me. My confidence went up, I felt lighter emotionally, my anxiety levels went down. I felt happy. I was there with my fiance..I was present when I went shopping, when I made dinner, when we watched movies..I was there. I wasn’t half thinking about this fake world of Instagram.
My happiness levels went up, and my stress levels went down. And that has to mean something.
Why social media detox’s are bandaids..AKA they don’t work.
Now, it would be beautiful if that little break reset me, and I was fresh and ready to go back on my grind of Instagram + blogging. But this time is different. This time, I didn’t need a break. I needed to break it. To break up, to break it off, to break it in half. I have to rethink everything with how I use this app..especially because this is an integral part of my livelihood.
I’ve learned a lot..and yet have only scratched the surface..but here is what I know to be true.
- You can not use social media without consequence mentally, but you can control how you use it.
- social media isn’t going anywhere, so you either have to figure this out, or not even take part.
- Social Media is an APP..an addicting one, but none-the-less it is not real life. The term “highlight reel” is legit.
- You can not use social media without knowing yourself, being confident in who you are, your purpose on there and your intentions. Without knowing that..social media will control you.
This leads me to why I am even writing this.
I know I’m not the only one who struggles. I know i’m not the only one who has fantasized about deleting the app and saying goodbye forever to this “time suck”. I know I’m also not the only one who uses it for something bigger than themselves…I started my Instagram to inspire, to spread positivity, to connect, and I have done that successfully. Yet it’s drained me. It’s pulled me away from what’s important in life. I know i’m not alone there. I placed my accounts well-being above my own…mistake #1.
My well being is always going to be placed WAY high above anything I gain from using social media. No amount of money from a sponsored post, no amount of followers, no amount of prestige will ever be more important than my mental + physical health and me being present in my life.
How to balance it?
I haven’t found an answer for this yet. I have an answer for how I plan to do this..but I wan’t to make one thing very clear. If I try my hardest to balance things, set boundaries, and take care of myself, and social media still causes me a mental unbalance..then I have already accepted that I will cut ties.
If you feel like you’re drowning in the negative aspects of social media..and you want to turn that around here is what I suggest:
- Take a break. A real break. Delete the app (not your account) and forget about it for a few days..a week is a good amount of time to clear your head.
- Ask yourself this: Why do you use it? What do you gain from it? Is it helping you or hurting your day to day life? Be honest with yourself.
- Set boundaries. This one is HUGE. Put a time on your phone for how long you can use the app. DO not check it in the morning or before bed. Carve out time if you want to use it, but don’t feel obligated if you don’t. Don’t obsessively check. Turn off notifications. Put your phone away when you’re with family and friends, even if they don’t.
I know this seems like I am just bashing Instagram and social media in general. I am not. I have met incredible people on here..and so many doors have opened up for me. That is why I am on a journey to regain my balance..because having a platform for my voice to be heard is a gift, and it shouldn’t cause distress.
This is just my take on things, my experience, my quick story about my break and my reasons..hell this is more of a rant than anything..but if you want to read a really great article that dives deeper on this subject, I highly recommend this article from Gather Co UK.
Tell me…did any of these point hit home?
If you want to talk – connect here or drop me a DM over on Instagram, i’d love to chat about your experience with social media + mental health.
How to make money blogging

Like most things in my life, where I just dive in feet first, blogging was no different! It all started with me needing a creative outlet. My fiance and I just bought our first house, and I wanted to document the process of us fixing it up. I had an interior design business, but that didn’t allow me to show off my own personal style and process, so My Eclectic Grace was born.
I’m pretty introverted, but I wanted a way to express myself and have a platform that could reach people worldwide. I started my blog as just a way to do that, until a few weeks in when during some late night Pinterest sessions, I realized people were making serious money blogging.
I kind of laughed, because first of all…my family already didn’t understand what a blog was, but if I told them I had a plan to use my blog as my side hustle, and eventually replace my full time income with it…they would’ve just laughed. So I didn’t tell them, I just got right down to it and started researching the heck out of how to make money blogging.
How to begin
I already knew a broad idea of what I wanted to blog about – home decor, DIY + thriftiness, and just a little bit of lifestyle. I kept it small at first – it’s always easily to start with a small niche and broaden your scope once you see what you really like writing about – and just as importantly what your audience responds to most.
I had done a lot of research and saw other big bloggers have success. It seemed like they were reaching their high incomes goals, and they made it look effortless. We are know the easier something looks..it usually isn’t. Blogging is really hard work..harder than anyone realizes until they start. But the pay off can be extremely rewarding, and it allows you to make money off of your own creativity. Hello starving artist dreams come true! Ha!
There are bloggers raking in anywhere from an extra $100 a month to $30,000 a month. That seems crazy, but after being in the game for almost a year, I now understand how they are getting that $30,000/month income. For me, that is not my goal. I want to get just enough to cover my expenses of running the blog, and start chipping off my debt after that. It’s a full time job to make such a large amount of money, don’t let anyone fool you into believing it isn’t. But at the same time, don’t believe you can’t do it; if you want to make money, anywhere from a few extra bucks to a few extra thousand, it’s possible and I’m going to tell you how!
This post probably contains affiliate links. See my full disclosure here.
Never blogged or written professionally before? No problem.
I’ve always enjoyed writing, it’s been a strong suit of mine, but i’ve never done it professionally. And prior to this blog, i’ve never created a website or coded…or marketed myself. I learned everything from scratch. My background isn’t in marketing, advertising, communications, or anything. I am an artist. So if you’ve never done anything like this, fear not.I didn’t invest in expensive courses..I took free courses. There are millions of free resources out there for blogging successfully – just a simple Google search with yield you results that will be useful. I don’t have tons of traffic to my site – I don’t invest in ads or participate in “follow me” threads on Facebook, or sell courses or Ebooks. But I still make money from this. And you can too!
Where to start.
Best piece of advice I’ve received – “feel the fear and do it anyway.” Just jump in. Buy your domain. Write a post. Start. Starting is the largest hurdle..after that I promise it won’t seem so hard. After doing a ton of research, and talking to my fiance who is very savvy in the technology field, I felt like I had a grasp on the best way to start. I jumped in one morning over coffee and bought a year of hosting through BlueHost – the #1 recommended host by bloggers. I have a free WordPress site, got a killer free theme, and hit launch before breakfast was even over. It cost me less than 3 months membership at the gym for an entire year of my own site on Bluehost…it was a no brainer to say YES!
Before you start, you don’t need to everything be perfect. I literally started a a Pinterest account with my new blog name the morning I launched, and started an Instagram account (with 5 followers..now almost 4k after blog launch) and had 8 blog posts written. Finished is always better than perfect!
Let me make you realize something…your first pictures, first blog posts won’t be incredible or go viral (most likely). You have to test the waters, get the dust off the keyboard, put your manifestations out into the world. Blogging is one of those things where you only get better with time. The saying “practice makes perfect” is absolutely true when it comes to this.
I suggest having between 5 and 10 blog posts up on your site when you “launch it”. Why? You don’t want visitors to come to your site and have nothing to look at. When you announce your blog to your friends and family, they will be thrilled to check it out, and you’ll want some content for them to check out! I had three categories on my blog, and I split it up evenly – 3 blog posts in each category, which worked well for me!

Alright..so you bought a website and have some blog posts written..now what?
When your website goes LIVE this means everyone can see it – but no need to panic, you aren’t going to be on the top search of Google..yet! Don’t let your excitement be dulled if you don’t get a ton of views at first, it takes persistence!
It can get overwhelming…Pinterest, Affiliate Marketing, SEO, email lists, rich content…ETC. Don’t try to tackle it all at once, take it in strides. I broke it down and tried to fully understand one thing at a time, which ultimately made me better at each thing in the long run.
What you do need on your blog to go LIVE.
You’ll want an about me page – with a clear and updated image of yourself! It doesn’t have to be a professional picture, just make sure it represents you and you’re smiling! “About me’s” can be tricky, but I started reading other people’s about me sections and took notes on what I liked about them, what caught my eye…I’ve changed my about me text a few times now, but it’s best just to get something written and out there.Q
A contact page – if someone wants to reach out to you, you don’t want to miss that opportunity because you forgot about this section!
I believe starting on a good foot makes all the difference. One main key to blog views is getting shared, so having a “share” button on all pages and posts can be very quintessential to growing your blog post views.
Are you thinking..why did she keep bringing up Pinterest?
I have had a Pinterest since I was in high school. I guess that shows how young I am, but hey it’s an amazing tool! If you just pin for fun, or go on recipe rampages where you Pin every delicious recipe you see..now is the time to either stop and Pin strategically, OR start a brand new Pinterest account with your blog email. I started a brand new Pinterest so that my boards would all coincide with my blog.
Pinterest is the bloggers search engine. Need advice on staining your deck? Pinterest search. Mommy hacks? Pinterest search. New hair trends? Pinterest. If you want to get clicks, you have to use Pinterest!
At first, I was just manually pinning..when I remembered. I would try to Pin for a half hour a day…yikes. That got exhausting, and truthfully I didn’t know if I was helping or hurting my blog. I had about 5 followers, followed 50 people, and felt like NO ONE was seeing my content. I will tell you what I do know is true though – these next steps are essential for Pinterest and blogging.
First things first – do these steps:
- Make a free business Pinterest profile
- Make your name the same at your blog + match the picture (or logo) so people know it’s you!
- Add your website to your profile so people can easily find your blog directly.
- Follow people who are in your niche and repin from them
- Make at least 5 PINS from each of your blog posts and pin them on your own boards.
I did all of this, but until I joined Tailwind, I was still stuck with low views. Tailwind took my Pin impressions from 1.2K views a month to roughly 112K views in about 3 months and (growing daily). If you aren’t familiar with Tailwind, it’s okay, I wasn’t either. A friend of mine showed me her results, and I was smitten! If you use a current users code, you get to try Tailwind for free for 30 days, so I am offering you mine. I don’t pay for any subscriptions for my blog OTHER than Tailwind..I refuse to ever go back to manual pinning!
Google is your new bestie.
Sign yourself up for a Google Analytics account. Yes, it will seem so overwhelming you’ll want to cry at first. I did. No shame. But then you’ll be able to handle it, and it breaks down everything.
You’ll be able to use the invaluable information it provides like
- Pageviews
- Active users
- Traffic source (how people are finding your blog!)
- Sessions
- How long people are looking at your site
Alright…can I make money now?
When I started, I had no idea how to make money. I thought I would get a bunch of views and then I’d get a magical check in the mail for some reason? Nada.
There are big ad companies that you won’t qualify for at first (like MediaVine and Ad thrive) but you can apply for Google Adsense, which is super basic and you won’t get much money compared to the larger networks, but it will be something. It also gets you familiar with how ads work on your website.
Ever heard of affiliate marketing?
Yeah, I hadn’t either. It’s my best friend now, and my 2nd top way I make money from my blog. It’s how most bloggers and influencers make their money, and it’s very simple. You will sign up for different companies, and by talking, writing about, or recommending products, a company rewards you with a “commission” of sorts. It’s performance based…so if no one buys the vacuum you are talking about, you won’t make a dime.
Some companies reward you, the affiliate, from clicks, views, or sales, depending. You can throw an affiliate link in wherever it seems reasonable and makes sense. But don’t crowd your post with BUY THIS HERE and such..that seems salesy and icky. It has to flow and you have to be transparent and 100 % honest for it to work. I never recommend or ever talk about something if I haven’t used it myself and 100% believe in it.
As a new blogger, here are the affiliates you can apply for:
- ShareaSale
- RewardStyle
- CJ Affiliate
- Rakuten Affiliate
- Awin
- Amazon Associates
- BlueHost (once you sign up)
- Ebates (sign up here!)
Whatever you do, do not forget to mention that a blog post or page has affiliate links. You can mention it and add a link to your affiliate disclosure, but this is a must!
To put ads..or not to put ads.
This is a personal preference. I had ads up for a few months but they were not looking right with my theme, so I got rid of them. I decided once I had thousands of views and could apply for one of the big guys where the real money could be made…i’d just keep it clean.
If you want to put ads on your site from the get-go, more power to you! You can make a few cents a day for doing nothing in the beginning…so it’s all about what you want and your vision.
Batch write your posts.
At first, I was pumping out two blog posts a week..and they weren’t quality. They were thrown together and published because I saw big bloggers doing this and thought it was key. It wasn’t. I slowed down and starting writing ONE really good post every week…that was all I could keep up with along with my full time job. Once I started focusing on QUALITY > QUANTITY, my blog traffic increased dramatically! Q
I take Sundays and I batch write. Sometimes I get all my ideas down and a few drafts written and then during the week I polish them up and get photos, etc. It doesn’t have to be all at once, but setting aside chunks of time where you can focus is very helpful, especially if you work as well.

How do you promote your blog?
So your post is live…okay well no one is going to see it unless you tell the world!
When a blog post goes live – these are my next steps immediately:
- Make Pins for my Pinterest account (2-3 per post)
- Publish my blog to Facebook – my blog Facebook page and my personal page
- Put a post up same day (either feed or story) on Instagram letting my followers know I have a new blog
What do you mean “make Pins”
On Pinterest, you can add your own “Pins” manually. You can also “pin” images from your blog post directly to Pinterest by either adding the pin with your blog post URL or by having the “Pinterest save button” plugin on your blog. Both work as easily!
I like to create a few pins per post as well. I use Canva. Canva is a free site that allows you to design everything from birthday cards to Instagram stories to Pinterest Pins – if you aren’t utilizing them for your blog, start now!
Just go into Canva and chose “Pinterest graphic” when designing a new layout – they have hundreds of templates to help you get started. They also have stock photos if you don’t have your own photos.

Pin essentials:
- Eye catching – look at other people pins that you’ve saved and take note on what caught your eye..pictures, colors, font, wording, etc.
- Keywords – write a descriptive but short description for your pin using the keywords someone might use to search.
- For example if you are pinning a cake recipe you’d want to say “Simple 7 ingredient chocolate cake recipe. Simple and sweet. Paleo.” or whatever describes it.
- Always double check that your URL is going to the right page and that is it working and not a broken link. Nothing worse than someone wanting to read your post but the link is broken!
- Pin to more than one board. I pin everything to 3+ boards for maximum exposure.
- Use a scheduling platform like Tailwind for optimum reach
Put it all together now
Blogging is much like making a really difficult recipe. The first time is going to be challenging and you won’t be sure how it turns out until it’s done and you’ve tried it..along with several other people. But every time you make the recipe it gets easier..and soon you could make it in your sleep and everyone love it! You get the picture right?
Just start!! Get your voice out there. Make a Pin on Canva, publish an article, and DO NOT GIVE UP. Your thoughts are important, and your content is worth sharing. I joined several blogging groups on Facebook for support and that helped me tremendously in the beginning. It’s a great resource for when you are stuck or just need moral support.
In the name of transparency – i’m going to show you what I made from my blog (+ instagram) in the first 6 months. I’ll tell you this – I didn’t take it seriously..or start my Pinterest until about 3 months in, so the first 3 months were just shooting in the dark.
- Google Adsense (only have for one month) $42.00
- Amazon Affiliate $60.00
- Tailwind affiliate $45.00
- Bluehost affiliate $75.00
- Sponsored posts $100.00
- Products reviewed for review (worth) $300.00
- E-bates Influencer program $90
That isn’t much…but I just starting getting serious in the last few weeks about affiliates, and it’s already proving to be something worth investing time into.
If I can do it – you can too!
Want more tips and to stay up to date on my latest posts? Sign up for my newsletter and follow me on Instagram @myeclecticgrace

Get Debt Free
When Brian and I decided that 2019 would be our year to get debt free, I knew we had to start January 2019 out strong. I’m a firm believer in going cold turkey with things, especially things that negatively effect your life. That’s why I am starting out this year with some strict tactics for myself to get into the habit of living simply and breaking old spending habits.
I’m writing my top 7 tactics I am going to use to success in my debt-free journey – I determined these were best for me. They may not be best for you, but overall they are ideas that can help you pay off debt, save money, and live more simply!
No Spend January
This is a popular tactic to use in January, and it’s going to be a huge challenge for me – which is why I’m starting the year off with it. If I tackle my BIGGEST challenge first, then all the little challenges will be seemingly simpler.
How to do a “no spend” month?
- Don’t spend any money outside of necessities. Necessities are bills, food, gas, basic care items, utilities, etc. Not a necessity; a $4 latte. Get the picture?
- ONLY buy what you absolutely need.
Tips for doing this successfully:
- Don’t use credit cards
- Stop Amazon auto-ship (unless those are your 100% necessary items you buy)
- Do free date-nights
Stop using Credit Cards
This is a hard one for me (and for many!) I trapped myself into the mindset that I can use my credit card, get the points, and then I’ll pay it back as soon as I get paid. But the truth is, I spend more than I will have to cover the statement, and that is how debt is occurred.
Full Disclosure: I have one credit card I use to buy gas because I get 5% back, however I only buy $30 of gas a month, and I have it set on auto-pay so every month it pulls out exactly what I spent from my checking. THOUGH if I feel this is hindering my savings at all, I will stop doing this completely.
Tips:
- Take your credit cards out of your wallet, and put them in a drawer that you don’t frequently use.
- Remove auto-fill from your computer and phone so it’s not so easy to online shop (I swear autofill credit cards are the best and worst thing ever invented)
Only purchase items you can pay for then and there in cash
This goes hand in hand with not using credit cards – I only buy something if I can pay for it in cash (using my debit card). My checking account is where my paycheck is deposited, so I know exactly what I have in there. If I want that $5 coffee or that $40 rug on sale at the store, then I have to consciously know that it is pulling it straight from my pay check and bill fund.
If you get into the mindset that you don’t even HAVE credit cards to use (just pretend they are GONE) then would you still buy all the unnecessary items?
Cancel subscriptions
We all have automatic subscriptions that we don’t need or fully use. This is what you should do to figure out what you have and how much it’s actually costing you: Write down EVERYTHING you pay for monthly (besides bills, utilities, gas, food). Netflix, Hulu, Gym membership, membership to Costco, etc. Do you use them all? If you’re on the fence about it – break it down by the day. My gym costed me $1 a day, but I work out at home 90% of the time, so I decided to cancel it. It may seem like a trivial amount, but it can easily equal hundreds of dollars a year.
Sell extra items
I know my home is full of EXTRAS. Extra shoes, clothes, books, furniture..we even have 3 laptops we don’t use anymore. Instead of letting all the extra sit around, sell it. It doesn’t matter if you get $5 a pop for everything – use that money to pay a bill, or put it in a rainy day fund.
If your items hold no value, donate them. You can use the donation as a tax write-off, but more importantly, having a clutter free house will make you feel better, and enjoy the items you DO have.
List out debts and pay them from smallest to largest
This is not the approach everyone has, but for myself, this is the best approach. I lose momentum when I don’t have any gratification, so if I start paying off my debts from smallest to largest, I will feel that I am checking things off my list and it will keep me going!
For instance – I have a bunch of small medical bills, vet bills, credit cards with smaller amounts, and those are what I will tackle first. This does not mean I am abandoning other bills or debts. I am still paying my monthly minimum on all other bills, but I am putting any extra money into those small bills until they are 100% gone.
If you do make a purchase, make it wisely!
I can’t go a year without getting my hair cut, or going on a date with Brian, but when I do, I make a smart decision. We go to matinee movies, go to restaurants where we have a gift-card or coupon for, etc.
I am also renovating my house this year, and I don’t plan on stopping that to pay off debt. I thrift shop, and am very good with budgeting. If I order anything online, I always use Ebates which gives me cash back. (I use that cash back every quarter to put into savings!) I also starting using Brandless, which is an online store for everyday household items at inexpensive prices that end up saving me money. Every penny counts on your debt-free journey. (Sign up for your free Brandless account today and get $6 off your next order: https://refer.brandless.com/s/s74cs)
I am so excited to use these tactics, and hear about it if you use them! Paying off debt and putting some money into savings doesn’t have to be so scary when you break it down and make small everyday changes. Don’t beat yourself up for having debt, just make it a fun and challenging journey to pay things off!
20 Free (or super cheap) date night ideas for winter!

When Brian and I decided that 2019 was going to be our year to become debt-free, we knew we had to cut back on our date nights out. I was determined though that even if we didn’t have the money for lavish dates, that we would still have fun. That’s why I put together a list of 20 free (or super cheap) date night ideas for y’all this winter!
Some of these can be done any time of year however, so it’s a great list to keep around!
20 Free Winter Date Ideas!
- Find a fun new recipe on Pinterest and cook dinner together – get a bottle of wine, light a few candles, and have a romantic dinner! Make it even more interesting by challenging yourselves and making something you’ve never tried!
- Make hot cocoa or coffee, get in the car, put Christmas tunes on, and drive around your town looking at everyone’s Christmas lights. You’ll be surprised how fun this is!
- Have a game night! Get your favorite board games out, make some cocktails, snacks, put on some good tunes, and challenge your partner to a game! This can also be a fun double date idea!
- Do a “Top Chef” cooking competition, using on the ingredients in your kitchen. Set a timer, put music on to pump you up, and both get cooking! Then when your done, try each others creations before you try your own! This is a fun one to do with dessert!
- Watch dance instruction YouTube videos – learn the cha-cha or fox trot right in your own living room! Don’t take it too seriously, because this will definitely end in a laughing fit.
- If you have a fire pit, sit out at the fire pit, uncork a bottle of wine, make s’mores and talk about your dreams. I love the “what would I do if I won the lottery” kind of talks.
- Go get coffee at your favorite joint, walk around town holding hands (because not only newly dating folks should hold hands) and site see. If it’s too cold to walk – get coffee or a milkshake and drive around town, through the beautiful neighborhoods, backroads, with no end goal it site other than spending time together!
- Learn a new skill together. Maybe you both want to learn how to cook, do photography or even woodwork. There are a million free resource videos out there – watch some and try it out together!
- Turn your movie watching room into a tent. This isn’t just for kids – because it’s friggin’ magical folks. Put cushions or an air mattress on the floor, get movie theater candy at the dollar store, hang blankets and sheets, and make a fort. Then binge watch your favorite movie series or show. Awesome for a freezing cold day!
- Volunteer together. I’ve went on my fair share of dates to the local animal shelter, playing and walking the pups. It’s undeniably bonding for you and your partner, free, and your are doing a good deed. You could visit nursing homes, shelters, or help out at your local church.
- Spa night. Because any guy who denies liking being pampered is lying! Get mud masks, make yummy spa waters, get your robes on, soak your feet, and make it fun! You can give each other foot rubs and massages, and I promise you’ll feel relaxed and better than ever. And don’t forget to take a selfie together when the mud mask is in full effect.
- Go to the mall and walk around, exploring all the stores. Go get all the free samples at the food court, try all the free hand lotions, pick out outrageous outfits for each other to try on, and don’t spend a dime! You’d be surprised how this seemingly “teenage” activity can actually be quite entertaining!
- Look for free events in your city! Many colleges will have donation based comedy or improv shows and plays, which is perfect for a relaxed night out. Go to museums or art galleries that are having free open houses – this is especially popular around Christmas.
- Go on a scavenger hunt! We did this when we moved to a new city. It was $10, but we found free ones after. Some scavenger hunts will take you all around your city which gets you out, seeing new things and learning a little something about where you live.
- Go hiking! If it’s cold where you are, bundle up! Even if it’s a bit of a drive to hike, it’s free and will lead to lots of photo opts, memories and it’s exercise, so win-win!
- Be a kid, and go play in the snow. Build a snow man, have a snow ball fight, so sled riding, and cozy up inside after with hot cocoa and a marathon of cheesy Hallmark movies.
- Karaoke or trivia night at a local bar! Food and drinks aren’t free, but karaoke and trivia are fun and free entertainment! Eat beforehand and each get a drink while you’re there. This one is not for the introverted (like us!)
- Bake Christmas cookies for your friends and coworkers together. What’s more fun than baking and decorating cookies with some good ole Christmas tunes on!?
- Have a pot luck with other couples! Invite them over, asking them to bring their favorite winter dish. Then you end up with food, friends, and lots of good times!
- Go to free winter festival! This time of year there are usually tree-lighting events, Christmas light snows, Caroling, and parades. Make a date of it!
Have any fun date night ideas? I’d love to know what they are! Tell me in the comments below!
how to prepare your home for guests
With the holiday season quickly approaching, more and more of you will be hosting guests! Personally, I love hosting guests in my home. Being able to share my home, make it cozy and comfortable, and be gracious with my house makes me so happy! We don’t have a dedicated guest room (because we rarely have overnight company) and many people don’t have space for a dedicated guest space, but you can still make their stay comfortable.
I put together a list of things to do and prepare for to make your guests feel at home. Especially over the holidays, we want our company to feel at ease! One thing i’ve learned from being the guest in the situation is I hate to have to ask for anything. Asking for the wifi-password (why does that make me feel like a jerk?) where the towels are, if there is coffee, etc..it makes me feel like a nuisance at times. That’s why I am making this list – make your company love every minute at your home (but not too much or they will never leave! haha just kidding!)

Whether it’s a whole family staying with you or just one person, these tips are simple and will make their life and yours easier!
- Wifi password
- This may seem like a funny thing – but I know when i’m traveling I want to check in with people or work, and connecting to wifi so I don’t have to use data is very nice. Instead of making your guests ask for it – have it written somewhere accessible! Bonus points for making it cute!
- IDEAS: Paint a frame with chalk paint and write it on there (or print it on paper and stick that in the frame!)- then put the frame on a bookcase, dresser or nightstand where the guests will be staying. That way they don’t have to go hunting for it!
- Towels
- Have you ever traveled all day and all you want is a nice hot shower? Don’t make it hard for your guests to find things they need like towels! I like to roll up my fluffy towels and put them in a basket in the bathroom, or better yet put them in the guest room. Add all hand towels and wash clothes – it’s nice for your guests to feel like they have all that they need to be comfortable.
- Toiletries
- I know most of us travel with our own toiletries, but have you ever got somewhere and realized you forgot something? You don’t have to supply your guests with everything but simple things like cotton balls, Q-tips, kleenex, toothpaste and hand-lotion are nice touches! You can put them in little jars on your bathroom counter or in the guest room – so they know they are welcome to it.
- Toilet Paper!!!
- Are you confused? Of course you’ll give your guest toilet paper, but make sure the bathroom is stocked. Stack extra rolls in a basket next to the toilet, along with a room spray. I know i’ve ran out of toilet paper at another persons home and had to decide to either snoop for some or ask, both which I dread. Plus this is a good idea to just do all the time – it keeps the bathroom looking a little more stylish and practical!
- Water bottles
- We don’t use water bottles in our house for eco reasons, so I give our guests refillable glass water bottles. (either way it’s a nice touch!) Instead of them asking right away for water, put a few bottles on their dresser or nightstand, it’s very convenient for them and simple for you!
- Blankets
- Not everyone runs the same temperature, so wether it’s hot or cold outside, make sure your give your guests options for their comfort. I like to make the guest bed how i’d normally make it and then leave some folded blankets at the end of the bed or in a basket next to the bed.
- TIP: put a few different pillow options on the bed – not just one pillow. I like to add a thick pillow and then a thinner one so they can choose.
- Phone Charger
- It never fails that either I forgot my phone charger when I travel or one of my guests do. I always have an extra charger lying around, so I will put that in the room. You don’t have to plug it in for them, but lay it nicely on the dresser or where you put the WIFI password so guests can use it.
- Luggage stand
- This may seem like an old fashioned thing – but if your guests are staying for more than a day, having a luggage stand in the space is nice so they can unpack. They are relatively cheap, and can be used as a cute decor item when guests aren’t over, so it’s a win-win!
- Laundry basket (empty basket will do!)
- I’m not saying you have to do your guests laundry – I don’t suggest that! But if you have people staying for a week or so, it is nice to have an empty basket or hamper so they can put their dirty clothes in there. (that way they don’t have to pile up their dirties on the floor in a corner!) And if you do offer them to wash their clothes, they then feel comfortable with their own basket!
- Fan
- If you don’t have a ceiling fan – this is a must. Many people get hot in the night or are used to different sounds, so having background noise can assure that they sleep well. A simple floor or desk fan is a nice touch, you can just coil it up and put it in the corner of the room so that it is seen.
- Flowers or plants
- If your room already has house plants – just make sure they are nice and healthy (you wouldn’t want to stay in a room with a bunch of dying plants would ya!?) Adding a vase to a surface and putting a few flowers from the supermarket is a sweet touch. It brightens up the space and will add a nice aroma to the room.
- Coffee cups + items
- Not everyone drinks coffee, but if your guests do, it’s nice to have it all readily available. I like to put out K-cups, a bowl of sugar and let them know where the creamer is. I also make sure my mug rack is full of clean mugs and tell my guests to feel free to make a cup whenever they want. I can’t express how much I appreciated this when I was at others homes! Nothing is more comforting in the morning that a big cup o’ joe!
- Declutter and clean
- This is a no-brainer. Most of us clean before a guest comes over, but I encourage you to go a bit further here. Declutter the guest space and bathroom they will be using. If the room doubles as a child’s room, playroom or office, then put things away. Put toys in the closet, take items off the surface of dressers and nightstands; this makes space for your guests items. A decluttered space is also more peaceful and welcoming!
My final thoughts:
I like to think of my own best guest experience, whether that be at a hotel, bed & breakfast or at someone’s home, and recreate it for my own company!
Do you need a few last minute things for your guests? I put together a simple list of items below that are inexpensive and quickly available. #tipshostingguests

- WiFi Sign & Magnet Whiteboard Set, Dry Erase Wi-fi Password Plaque Home, AirBnB Office
- Asetena Large Cotton Floor Storage Basket
- Convenience Kit
- Poo-Pourri Toilet Spray
- Glass Water Bottles 18oz
- Knitted Throw Blanket 50″x60″
- Multi Charging Cable
- Modern Bamboo Luggage Rack
- Large Laundry Basket
- Lasko Standing Fan
- Aloe, Live Indoor Plant
- Christmas Camper Christmas Vintage Mug
Do you have anything you like to do for your guests that isn’t on the list? Perhaps a plate of cookies or something else? I’d love to hear what it is! Leave me a comment below and maybe I will add it to the list! ♥
how to decorate & keep the peace
What’s more challenging – moving in with someone or deciding on a decor style for your home? How about doing both? Combining and compromising on style when you move in with a significant other can be quite the task. It can be super rewarding and fun to find a style you love together..but how about when your styles clash? Or you both has strong taste opinions?
Don’t let that be something to fight about, and don’t let clashing styles hold you back from creating a beautiful home! There are many ways to combine styles, compromise, and find a happy balance for decorating your home with your partner (and contrary to what HGTV might show you – it doesn’t have to be one sided!
My Story
Let me start with how Brian and I did it. I, of course, felt like I needed 100% control over the design of our home. I was in fact the one with the design degree, however I quickly learned that that’s not the answer to a harmonious house. He didn’t have a strong opinion on the furniture or decor, as long as it was comfortable and functional, I got the green light. For instance, we went shopping for sofas together and tried them all out! If Brian thought it was “lounge-able” and I liked the style, it was a winner. It’s been that way for everything, and it’s worked great in our home. We also both have our own spaces to do with what we please. His is his office and bathroom and mine is my office and bathroom. This has been a key to keeping it peaceful as well – creating a space that is all one’s own can give you the creative freedom you want!
But I don’t speak for everyone, so I set out and interviewed a few fellow home dwellers who had some helpful words of wisdom on this subject! Check out my interviews from 6 lovely ladies below.
See how these couples decorated together & kept the peace!
Aubrey, 25 @aubreylidwell
Whom do you live with?
My fiancé
Home:
We have owned our home since May 2016
Style:
He doesn’t have a style, he’s a mess. My style is modern and clean, with a touch of vintage and boho.
How did you decide what to keep/get rid of?
We were both moving in together from college dorms so we didn’t have a lot. We brought furniture from our childhood bedrooms, got a ton of hand-me-downs, and bought very little. We chose by what made the most sense as far as our beds, desks, and dressers.
How do you decide on how the home is decorated?
We discussed decor then shopped together for paint colors and things like that. It’s a joint decision, especially on items like wall art. We spent the whole first summer we lived in our home shopping for unique wall art. Now we are discussing which of our engagement photos to print on canvas to display in certain spots and how we will change those out seasonally with our wedding photos once we have those. We do our own things in our own spaces, like his office and my walk in closet. He doesn’t much care about a lot of the decor so I make smaller decor purchases without his input.
What is your best piece of advice?
Find common ground with your goals first- like budget, (future) kids and animals, and functionality. Then fight it out about the rest of the details.
Kate, 25 @katekozarphotography_
Whom do you live with?
My Husband, Brett, and our dog-child, Daisy Mae.
Home:
We bought our first home 2 years ago! It’s a middle-unit town home in a great community. We love it! We have about 1,344 square feet of space. We have an unfinished basement which we will be developing soon as we are trying to conceive! We landscaped our backyard this past summer with plans to finish it all up come spring!
Style:
In regards to home style – it is pretty easy to work together because we both like the same style. Rustic, antique, with a touch of modern. We have dark grey and wood accents throughout our entire home. It’s farmhouse rustic!
How did you decide what to keep/get rid of?
Well, we actually moved in 2 weeks after meeting (7.5 years ago). I didn’t have anything, Brett had most of everything in his apartment he was already in. We moved around a couple times, and in each home we bought new items and decor that we have carried with us. When we bought our current home, it was the first home we owned and could really do anything we wanted with. We essentially went out and bought mostly new items and found ways to work with what we had to furnish our home. After 2 years, we still have some unfinished spaces but have created a wonderful & warm home together.
How do you decide on how the home is decorated?
I lead the suggestions, and when something doesn’t work out – I always ask for Brett’s opinion. It’s interesting to see his twist on things, and his surprise as to how some of my ideas actually work out and look good! He always tells me it’s me that makes it feel like home… not just because I live there, but for how I decorate it and the ambience we’ve created together.
What is your best piece of advice for a couple struggling to be in harmony with how the house is set up?
I think the biggest thing is patience. Most new home-owners want to get everything done all at once, which adds stress big time, whether it’s financial stress or emotional stress. If you don’t agree with the same style of home/decor, etc… I would say learn how to compromise. Sit down with each other and talk about what you like, and what you don’t. Talk about the MUST-HAVES for each person to be happy, and find a way to possibly each have a room, or space to make their own. A lot of moving in with someone or living with someone is learning how to compromise. It teaches you a lot about YOU and how to begin to share your life with someone. You don’t have the final say. Together, you do. It’s important to make your partner feel heard and respected and in the slightest bit of control of THEIR home, too. Huge learning curve… but so much fun if you’re doing it with the right person.
Mallory, 33 @JustMalloryKaster
Whom do you live with?
My husband of 4 years
Home:
We purchased our first house about 1.5 years ago, and while it wasn’t a complete Fixer-Upper, it did need some renovations. We lived in the basement for six months, and hired a contractor to remodel the upstairs. We repainted, renovated all of the bathrooms, purchased new countertops/backsplashes, painted the exterior, and added a double-door entry instead of single-door entry. It is 3 bedrooms with 2.5 bathrooms, a small kitchen, small living room, and half finished basement.
Style:
I had previously decorated using LOTS of bright colors and vivid paintings, but in an attempt to simplify and also include my husband, I went with a very neutral pallet for our house. (He honestly doesn’t have a style, but I wanted him to be comfortable with colors he liked as well.. and also make it a little less feminine compared to when I was living on my own.)
How did you decide what to keep/get rid of?
When we rented, we combined our items, but over time, we would slowly get rid of our ‘old’ stuff, so that we could pick out new furniture together. We based a lot of decisions on which items to get rid of based on how old they were. In many instances, we kept the furniture, but changed the decorations in order to make it feel more cohesive. For example, we both had wooden beds, but different color bedrooms… when it came time to combine furniture, we got all new bedding to make the rooms look more similar.
How do you decide on how the home is decorated?
I make all of the decisions regarding decorating our new house; however, I do consult my husband on every decision. He knows the general style I’m going for, and trusts my decisions 100%.
What is your best piece of advice for a couple struggling to be in harmony with how the house is set up?
If you buy staple pieces in neutral colors, it’s easier to change up the look and feel of the entire room by switching out smaller decorations (rugs, pillows, picture frames, etc.)
Any additional thought you’d like to contribute?
Create a mood board on Pinterest as a visual guide. If what you’re thinking to buy doesn’t 100% match the mood board, don’t buy it!
April, Success in Black and White Podcast
Whom do you live with?
My husband
Home:
We own a 1,300 sq. ft home. Have lived in it for 1 year now!
Style:
I’m very OCD, and need everything in its place. My husband has a very visual memory, so our biggest argument is usually when he walks in the door and puts a receipt on the counter. I pick it up and put it in the receipt box (naturally) and 3 hours later, he’s like, wheres my receipt?!
How did you decide what to keep/get rid of?
We did both – combine and get rid of – when we first moved in together. Most of my stuff we sold because it was big gaudy furniture, and wouldn’t fit his apartment at the time.
How do you decide on how the home is decorated?
It’s a joint decisions, but he will default decisions to me. He will tell me what he doesn’t like though! Our home is rustic/utilitarian comfort style.
What is your best piece of advice?
Communicate so you don’t get in silly fights about who moved the receipt! Talk about how you manage the house and compromise. Also talk about how you both grew up to create understanding. My dad was and still is an intense cleaner and that’s dictated my actions in our home. So my husband understanding that has helped him know I’m not ignoring him or the kids, just need it to be done before I can relax!
Kelsey, 27 @kelseyrosemcginnis
Whom do you live with?
My husband, Jason and our son, Ezekiel!
Home:
We live in a former one room schoolhouse. It was built in 1917, and was remodeled in the 60’s into a home. I think the overall finished square footage is about 2,500 sq. ft. Our great room (dining and living) alone is 1,100 sq. ft. It’s huge and was somewhat of a challenge to lay out properly!
Style:
When my husband and I first got married, I was on the rustic clean side of things and his style was very modern. My tastes have changed over time and our style has formed into Mid-Century Modern/Scandinavian modern. We own a retail furniture store specializing in this furniture style, which has now made it easier to decorate and get pieces we love.
How did you decide what to keep/get rid of?
We combined! We didn’t have much money so we got a lot of things from my parents and Goodwill. After being married for a couple years and opening our shop, we have phased all of that out and bought all new pieces.
How do you decide on how the home is decorated?
Now that our tastes are pretty similar, we decide together and both trust each other’s eye. My husband has a surprisingly good eye for design. It’s fun working together to design our space. We do occasionally butt heads as he likes more color than I prefer.
What is your best piece of advice?
I’d say to allow each other to have a space that they can be free in their design. We have both had to compromise on things. I know my husband likes a lot of color, so I picked out a Persian rug that had a lot of berry colors in it, but also a lot of grey. It was a compromise that now I love.
Any additional thought you’d like to contribute?
Be open to each other. It never hurts to try something, if you end up not liking it, it’s simple enough to change down the road. You never know, you might grow to like it.
Also, it’s worth saving to invest in lifetime furniture pieces that are quality rather than buying something cheap just to have something. It gives you more appreciation of what you have.
Michelle, 24 madewithmichelle
Whom do you live with?
My husband
Home:
When we first got married, we lived in my in-laws’ basement for six months while we shopped for a home. We finally found the perfect property with a lake front view that happened to be in our budget. It’s about 3,000 sq. ft., which includes 4 beds, 2.5 baths, and an unfinished basement. It was built in 2003, so it needs a bit of updating, but nothing too drastic. We have lived here for about six months now and have loved having our own space to grow into together.
Style:
My style is definitely minimalist. I only want the necessities and things that are personally meaningful. I also love keeping things light and bright by using lots of white with the occasional pop of color. I’m inspired by modern art, geometry, and Art Deco. On the other hand, my husband loves black and dark, earthy tones. He likes things to be neutral and muted. One thing we both agree on is that we want our home to feel timeless. We don’t want to fall into trend traps that will go out of style quickly. My husband is constantly reminding me of that goal so we don’t waste money on cheap, trendy items. We also both love natural elements like wood and greenery. This is how we have been able to compromise several of our decorating decisions.
How did you decide what to keep/get rid of?
Both of us were living with roommates in small apartments when we got married, so we honestly didn’t have much. He had a black IKEA bed set, and I had a walnut cabinet that I built in my college wood shop class, but that was about all the furniture we owned. I don’t like black furniture, so we decided to put his old bedroom set in a guest bedroom. We bought a new mattress, bed frame, couch, desk, kitchen table, and nightstands when we moved into our home. Because it’s just the two of us, we’re leaving the rest of the bedrooms unfurnished for now.
How do you decide on how the home is decorated?
Decorating the home is definitely a compromise. The home needed a new paint job so we had to figure out what color to choose. I wanted to keep the paint as bright as possible, but my husband wanted some contrast between the walls, baseboards, and ceilings. We settled on a light gray color to keep it light, but not quite as boring as stark white. Choosing furniture is also a compromise because we want quality furniture that will last a while, but we also want a good deal. My husband is really good at hunting the classifieds, so he is usually the one finding the deals and I give him the go-ahead to buy it or not. I take the lead on decorating the walls because I do photography, graphic design, and woodworking. I like blending my talents to create custom artwork and frames for our home.
What is your best piece of advice?
One thing I would suggest is figure out each of your strengths and focus on that. My husband is really good at finding quality furniture, so I let him do most of that. My strength is making art, so I take the lead on that. Remember that it’s a process. Don’t feel like you have to decorate the whole house at once. We still have folding chairs at our kitchen table because we haven’t found chairs we both like yet.
If you have thoughts, questions or your own story of how you and your SO combined styles, feel free to comment here or message me on Instagram! I truly love hearing from y’all ♥
The truth about buying a fixer upper
October marks the 6th month that Brian and I have lived in our fixer upper home. In those short 6 months we have learned a lot of lessons about buying a fixer upper. There are things I didn’t think about before buying a house that needed major work, and things that were also a pleasant surprise. So whether you are considering buying a fixer upper house or are in one and can relate, this post is for you!
Now I am not a real estate agent, and I am not an expert in construction or finances, but my perspective comes from a millennial first time home buyer who is an expert in interior design.
https://www.instagram.com/p/Bms6AisgBhc/?taken-by=myeclecticgrace
1. Time equals money
It has not been any secret that i’ve been trying to revamp my 1970’s house on a tiny budget. Like TINY. After spending less than $400 on my kitchen, I felt like a champ. The rest of my projects have has similar success; I’ve kept budgets low and had great results. However, the time I’ve sacrificed was something I didn’t fully consider. For example, it took 6 full days to finish our kitchen, which does not seem like much, but this was days spent inside, putting sweat equity into the house instead of doing anything else.
My advice to you when looking at a house that needs work – be realistic about how much time you have, but more than that, if you can’t afford to outsource work (a painter, laborer, contractor, etc) then be realistic about how much time it’s going to take you to finish the job. Ask yourself, is it worth it to hire someone who can get it done in a day, or is it worth it to give up a few weekends to save some money? Many times I’ve wanted to throw my paint brush down and call a painter, because I just wanted or needed to be doing something else on my list of to-do’s, but ultimately I signed up for this, so I’ve kept trucking on!
2. Underestimating the amount of work
This is huge. HUUUGE! I remember walking through our house with the realtor, seeing the sea of wood paneling and brown trim and saying “No biggie, we will just paint it!” That was before Brian and I spent 3 days painting one room of wood paneling and wanting to just slam our heads into the wall.
This happened again when I started painting the trim in my entryway..I started one day and quickly realized after spending 2 hours taping and prepping that this wouldn’t be a simple thing I knocked out in one day. You know yourself, your schedule, and your work ethic better than anyone else – so when you see a project in a new house and think it will only take a day, or an hour, my advice is to triple that amount of time (I can’t count how many times we had to run to the store for supplies or how many times I had to stop to clean up spilled paint) and if you are okay with that tripled time – then go for it! Which brings me to my next point.
3. Things will not be done overnight. Or in a month.
I have busted my butt, worked on my house daily, and in 6 months was able to flip 5 rooms in my house. I like to say most of my makeovers are beautiful bandaids for now – because I didn’t overhaul the floors or move any walls, just cosmetically uplifted the rooms. And just with cosmetic makeovers, it has taken me 6 months of non-stop work to get 5 out of 10 rooms in my house finished.
Like I stated above, one day I started the trim in my entryway. Everything is primed, and guess what? Two months later, things are still just primed. My entryway is adorned in blue painters tape and ugly white primer. But life got in the way; we traveled, got sick, wanted a weekend out and not inside slaving away in the house. I finally made a goal to have it done by the end of the month, knowing that it will take more than one afternoon, and accepting that it’s taken me this long.
When I bought the house, I had a mission to have it flipped by the end of 2018. It’s not going to be close to that, unless I win the lottery soon! So ask yourself – can you be realistic with a timeline? Can you live in half finished rooms, ugly spaces, and works in progress? If you can’t live in a construction zone for a good while, then a fixer upper IS NOT for you.
4. Things change, and you will too. Adaption is KEY.
Take me back to April 2018, closing day on my house, and I had a completely different vision for it. I thought my style was 100% Mid-Century Modern with a splash of boho. Then I moved in, and they house was even quirkier and more 1970’s than I knew how to handle! Things changed. Paint colors came out different than expected, but with my budget, I had to learn to live with them – and love them now!
As you work on your house, trends will change. Always stay true to who you are, and don’t just style your home to be on trend, but be okay with a shift in perspective. Once I was in the house, I realized more important to me than a trendy home was comfort and coziness. I became a plant lady (who knew that was possible!) and fell in love with the concept of Hygge and bohemian interiors. My style shifted, and now my house is one eclectic mash up (and I love it so!).
Can you adapt? Maybe the light fixtures you pictured aren’t sold anymore, or the shiplap wall you always wanted doesn’t really excite you anymore – that’s okay. We grow, our plans change, and your house is a mere outward expression of who you are. For example..Wilbur (my dog) decided that the stairwell was going to be his hangout – so instead of ripping the treads up and concreting the steps, we kept the carpet for him for now. Things change, and you just have to go with the flow!
5. Burnout is real.
After a few months of working hard on my house, I lost my spark. I still had so many ideas and excitement, but I was TIRED. Really tired. I took a month off and just did little things, like framed some pictures, and weeded my yard. I pinned a lot of inspiration to my Pinterest but I didn’t force myself to complete anything. Sometimes you just need a break, and you have to be okay with giving yourself one.
The most important thing about taking a break though? Not letting it be permanent. Do you know how many homes I’ve been in as a professional designer where homeowners started a project – and didn’t finish..and years went by! It happens more often than not I’ve discovered. I have never been one to leave something unfinished, but it’s easy to ignore that unpainted strip on the wall or the light fixture that sits in the box for months. My advice? Give yourself a break – but schedule it. Give yourself a few weekends off from working on the house – do something fun. Stop thinking about home decor and fixing things in your fixer upper. Instead enjoy life, and inspiration and energy will come back to you. Get back on that horse with a fresh mind and love for your home in your heart!
It’s not all bad, actually I’ve found the pro’s outweigh the con’s!
So here are all the reasons you will LOVE buying a fixer-upper ♥
1. Customization
The best thing about buying this house that wasn’t “finished” was that I could put my stamp on it. The house has character, unlike many new track-homes (those have their perks, but getting real character only comes with age!) Customization might just be painting cabinets or ripping out new floors, but this means you can really make a house your own.
2. Sweat Equity is real.
If you are buying a fixer-upper, then chances are high that you bought it for a good price. No one buys a fixer-upper because it’s in move-in condition and ready to be shown off. You buy it because it has other qualities that make it worth it. For instance, the inside of the house I bought was outdated, but functioning. The location was ideal and the lot was huge. Knowing this, we knew that whatever money we put into the house, we would be seeing back. Real estate is always an investment (most of the time!) so when you’re on hour 3 of painting over ugly mustard walls, or scrapping popcorn off the ceiling, just remember that sweat = equity.
3. Your house is your canvas.
You don’t have to have a 4-year design degree to enjoy or even be good at design. After two years of listening to me and noticing things I talk about, my boyfriend has started using terms like “vintage charm” and “Hygge” when we talk about our makeovers. He is a man of logic and technology..so if he can catch on to what good design is and what’s a hard “no” than anyone can! With that said, redoing a house, whether you’re just doing cosmetic updates, decorating small nooks, or stripping the house to the studs, is a creative process. I am an artist at heart, so for me, having a 2,200 sq. ft. canvas was a dream come true! The best thing is – it’s your house. So if you want every room to be a different shade of blue, you can. Or if you want the whole home to be in a style that you love, go for it.
4. You will learn skills you never thought you’d know!
I never had a desire to work with power tools or to spend time researching the best methods of staining, but once I started working on my own house, I did just that. In these past 6 months, I’ve learned so many things – a lot of what-to-do’s and just as many what-not-to-do’s. They key is to not get too caught up on mistakes made – like paint colors that you don’t love or a design choice that you are second guessing. Fix it, play around with decor, and move on. If you are doing a lot of the work yourself, you will memorize the isles at Home Depot…or is that just me?
4. It is a growing experience.
Brian and I had never done more than hand each other light-bulbs to screw in. So when we bought this house in May, we quickly learned how to work together when updating the house. AKA he learned that I like to paint alone, and I learned that he can change a light fixture out faster than anyone I’ve ever seen. We have had days of house work end in fights, in tears, and in laughing fits on the floor. Wilbur has rubbed up against more wet walls of paint than he even realizes, and I have spent hours at the store searching for deals for my house. Either way, i’m so happy we took on a fixer-upper because of this. It’s bonded Brian and I, taught us to work together, and really made us appreciate this home. It’s a home we created; we can tell the story of our first house, of the trials and tribulations, and ultimately, it’s a home that we share our life together in and grow daily.

So let me ask you know – are you prepared for a fixer-upper?
Want some inspiration for your next project? Follow me on Pinterest!


