
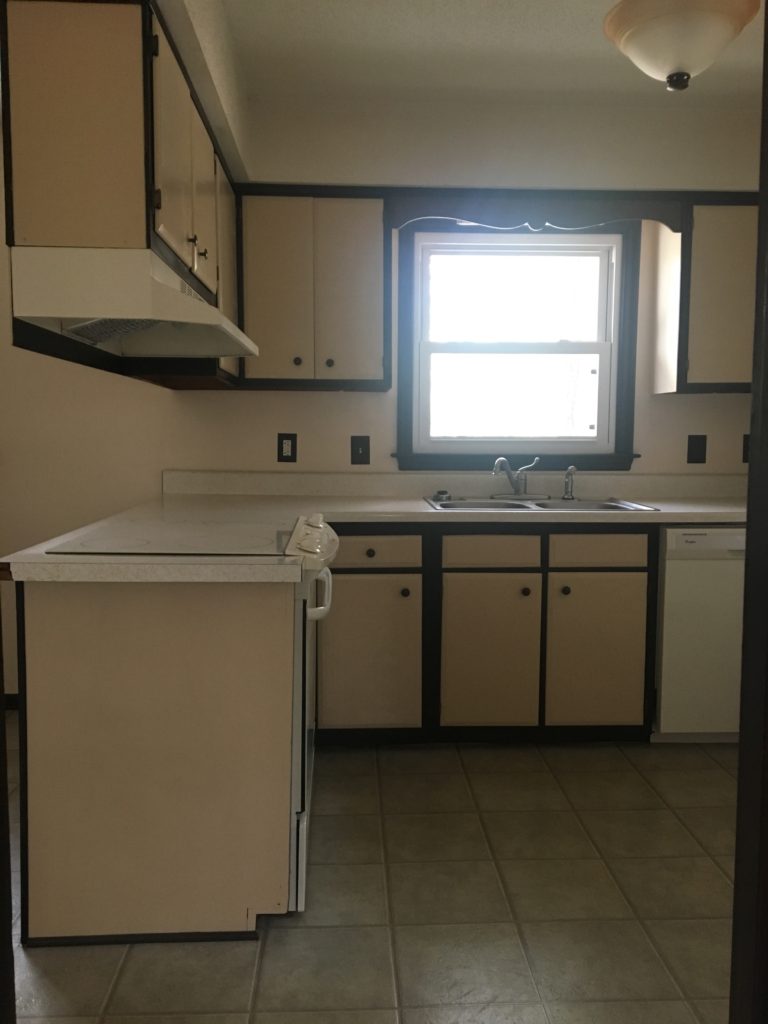
It’s been a few months since I painted my kitchen cabinets, and i’ll be honest – I wasn’t too optimistic when I started. I had only heard bad things about painting cabinets – that it’s time consuming, it’s hard works, and it’s not worth it to do it yourself. After painting mine, I disagree with all of those statements.
So you want to paint your cabinets without sanding, or other fancy equipment? I’m writing this to show you how simple it really was, but also because i’ve had countless comments and DM’s from my followers saying they want to paint their cabinets, but they are scared. Is it hard? Isn’t that really expensive? I wouldn’t know how to do that!I
Here is the truth. I painted every cabinet in my kitchen in 72 hours, for $85 (this includes paint, primer and all supplies brand new). I had NEVER painted cabinets before, and my cabinets were not in the best shape – so the odds were against me in my DIY quest. Ready to find out the easiest way to transform your kitchen cabinets? Read on!
1 – Clean well and skip the sanding.
I didn’t even own a sander or sanding block when I redid my cabinets – and honestly if you told me I had to sand my cabinets before priming them, I probably would’ve throw in the towel then. I despise sanding y’all. Instead, I cleaned my cabinets with a degreaser – and by that I mean I mixed dawn dish soap with hot water, got an old rag and scrubbed all the cabinets. Then I wiped them off with clean water and waited 10 minutes for them to dry. Beats hours of sanding right?
My cabinets had already been painted over – but this would be fine for wood cabinets that just had a gloss finish on them too. If you have cabinets with peeling paint – you’ll have to use a paint stripper to get it off or you may end up with a lumpy surface. I had a feel peeling areas, but I just pushed them down and primed over them. (Lazy girl DIY)
2 – Label cabinets and take them down.
Label all your cabinets while they are still up. If you have a small kitchen, it won’t be hard to figure out what goes where, but even then it can be confusing..especially if you are painting the uppers and lowers different colors (like I did!)
I used painters tape and labeled on the inside of each cabinet door where it goes. After labeling all of them all, I took all the knobs off. I wasn’t keeping mine so I just put them to the side. I kept the hardware on the doors, like the door hinges and drawer rolls (I’m sure there is a technical term for that). You can take them off, but for me it was just simpler to keep them on and put tape over them to protect them from the paint.
I then laid them all out side by side on a large plastic drop cloth so I could begin the priming. (I primed the actual permanent cabinets first!)
3 – buy quality primer.

If you are going to skip sanding – which isn’t necessary, then you must invest in good primer. I used Zinsser Bulls Eye 1-2-3 Primer. It covers masonry, wood, metal, plastic, etc. No sanding required, and it dries in an hour. It’s what I used on the wood paneling in my basement too. This stuff really seals in everything, and goes on like liquid gold! I highly recommend it – and I only needed one coat!
3 – Get your painting pants on!
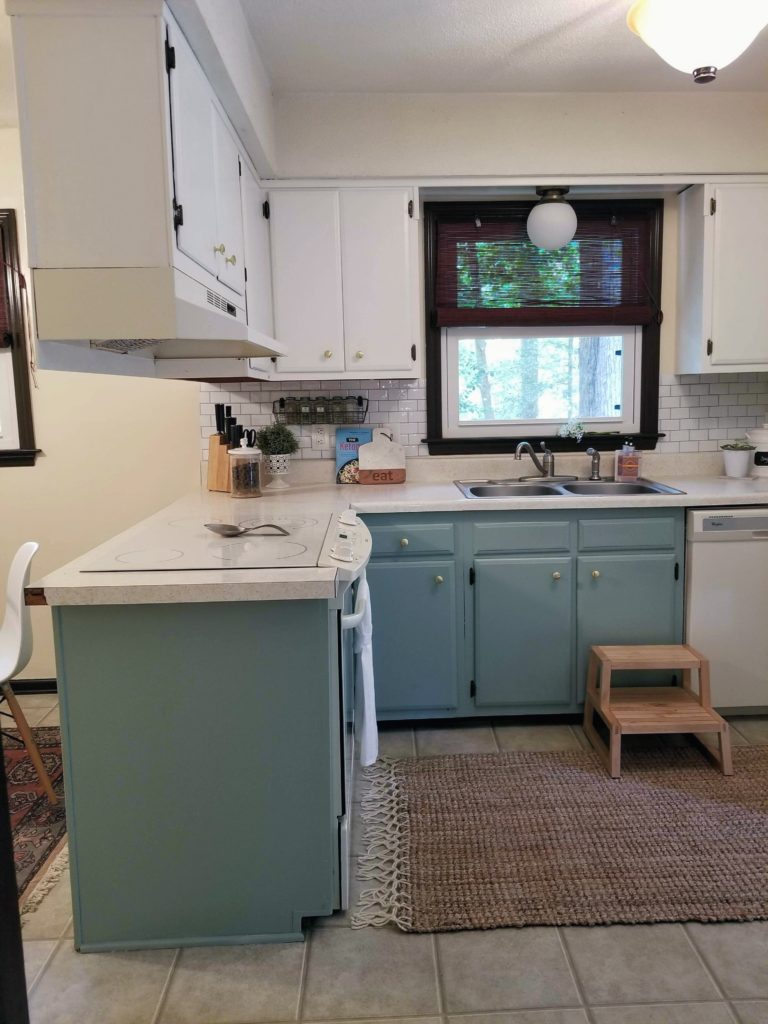
What? You don’t have painting pants? OK so after the primer is dry – it’s time to paint. My cabinets were brown and peach, and one coat of primer sealed that color out. It claims that it dries in one hour, but I like to be extra cautious and wait a little longer. After 2 hours I started painting my cabinets.
What will you need?
- angled paint brush
- High-Density Foam Roller 4″
- paint pan
- large tarp or Clear Plastic Drop Cloth
- painters tape
- Interior LATEX paint – you can use satin or semi-gloss. These two sheens will hold up to everyday life the best while still looking nice.
This part is pretty self explanatory – I painted all my cabinets. I only did one side, for the sake of saving time, but if you want to paint the insides, go for it – it will just add more drying time.
After painting one coat of paint – not too thick, I waited for it to dry completely. A huge mistake many make is not waiting for the paint to cure. Especially if it’s humid, you need to take this step seriously.
Have you ever painted furniture and it’s sticky after “drying”? That is because you didn’t let the coats of paint cure all the way and they become tacky which can take months to dry – and even then they will never be completely perfect.
I waited a whole 24 hours between coats on my cabinets. Because my green color on the lowers is pretty saturated, I had to do 2 coats, but the white paint only needed one coat. After waiting 24 hours between coats – and blowing a fan on them the whole time – they were ready!
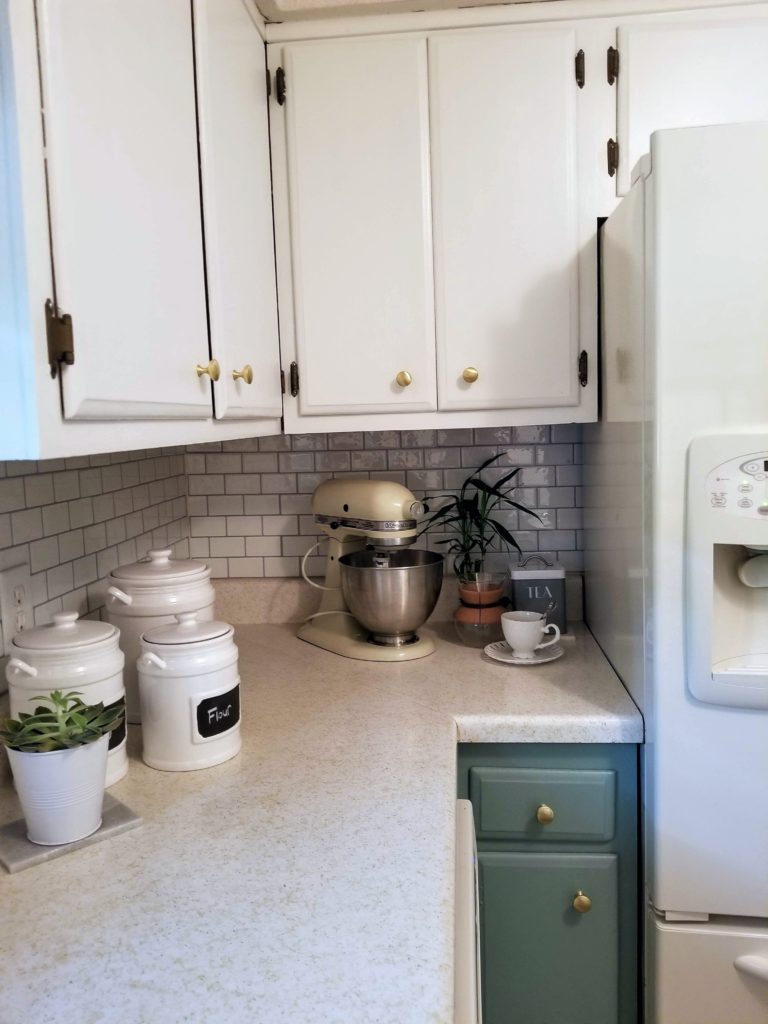
I put the cabinets back up, and attached my new knobs.
That is literally it! 6 months later and I haven’t had any peeling, chipping or scrapes – and with a 1 year old dog and busy kitchen, we are not gentle on them. I’ve even had to scrub numerous cups of spilled coffee off the paint and it hasn’t lost it’s beautiful sheen!
If you want to see my whole kitchen makeover – check it out here.
Any questions for me? Feel free to drop a comment or drop me a DM over on Instagram @myeclecticgrace
*affiliate links are used in this post – these are products I have used and absolutely love and suggest using if you are following this tutorial*

2 Comments
Love your kitchen and your tips 🙂
Thank you so much Arianna!!