The big boom that launched my blog was my $397 kitchen makeover! If you haven’t read it – you can see it here. Since completing that makeover, I’ve had so many people inquire about how the products I used are holding up, and how my unsanded painted cabinets are holding up..and I’m going to answer all of that! I will also cover some updates i’ve done since!
Right after the makeover!
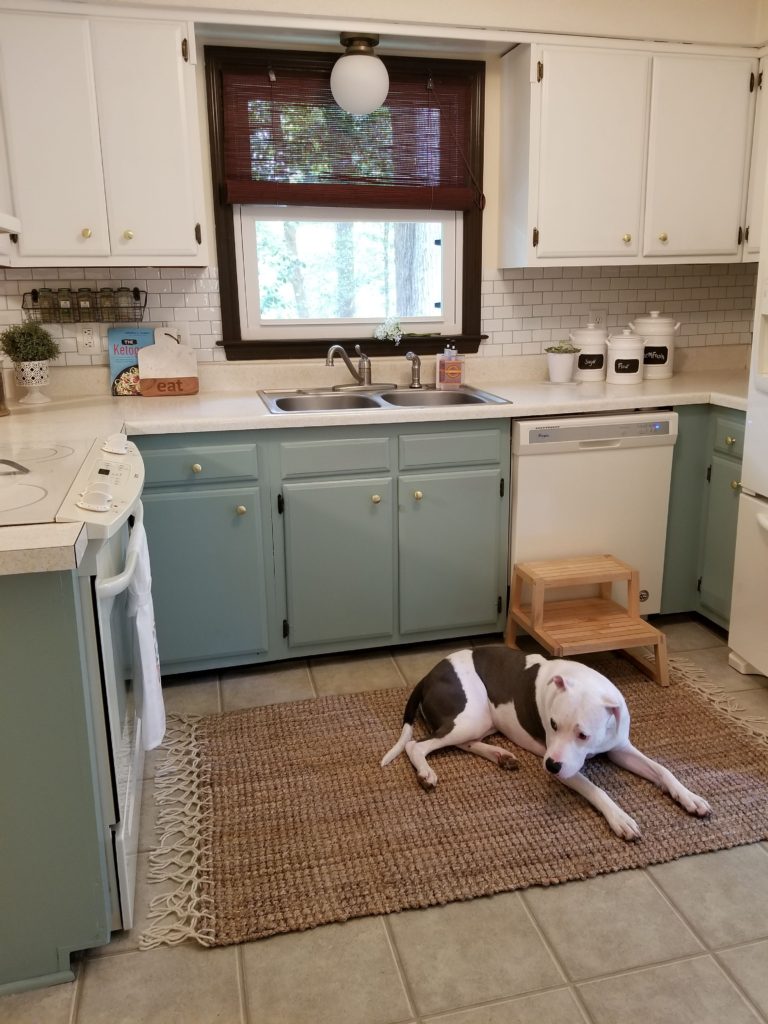
My kitchen looked like this (above) after the makeover. I painted my cabinets without sanding (see how here) and added a peel and stick backsplash from Tic Tac Tiles all along the exposed walls.
Peel and Stick Tile Update
It has been 18 months this month since I “installed” the vinyl backsplash and it’s been AMAZING. I would 100% recommend and use it again. Not one corner has started to peel up, it’s not fading or yellowing, and there are not surface issues from me cleaning it. It looks as good as the day I put it up. Over a dozen of my Instagram followers have boughten Tic Tac tiles after seeing mine and have all had positive results. They peel off clean, are super affordable, and come in really chic tile patterns! If you want to reach more about them – I reviewed my subway tile ones here. You can also buy them from Amazon Prime here!
For your own reference – my kitchen gets very humid as I live in North Carolina and I cook a ton. I clean my kitchen a lot, and we use plant-based cleaners so it’s not very harsh, but the tiles still have shown no wear from this. The wall underneath the tiles was painted drywall, but you can stick these over wallpaper, primed wall, smooth wood, vinyl, laminate, and even other backsplashes!
Painted Cabinet Update
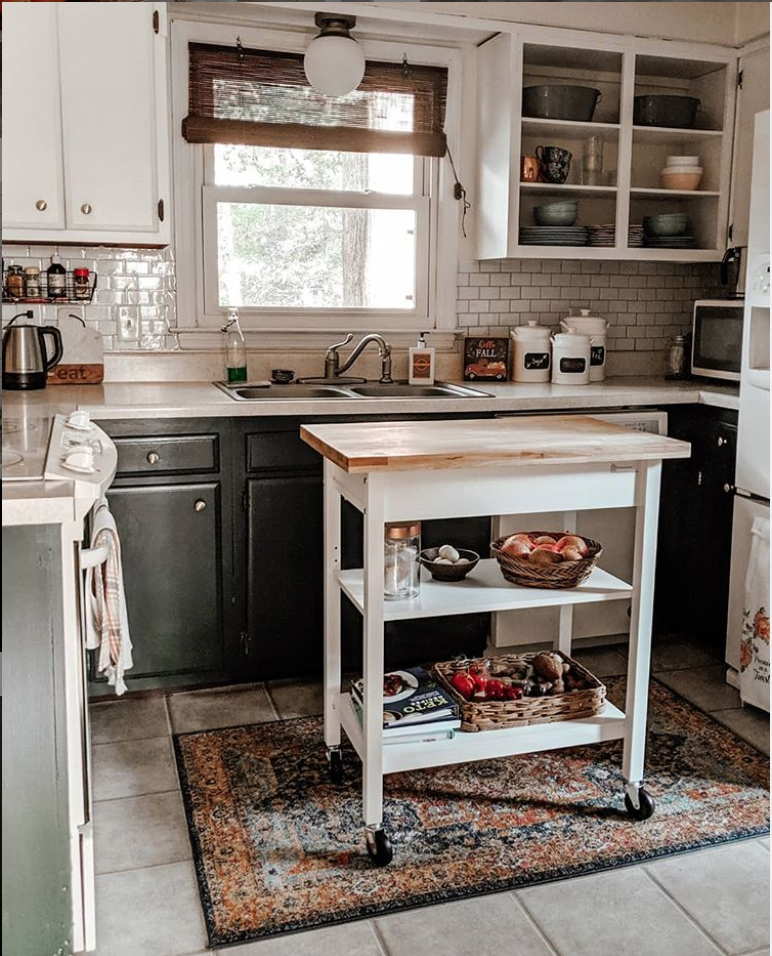
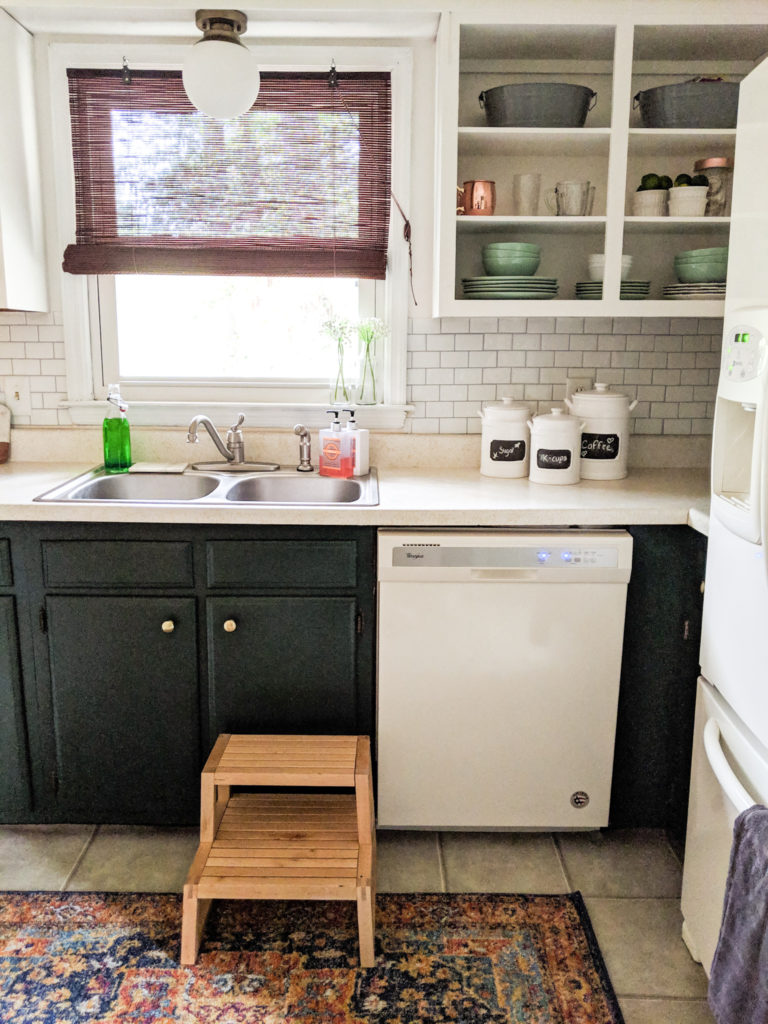
As you can see, things have changed! I actually painted OVER my painted cabinets for a second time. Let me get you up to speed here: when we moved in our kitchen cabinets were painted already. Underneath the paint, I’m assuming was some type of veneer wood – the kitchen is original to 1972. I didn’t sand the cabinets, but I primed them with KILZ multipurpose primer which totally sealed the paint on. I then did two coats of latex interior satin paint. Not once did they chip, and I did the whole kitchen in one weekend.
About 10 months later (still no chips or peeling or bubbling) I decided I wanted a more dramatic color. I cleaned the cabinets with light soap and water and painted directly over the old paint. No sanding or priming! It’s been almost a year since I did this and there have been no signs of wear or chipping either. We use our kitchen the most and have a 70lb dog who loves to rub against, throw toys into, and slam his body into the lower cabinets. Needless to say, the paint is pretty darn durable.
A few more updates!
I swapped out my jute rug for a synthetic rug – as the jute was trapping more dirt underneath than I realized. I bought this rug for under $40 for my kitchen and it’s been perfect for the last year!
I also decided to take my cabinet doors off one set of uppers. I wanted to have open floating shelving, but new that tearing down cabinets could open a can of worms, so I settled for some open cabinets instead. I simply just took the cabinets off, filled the drill holes with putty and painted over it. I painted the inside of the cabinet the same color as the outside, but you could always do a fun accent color inside or wallpaper.
I also added an island cart on wheels! I waited for it to go on sale at Walmart and snagged it for $46. I love that it adds storage for cookbooks, extra prep space, and it fits perfectly on the wall opposite the sink. The butcher block counter adds a nice textural touch to the kitchen as well. The one I bought at Walmart has been out of stock for 3 months now (kinda odd, maybe it’s discontinued!) but I found some comparable ones for the same price.
Grade A!
All in all, for under $400, this kitchen has held up really well. I would definitely use the same materials and strategy again in another kitchen and stand behind the thrifty products I used.
If you want more ideas on upgrading a kitchen on a budget (rental kitchens included!) check out this blog post here.