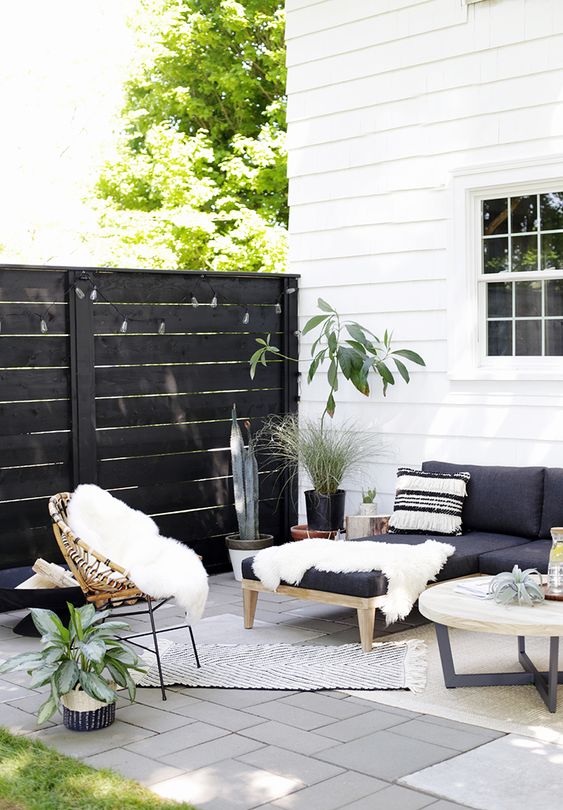
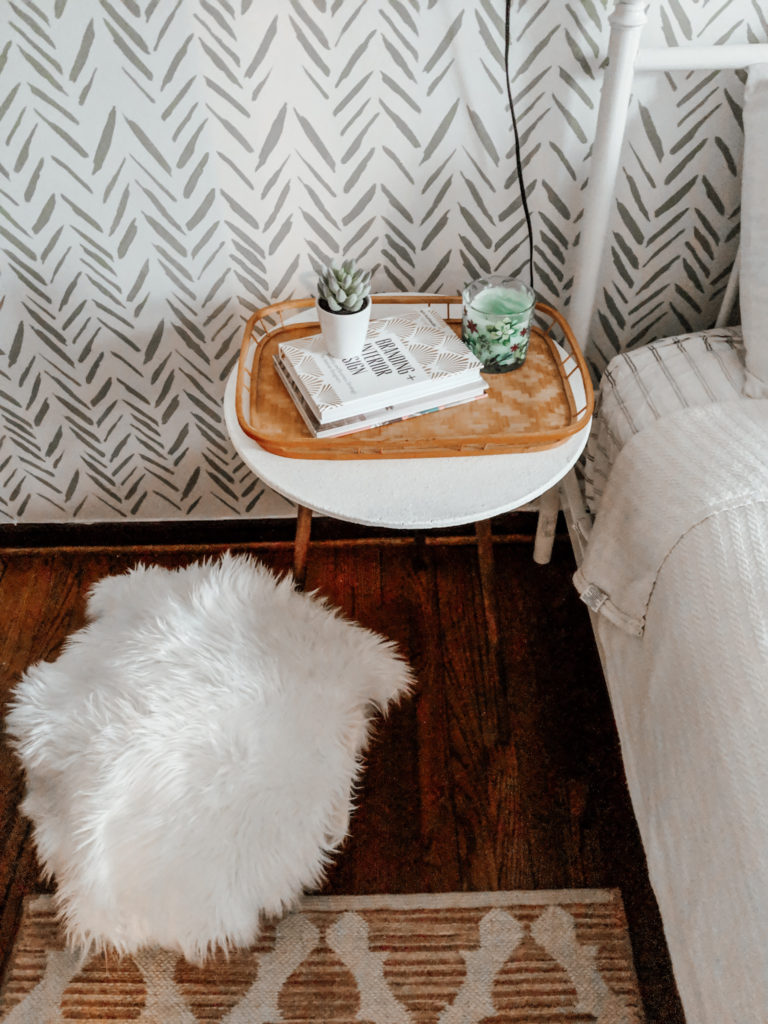
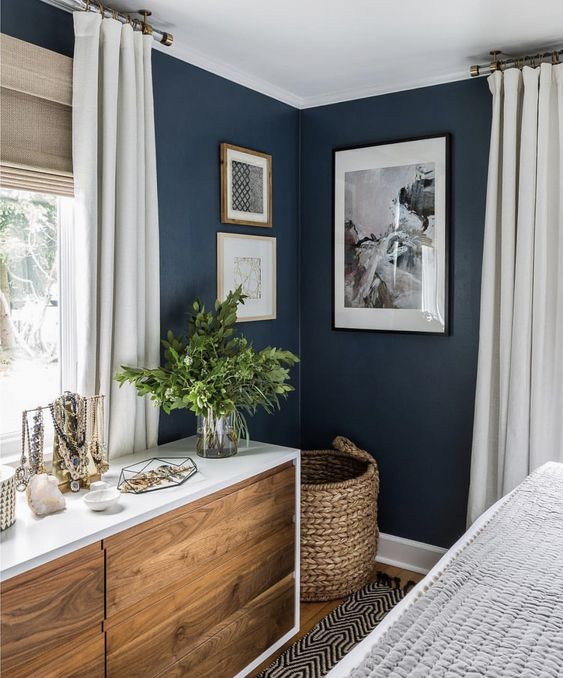
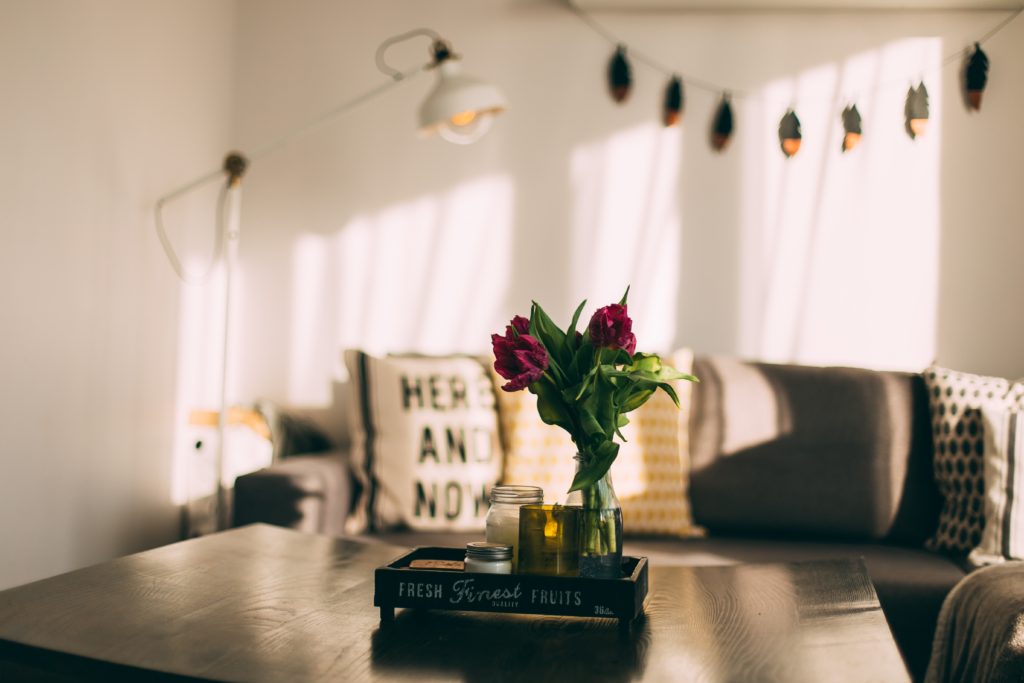
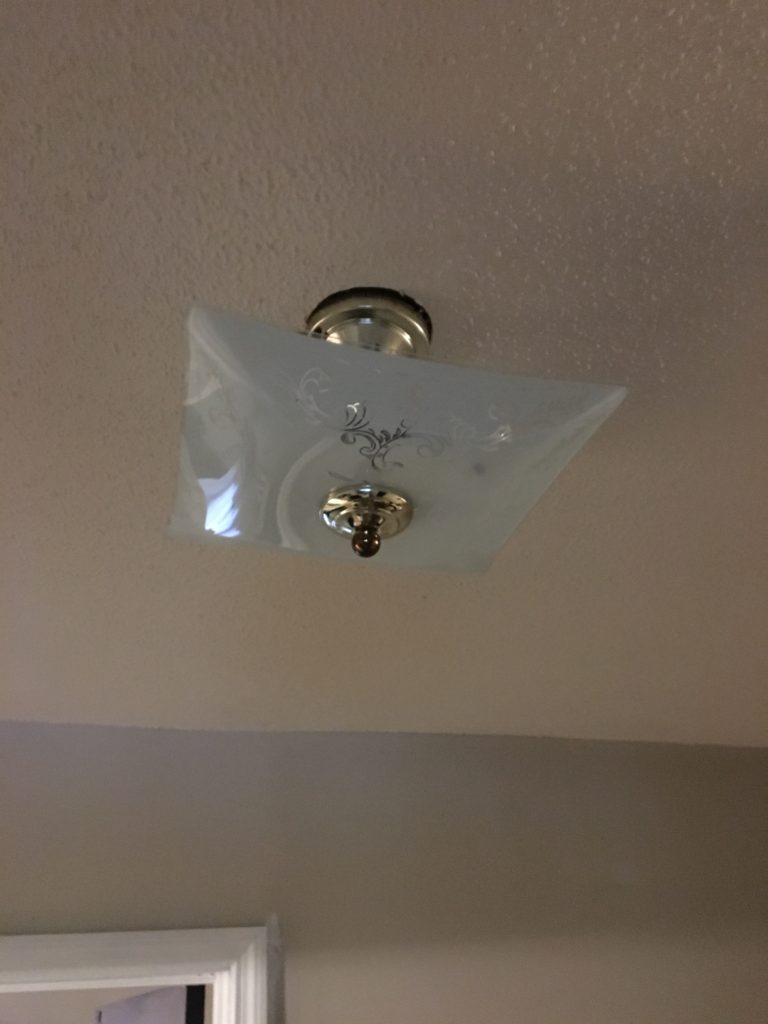
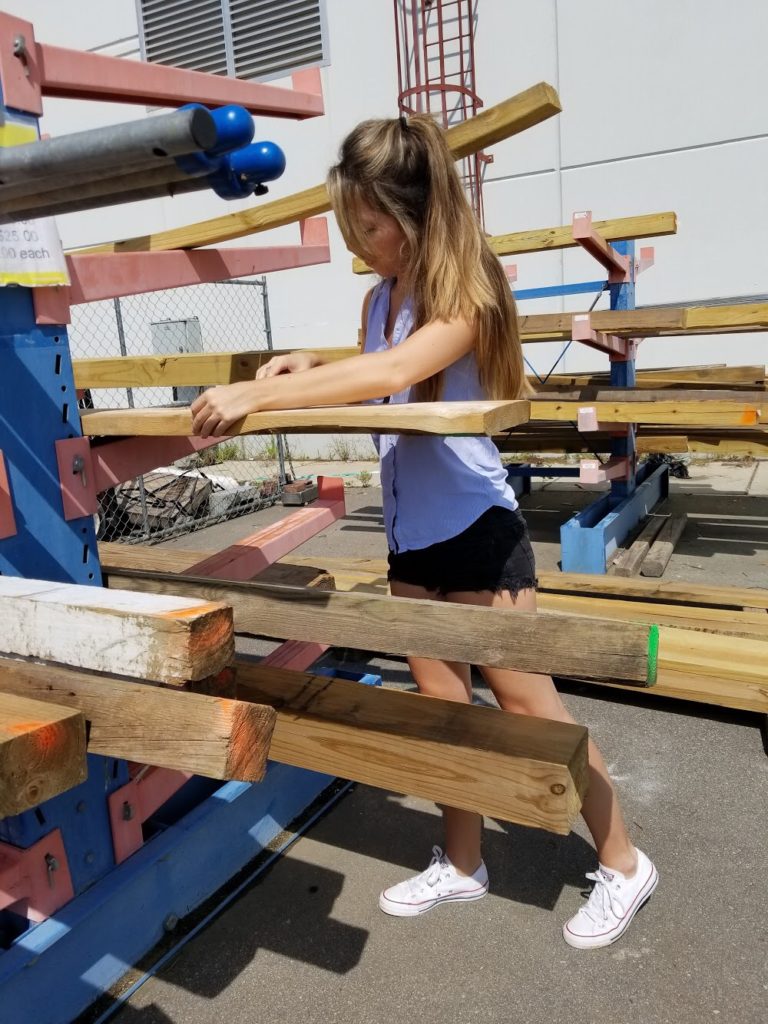
How to decorate your patio on a budget
As an interior designer, you’d think that designing outdoor spaces would be easy for me. hint hint it’s not! Decorating patios, decks, outdoor living spaces..it’s a whole new ballgame and it’s not the simplest. One of the main reasons my deck sat vacant for 8 months after I moved it was because I had no idea what to do with it and even more than that, I couldn’t afford to make it look nice. That’s what I thought at least! Outdoor furniture is so expensive…am I the only one who is always stick shocked by how much an outdoor sofa is?
However this year, I decided to do what I can with what I have and stretch my dollar far to make my deck useable and cute! I learned a lot while I was piecing it together and ended up transforming my deck for under $50. Now I want to share some thrifty ways I did this with you!
Don’t break the bank!
: Prioritize money
If you have a budget, no matter how small, prioritize the bulk of the cash towards furniture. Furniture is the base of the space (obviously) and even if all you can afford this season is a new set of chairs, you can still bank on that and thrift for the accessories. I use 75% of my funds for furniture and then 25% for decor.

Teal outdoor rug
Black and White Boho Rug
Round Jute Rug
: Lighting
Maybe your house is like mine – there is one dingey outdoor light from 1985 that gives off a motel vibe. Adding lighting is essential! The cheapest way to do this is with string lights and candles. I buy candles from the Dollar Tree, add a few citrenella for the bugs and scatter then in votives and lanterns around my outdoor space. Never underestimate how beautiful candlelight can make any space!
I also love adding string lights – or market lights as they are usually called in an outdoor setting. Adding lighting above your seating can make the space feel even more like an outdoor living area and create a coziness.
(if you have no posts to hang lights from check out this great DIY to create cheap posts!)
Shop all my favorites from Amazon to complete your modern boho outdoor oasis!
: Plants
I’ll be the first to admit that I have the farthest thing from a green thumb, but I couldn’t possibly finish my deck without plants. They add a fullness and there are many low maintenance plants that make spaces look lush!
Try adding some plants around the perimeter of your outdoor living area or along pathways leading to it – it will take it to the next level.
4 plants for outdoor spaces (if you have a black thumb!)
– Little Bluestem
– Boston Ferns
– Lemon Grass
– Marigolds

Outdoor Jute Pouf
Boho Desert pillows
Live Edge Coffee Table
: Wait for Sales
This seems pretty obvious too – but I’ve bought most of my lights and outdoor accessories when there was a sale. Check during Memorial Day, and even 4th of July for really low prices on outdoor items (especially furniture). If you don’t mind shopping out of season – most lawn furniture and outdoor accessories go on major discount at the end of summer. I’m talking like 75% off! Sometimes it’s worth the wait – especially if you live somewhere where warm weather extends farther than the typical “summer season”.
: Buy used
I buy as much as I can used for many reasons (costs, eco-friendly, ease) but buying outdoor items used is often passed up on for some reason. Many times you’ll see outdoor furniture for sale that looks a little worn…as in the owner left it outside for years and now wants to get rid of it. If it’s sometime you can repair, repaint, clean or repurpose, it’s always a good idea to snag up a deal like this! A can of Rustoleum spray paint, a bottle of bleach and some new accessories can go a long way in fixing up outdoor furniture (and for 1/10 of the close)

Check out these unique “outdoor” furniture finds!
Outdoor Rocking Chair
Woven Swing Chair
Modern Side table
: Items don’t have to be “outdoor” to be used outdoors
Sure, you don’t want to put your faux sheepskin rug outside all the time, but thinking outside of the box with what you use really saves. When things are labeled as “outdoor items” they are automatically marked up. Things like stools, side tables and coffee tables don’t need to be outdoor only. If they of durable material (and you can weather proof just about anything) then they will be okay! This goes for pillows as well – I bring my pillows inside when I’m not using them so they don’t need to be outdoor fabric (more $$)

Check out my favorites here!
Modern Boho Paint Colors [what I used in my own house]
If I got a nickel for every time I was asked what paint colors I use in my home..well i’d be rich enough to pay someone to paint for me! Paint can be a tricky thing. From a computer screen to a photograph, to the paint chip card, even the sample of paint – they all can look different. I have had my fair share of trials and errors, but I love the colors we ended up using in my 1970’s fixer upper, and I wanted to show you what they are!
I don’t believe that your whole house needs to be in the same shade or color family. Every room in my house is a different color because my style is very eclectic. However, I did want the spaces to flow, so the trim and doors are consistent and there is an element of green in every space. Using a common element amongst each space can help make the spaces flow!

KITCHEN

Lower is SW Halcyon Green


Trim is Behr Pure White
ENTRYWAY

Walls are BEHR White Pepper

FAMILY ROOM

GUEST BEDROOM

Stencil pattern is Behr Simply Sage
BATHROOM

DINING ROOM

Lower half is Valspar Perfect White
The breakdown of each space and materials used can be found in these posts:
Best online rug stores: on a budget
Shopping for rugs can be annoying, overwhelming, and truly like you are spinning tires. If you order it online, you can’t always tell the true quality and the colors can appear different in person…and if you go in store, you can feel limited by the choices unless you’re dishing out major bucks. I’ve had experience with amazing rugs, so-so ones and ones I will never buy again, and i’m going to break it down for you!

my favorite online rug stores
RugsUSA is by far my favorite place to rug shop! Not only is the selection enormous (pretty much every rug your mind can imagine) but their prices are hard to beat.
When you buy your first rug, you get 40% off your purchase. On RugsUsa, there are constant sales – I’ve gotten PROMO codes for them up to 80% off, and they have free shipping on all orders within the US.
I’ve bought many rugs from them – and they carry everything from $10 matts to $4,000 wool rugs.
No surprise that Amazon is on the list, right? Amazon pretty much has everything your heart desires..delivered to you in 2 days (Hello Prime), so when you want to see that area rug right now in your living room, you pretty much can. The only issue is Amazon can make it difficult to return (if you don’t like the rug).
I’ve ordered 3 rugs now from Amazon, and haven’t had to return a single one though because I loved them all! I also like getting my rug from Amazon because you can read the reviews and often times see pictures of the rug in real customers spaces. This helps with the very real challenge of color accuracy when buying a rug online.

I’ll start by saying I personally have not purchased a rug from Ruggable, however I’ve had many home decor enthusiasts and friends swear by their Ruggable rugs – most have went back to purchase a second one.
Their rugs are machine washable, spill + stain resistant, made in the USA, and made of sustainable resources. In my book those are all wins! For the quality of their rugs, they are truly a steal!
I plan on getting a Ruggable rug for my living room eventually, and can’t wait for that!
Okay..so maybe you’re confused why I put Target on this list. Especially if you know me, you know i’m not a fan of shopping at super trendy stores like Target, but their rug selection seriously impressed me. They carry one of my favorite lines, Savafieh, and so many more!
Their rugs are very reasonably priced, and if you pay attention or sign up for their sale alerts, you will see that their home goods go on sale frequently (online). I wait until those sales to get a rug and get it shipped for free to my local store to pick up. I recently bought a rug for my kitchen from Target.com and paid $20 for it..originally $56 so I’d say it’s worthy of this list!

Rugs Direct is another one that I haven’t personally ordered from – but back when I did E-design, many of my clients ended up ordering rugs from there. One of the best things they offer is 30-day trials. That is unheard of in home decor and furnishings. They will let you keep the rug in your home for 30 days and if you don’t like it you can return it for a full refund..they also price match and offer free shipping!
They have a mega selection, kind of like Rugs USA. This is a great place to look if you know what you want – you may get overwhelmed with the sheer selection if you go in blindly!
Round up…
These are 5 of the top places I start with when I want to find a rug online, in a good price range, and know i’m going to get quality. Of course there are other online rug retailers, but in my personal experience the 5 listed above are the best.
Tell me in the comments below – where do you like to get your area rugs?
Dollar Store Organization Hacks
I think my love of dollar stores started when I was a little girl. My nana would take me to the one near her house and I could pick out anything I wanted..and I would always get a doll. One dollar Barbie dolls were kinda my addiction at that age!
Decades later and things haven’t changed..I still love the dollar store. I am not going to sit here and pretend that you’re going to get top quality things. Personally I would rather have thrifted items or vintage pieces, but when it comes to organization, nothing beats the dollar store.
I recently collaborated with the Dollar Tree (this post IS NOT related or sponsored, just relevant) to revamp my pantry for Spring cleaning, and it was actually very fun! How I let my pantry get so unkept or why I didn’t think of the dollar store for my organizing needs is beyond me..but now it’s going to be my go-to spot! Let me show you my FAVORITE dollar store organization hacks!

Pantry Makeover
- Plastic bins (spray paint them in ANY color to match your decor!)
- Mason jars (think of storing small things like toothpicks, cupcake liners, rubber bands, etc)
- Large round bins for bottom of pantry (kid snacks, pet food, household cleaners, etc)
- Labels (they have cute labels for all your stuff!)
- Contact paper (pack a punch in your pantry with pretty + cleanly lined shelves)
- spice jars (pour spices from plastic containers, print or make cute labels)

Under Kitchen Sink
- Plastic bins (organize cleaner by type)
- Bins with lids (not child proof, but still safer!)
- Shower caddy (store stuff you take around the house with you!)
Laundry Room
- Cloth bins (to sorta colors)
- plastic bins to store detergent
- rope and clips for socks
Bathroom Counter
- jars with lids (for q-tips, cotton balls, bath-bombs)
- Mason jars (toothbrush, toothpaste)
- tall bottles (bath salts)
- DIY tiered tray (super glue plates on candle holder)
- Makeup holder (candle jar glued on candle stick holder, add beans or sand for makeup brushes!)
Simple + Inexpensive
The way I think about it is this: When I am shopping and I see something I’d like to buy to help organize my home, I think “Can I DIY this myself or buy it cheaper?” The answer has been yes 99% of the time.
These are just a few examples of how you can organize your home with dollar store items! I have many more hacks for the dollar store, but I wanted to show you the places i’ve personally used these hacks – and frankly the most common places we all struggle to keep organized!
I hope this helps! Feel free to tag me on Instagram if you use any of these hacks – I love seeing all of your work!
Cutting Edge Wall Stencil 101 + Budget Makeover
Full Disclosure: I sought out a partnership with cutting edge stencils because I was truly interested in using their products for my makeover. I received a free wall stencil in return for a 100% honest review. Please see my affiliate disclosure for products listed in this post HERE.
Makeover Time
When I first decided to redo my guest room, I started like I started many projects..gathering inspiration. I started scrolling through Pinterest for ideas when I came across a space with a beautiful statement wall. I thought “wow, I would love to wallpaper the wall behind the bed..but wallpaper is expensive and messy.” I clicked on the picture anyway and was blown away when I read that it was a wall stencil, not wallpaper! Immediately I was intrigued!
I started Googling wall stencils, and time after time, Cutting Edge Wall Stencils came up. Then I started noticed that many people I follow on Instagram were using wall stencils..and I was smitten with the idea. I had to try it!
Why I chose a wall stencil over wallpaper (and would again)
- First of all, the cost of using a wall stencil is significantly less than using wallpaper. I had to do my guest room makeover on a tight budget, so using a stencil only made sense.
- You don’t have to measure for an exact amount (one stencil can be used over and over again to fill as much wall space as you need)
- If I ever wanted to change it, I could paint over it – wallpaper is much more permanent
- That being said, if I mess up applying the stencil, I can easily fix it with paint as well
- I could chose any colors I wanted for my wall – any combo you can imagine – you can do!
- I can use the same stencil over and over again, and even in a different space or on a piece of furniture.
Cutting Edge Stencils
+ Their Options
I spent a long time perusing Cutting Edge Stencil’s site..they have so many stencils!! Think of them as your one stop shop for unique and beautiful stencils for your home. They have it ALL;furniture stencils, flooring stencils..wall, ceiling, outdoor, holiday themed, tiny to huge stencils..and all the essentials you need to get the job done simply and efficiently.
Ultimately I decided on the Brush Strokes Wall Stencil..it caught my eye immediately and I kept coming back to it, so I knew it was perfect for my boho guest room!
After deciding and placing my order, I received the large wall stencil, along with an edger stencil (for the top + bottom portions of the wall) and the essentials kit.
The essentials kit included:
- 1 high density foam roller (this is a must! It was so quick with it!)
- 1 clip on level (to make sure your stencil is level and lines up perfectly!)
- 1 natural bristle brush (perfect for getting in the corners and for small details)

DIY
(the simplest wall transformation you’ll ever do!)
I started by painting my walls all White Moderne by Behr in eggshell for a clean slate. It’s best to start with a clean + smooth wall. The stencil will not work ideally on a textured surface.
After waiting 24 hours for the paint to dry, I started with the stencil. I used paint I had from my front door – Simply Sage in satin by Behr. I wanted the look to be organic and botanical feeling, so I did green over white for a simple and refreshing look. That’s the coolest thing about using Cutting Edge stencils – you can completely customize it and use any color combo you want!
I simply lined up the stencil in the bottom left-most corner of the wall I was stenciling and used a few pieces of painters tape to hold it in place.

I used very little paint – which was different for me people I am one of those people who globs paint on the walls! I got just enough paint on the high density roller and then rolled it on a few paper towels until it almost looked dry. Then I started painting right over the stencil – not pushing too hard to avoid bleeding. It was so simple! Once I finished the first one, I peeled it off the wall and was astonished that there was NO bleeding. It looked perfect!
I kept going in a horizontal line across the bottom, then went up a row. It took three rows vertically to complete the whole wall and took me under 3 hours which is pretty fantastic for a one of kind statement wall!

The stencil itself had to be cleaned once during the process – halfway through the wall it started to get tacky. On the direction sheet that comes with it, it says this will happen. I took it outside, hosed it off, and it dried in a few minutes so I could keep going.
The stencil itself is a thick but pliable plastic. The quality is way better than I expected. The package also came with two small surprise stencils which will be so fun to use for little projects!

Overall..if Cutting Edge Stencils was a movie I would give it 5 stars. The stencil arrived quickly after being ordered, the direction sheet was super comprehensive and thorough, the quality was better than expected, and truly it was simple to use. Did I mention it was my first time EVER using a stencil…and I think I nailed it!
Want to try a stencil on your wall!? Check out all that Cutting Edge has offer!
Room reveal!
This is what I started with…

And thanks to Cutting Edge Stencil + a thrifty makeover, I now have this!

*GIVEAWAY*
(FEBRUARY 25- WINNER CHOSEN MARCH 1)
Don’t forget to enter the giveaway for a $50 credit to use for anything on Cutting Edge Stencils site!
Here is how to enter!
1. Visit their site (here) and pick a stencil you’d love to use
2. Comment ON THIS POST with the name of the stencil that you’d want to win
3. (optional) comment on my photo of this room on Instagram and tell me what you think about my budget makeover!
That’s all!
On 3/1 I will be randomly selecting one winner! I will reach out to via email so if you enter make sure to check your email on Sunday 3/1!
How to create high impact spaces with a small budget
Since Brian and I have moved into our 1970’s fixer-upper, we have been doing low cost renovations and makeovers all over the house. I have carefully planned, budgeted and thrifted each space to assure I spent the least amount of money but made the largest impact.
I successfully redid my bathroom for under $200 a few months ago and decided it was time to tackle Brian’s bathroom now. This is when I got serious about high impact and low budget – I broke it all down one day on how to do this, and decided this would be a great blog post for y’all.
When the budget is smaller, but the want is large, focus on these main things…
WALLS

It’s no surprise that walls have the largest impact in a space. Painting your walls a new color can totally transform a space – and for such a low price!
If you want more of an impact than just painting one color, consider doing one of these things:
- peels and stick tile wall (awesome for kitchen and bathroom makeovers)
- wallpaper (all walls or just an accent wall)
- stenciling a pattern on the wall (cheaper than wallpaper)
- bold accent wall with contrasting paint color
- adding wood work (board & batten, shiplap, bead-board, etc)
- faux ship lap
LIGHTING
Lighting can make or break a space! If you have a room with zero lighting, then getting floor and table lamps is a must, but if you have an existing ceiling light that needs upgraded – it doesn’t have to cost a fortune either.
Ideas for upgrading lighting on a budget:
- spray paint outdated existing light fixtures (from brushed brass to old rubbed bronze, the choices are endless to make it look like new!)
- Cover an old pendant with a new shade (like my DIY rattan pendant)
- up-cycle a thrift store light fixture
- replace lamp shades if you like the existing base
- buy a basic light and add your own flair (check out this Pottery Barn look a-like pendant)
FLOORING
Flooring can be one of the most laborious and costly parts of a space to upgrade, but it doesn’t have to be that way. We have ugly brown carpet throughout our house, but until we can afford the reclaimed wood floors that we want, we are doing all the tricks in the book to make them work.
Here are some ways to disguise or cheaply upgrade a floor
- Rugs, rugs, rugs. Add a rug over carpet, linoleum, tile, etc. A stylish rug can make a room, and is essential to pull together a look.
- Paint it! You can paint just about any hard surface floor, from vinyl tile, linoleum sheet, tile, even wood floors. It’s a little more work, but it will have a huge impact
- Peel and stick tile! There are many retailers that offer trendy peel and stick tiles that will transform your floor for barely any cost (and almost no labor required.)
ARTWORK
Have you ever hung pictures on the wall and it felt like putting in the final piece of the puzzle? I love that feeling! Artwork and wall decor are so important for a space. If you have a small budget, it’s okay to spend the bulk on the “staples” of the space like furniture, flooring, lighting, paint, etc, but don’t abandon artwork all together.
Artwork can be gathered over time, it’s often times easier this way, but sometimes you just want to finish a space, and you don’t need to wait until you have $500 to shell out on art.
Here are simple and inexpensive ways to decorate your walls:
- Digital prints – digital prints are inexpensive and can have a bold impact in a space. You buy the digital file and print it at any size you’d like for your frames – it makes having original artwork affordable and simple. (check out my digital print shop here)
- Photography – maybe you have some amazing photos from your trip that would look incredible blown up on your wall – this is the time to print them out! If you don’t, no worries, find free images to use at Unsplash.
- Use mirrors – mirrors can add dimension and light to a space, giving it that full and polished look.
- Hang a vintage rug, tapestry, fiber art, or other woven piece. The dimension of woven pieces will have a huge impact on your space and are relatively inexpensive.
THE LITTLE ACCENTS

It can be easy to finish all the big items on your list and forget about the little things, like accessories. I don’t need to list all the things that can make a huge impact in a space, because that would be enormously long, but here are just a few that are worth going the extra mile to make stylish and part of your makeover:
- window treatment – even if you can’t afford to switch out your old plastic blinds, you can still add curtains on top for a polished look.
- house plants – faux or alive, plants are an inexpensive way to instantly lift up a space and add a rich feature
- textiles – from rolled up bath towels in the bathroom to fresh throw pillows on a bed, adding some new textiles will make a room look instantly more refreshed
- styling – simple and sweet. Decluttering, setting up vignettes on your surfaces, and simplifying will take your small budget and stretch it.
The final picture
It can be easy to get caught up in how little your budget is, making you not want to even start. I used to feel that way, thinking, if I can’t change the carpet out, is this even worth it? but that’s depressing, right? You can’t wait for a million dollars, or for the perfect time, you have to create a space you love with what you got. By switching your focus to making the biggest impact with the smallest budget, you can achieve wonderful makeovers without breaking the bank.
Check out my best high impact low cost space! $400 kitchen remodel.
how to decorate & keep the peace
What’s more challenging – moving in with someone or deciding on a decor style for your home? How about doing both? Combining and compromising on style when you move in with a significant other can be quite the task. It can be super rewarding and fun to find a style you love together..but how about when your styles clash? Or you both has strong taste opinions?
Don’t let that be something to fight about, and don’t let clashing styles hold you back from creating a beautiful home! There are many ways to combine styles, compromise, and find a happy balance for decorating your home with your partner (and contrary to what HGTV might show you – it doesn’t have to be one sided!
My Story
Let me start with how Brian and I did it. I, of course, felt like I needed 100% control over the design of our home. I was in fact the one with the design degree, however I quickly learned that that’s not the answer to a harmonious house. He didn’t have a strong opinion on the furniture or decor, as long as it was comfortable and functional, I got the green light. For instance, we went shopping for sofas together and tried them all out! If Brian thought it was “lounge-able” and I liked the style, it was a winner. It’s been that way for everything, and it’s worked great in our home. We also both have our own spaces to do with what we please. His is his office and bathroom and mine is my office and bathroom. This has been a key to keeping it peaceful as well – creating a space that is all one’s own can give you the creative freedom you want!
But I don’t speak for everyone, so I set out and interviewed a few fellow home dwellers who had some helpful words of wisdom on this subject! Check out my interviews from 6 lovely ladies below.
See how these couples decorated together & kept the peace!
Aubrey, 25 @aubreylidwell
Whom do you live with?
My fiancé
Home:
We have owned our home since May 2016
Style:
He doesn’t have a style, he’s a mess. My style is modern and clean, with a touch of vintage and boho.
How did you decide what to keep/get rid of?
We were both moving in together from college dorms so we didn’t have a lot. We brought furniture from our childhood bedrooms, got a ton of hand-me-downs, and bought very little. We chose by what made the most sense as far as our beds, desks, and dressers.
How do you decide on how the home is decorated?
We discussed decor then shopped together for paint colors and things like that. It’s a joint decision, especially on items like wall art. We spent the whole first summer we lived in our home shopping for unique wall art. Now we are discussing which of our engagement photos to print on canvas to display in certain spots and how we will change those out seasonally with our wedding photos once we have those. We do our own things in our own spaces, like his office and my walk in closet. He doesn’t much care about a lot of the decor so I make smaller decor purchases without his input.
What is your best piece of advice?
Find common ground with your goals first- like budget, (future) kids and animals, and functionality. Then fight it out about the rest of the details.
Kate, 25 @katekozarphotography_
Whom do you live with?
My Husband, Brett, and our dog-child, Daisy Mae.
Home:
We bought our first home 2 years ago! It’s a middle-unit town home in a great community. We love it! We have about 1,344 square feet of space. We have an unfinished basement which we will be developing soon as we are trying to conceive! We landscaped our backyard this past summer with plans to finish it all up come spring!
Style:
In regards to home style – it is pretty easy to work together because we both like the same style. Rustic, antique, with a touch of modern. We have dark grey and wood accents throughout our entire home. It’s farmhouse rustic!
How did you decide what to keep/get rid of?
Well, we actually moved in 2 weeks after meeting (7.5 years ago). I didn’t have anything, Brett had most of everything in his apartment he was already in. We moved around a couple times, and in each home we bought new items and decor that we have carried with us. When we bought our current home, it was the first home we owned and could really do anything we wanted with. We essentially went out and bought mostly new items and found ways to work with what we had to furnish our home. After 2 years, we still have some unfinished spaces but have created a wonderful & warm home together.
How do you decide on how the home is decorated?
I lead the suggestions, and when something doesn’t work out – I always ask for Brett’s opinion. It’s interesting to see his twist on things, and his surprise as to how some of my ideas actually work out and look good! He always tells me it’s me that makes it feel like home… not just because I live there, but for how I decorate it and the ambience we’ve created together.
What is your best piece of advice for a couple struggling to be in harmony with how the house is set up?
I think the biggest thing is patience. Most new home-owners want to get everything done all at once, which adds stress big time, whether it’s financial stress or emotional stress. If you don’t agree with the same style of home/decor, etc… I would say learn how to compromise. Sit down with each other and talk about what you like, and what you don’t. Talk about the MUST-HAVES for each person to be happy, and find a way to possibly each have a room, or space to make their own. A lot of moving in with someone or living with someone is learning how to compromise. It teaches you a lot about YOU and how to begin to share your life with someone. You don’t have the final say. Together, you do. It’s important to make your partner feel heard and respected and in the slightest bit of control of THEIR home, too. Huge learning curve… but so much fun if you’re doing it with the right person.
Mallory, 33 @JustMalloryKaster
Whom do you live with?
My husband of 4 years
Home:
We purchased our first house about 1.5 years ago, and while it wasn’t a complete Fixer-Upper, it did need some renovations. We lived in the basement for six months, and hired a contractor to remodel the upstairs. We repainted, renovated all of the bathrooms, purchased new countertops/backsplashes, painted the exterior, and added a double-door entry instead of single-door entry. It is 3 bedrooms with 2.5 bathrooms, a small kitchen, small living room, and half finished basement.
Style:
I had previously decorated using LOTS of bright colors and vivid paintings, but in an attempt to simplify and also include my husband, I went with a very neutral pallet for our house. (He honestly doesn’t have a style, but I wanted him to be comfortable with colors he liked as well.. and also make it a little less feminine compared to when I was living on my own.)
How did you decide what to keep/get rid of?
When we rented, we combined our items, but over time, we would slowly get rid of our ‘old’ stuff, so that we could pick out new furniture together. We based a lot of decisions on which items to get rid of based on how old they were. In many instances, we kept the furniture, but changed the decorations in order to make it feel more cohesive. For example, we both had wooden beds, but different color bedrooms… when it came time to combine furniture, we got all new bedding to make the rooms look more similar.
How do you decide on how the home is decorated?
I make all of the decisions regarding decorating our new house; however, I do consult my husband on every decision. He knows the general style I’m going for, and trusts my decisions 100%.
What is your best piece of advice for a couple struggling to be in harmony with how the house is set up?
If you buy staple pieces in neutral colors, it’s easier to change up the look and feel of the entire room by switching out smaller decorations (rugs, pillows, picture frames, etc.)
Any additional thought you’d like to contribute?
Create a mood board on Pinterest as a visual guide. If what you’re thinking to buy doesn’t 100% match the mood board, don’t buy it!
April, Success in Black and White Podcast
Whom do you live with?
My husband
Home:
We own a 1,300 sq. ft home. Have lived in it for 1 year now!
Style:
I’m very OCD, and need everything in its place. My husband has a very visual memory, so our biggest argument is usually when he walks in the door and puts a receipt on the counter. I pick it up and put it in the receipt box (naturally) and 3 hours later, he’s like, wheres my receipt?!
How did you decide what to keep/get rid of?
We did both – combine and get rid of – when we first moved in together. Most of my stuff we sold because it was big gaudy furniture, and wouldn’t fit his apartment at the time.
How do you decide on how the home is decorated?
It’s a joint decisions, but he will default decisions to me. He will tell me what he doesn’t like though! Our home is rustic/utilitarian comfort style.
What is your best piece of advice?
Communicate so you don’t get in silly fights about who moved the receipt! Talk about how you manage the house and compromise. Also talk about how you both grew up to create understanding. My dad was and still is an intense cleaner and that’s dictated my actions in our home. So my husband understanding that has helped him know I’m not ignoring him or the kids, just need it to be done before I can relax!
Kelsey, 27 @kelseyrosemcginnis
Whom do you live with?
My husband, Jason and our son, Ezekiel!
Home:
We live in a former one room schoolhouse. It was built in 1917, and was remodeled in the 60’s into a home. I think the overall finished square footage is about 2,500 sq. ft. Our great room (dining and living) alone is 1,100 sq. ft. It’s huge and was somewhat of a challenge to lay out properly!
Style:
When my husband and I first got married, I was on the rustic clean side of things and his style was very modern. My tastes have changed over time and our style has formed into Mid-Century Modern/Scandinavian modern. We own a retail furniture store specializing in this furniture style, which has now made it easier to decorate and get pieces we love.
How did you decide what to keep/get rid of?
We combined! We didn’t have much money so we got a lot of things from my parents and Goodwill. After being married for a couple years and opening our shop, we have phased all of that out and bought all new pieces.
How do you decide on how the home is decorated?
Now that our tastes are pretty similar, we decide together and both trust each other’s eye. My husband has a surprisingly good eye for design. It’s fun working together to design our space. We do occasionally butt heads as he likes more color than I prefer.
What is your best piece of advice?
I’d say to allow each other to have a space that they can be free in their design. We have both had to compromise on things. I know my husband likes a lot of color, so I picked out a Persian rug that had a lot of berry colors in it, but also a lot of grey. It was a compromise that now I love.
Any additional thought you’d like to contribute?
Be open to each other. It never hurts to try something, if you end up not liking it, it’s simple enough to change down the road. You never know, you might grow to like it.
Also, it’s worth saving to invest in lifetime furniture pieces that are quality rather than buying something cheap just to have something. It gives you more appreciation of what you have.
Michelle, 24 madewithmichelle
Whom do you live with?
My husband
Home:
When we first got married, we lived in my in-laws’ basement for six months while we shopped for a home. We finally found the perfect property with a lake front view that happened to be in our budget. It’s about 3,000 sq. ft., which includes 4 beds, 2.5 baths, and an unfinished basement. It was built in 2003, so it needs a bit of updating, but nothing too drastic. We have lived here for about six months now and have loved having our own space to grow into together.
Style:
My style is definitely minimalist. I only want the necessities and things that are personally meaningful. I also love keeping things light and bright by using lots of white with the occasional pop of color. I’m inspired by modern art, geometry, and Art Deco. On the other hand, my husband loves black and dark, earthy tones. He likes things to be neutral and muted. One thing we both agree on is that we want our home to feel timeless. We don’t want to fall into trend traps that will go out of style quickly. My husband is constantly reminding me of that goal so we don’t waste money on cheap, trendy items. We also both love natural elements like wood and greenery. This is how we have been able to compromise several of our decorating decisions.
How did you decide what to keep/get rid of?
Both of us were living with roommates in small apartments when we got married, so we honestly didn’t have much. He had a black IKEA bed set, and I had a walnut cabinet that I built in my college wood shop class, but that was about all the furniture we owned. I don’t like black furniture, so we decided to put his old bedroom set in a guest bedroom. We bought a new mattress, bed frame, couch, desk, kitchen table, and nightstands when we moved into our home. Because it’s just the two of us, we’re leaving the rest of the bedrooms unfurnished for now.
How do you decide on how the home is decorated?
Decorating the home is definitely a compromise. The home needed a new paint job so we had to figure out what color to choose. I wanted to keep the paint as bright as possible, but my husband wanted some contrast between the walls, baseboards, and ceilings. We settled on a light gray color to keep it light, but not quite as boring as stark white. Choosing furniture is also a compromise because we want quality furniture that will last a while, but we also want a good deal. My husband is really good at hunting the classifieds, so he is usually the one finding the deals and I give him the go-ahead to buy it or not. I take the lead on decorating the walls because I do photography, graphic design, and woodworking. I like blending my talents to create custom artwork and frames for our home.
What is your best piece of advice?
One thing I would suggest is figure out each of your strengths and focus on that. My husband is really good at finding quality furniture, so I let him do most of that. My strength is making art, so I take the lead on that. Remember that it’s a process. Don’t feel like you have to decorate the whole house at once. We still have folding chairs at our kitchen table because we haven’t found chairs we both like yet.
If you have thoughts, questions or your own story of how you and your SO combined styles, feel free to comment here or message me on Instagram! I truly love hearing from y’all ♥
DIY Beaded Chandelier
If you don’t think lighting is important in your home’s decor – think again. Especially in entryways, lighting makes a first impression, and you want it to be good! I have been eyeing up beaded chandeliers for months now, trying to find one that wasn’t going to break the bank – to no avail. That’s when I decided to DIY one (okay this is a partial DIY!)
Entryway design
My entryway was like the rest of my 1970’s house – bland and beige. Wood trim, brown doors, peachy-brown walls and brown carpet. Makes me itchy just writing that! I have big plans to brighten and lighten the whole space – but at this stage, I am working on the lighting.
I love mixing elements – smooth and textured, light and dark, etc. That’s why I LOVE beaded chandeliers. They work with a lot of styles as well – eclectic, coastal, boho, even classic. Since my house is a little bit of everything, I figured this was a style I could live with even when I change out furniture and decor.

Inspiration
My inspiration was this $299 beaded chandelier from Pottery Barn Kids.
I loved the flush mount style – which is perfect for a room with low ceilings where you still want to create a dramatic impact. I also loved the twine and tassel – it makes it a little more casual and bohemian.
However, my budget for my entryway is only $400, so spending $300 on the light fixture alone was not an option.

Amazon to the rescue
No need to even explain my love for Amazon – if you’ve read my other posts about my budget friendly makeovers, you know that Amazon is my favorite place to find inexpensive pieces.
I searched high and low for a chandelier that I could “upgrade” or add to to make a beaded chandelier light fixture. I considered buying a lighting kit and completely making it myself, but after adding it all up, it costed the same as just buying one from Pottery Barn..but then I found this beaded chandelier from Amazon for $58.00!

The coloring of it was less than ideal, but the elements were all there. I knew it would only be a few simple steps to turn this into exactly what I wanted! (PS – this one is currently out of stock on Amazon – but a bronze one is still in stock for $20 more, which still makes this an affordable DIY) link here
DIY steps
This was a very simple DIY and pretty self explanatory! The chandelier came pretty much assembled – all the beads were together – so I simple splayed them out, sprayed them with my favorite spray paint. I use Rust-Oleum in flat white primer because I wanted a matte look, but couldn’t find a white matte spray paint that wasn’t chalk paint, and that was too matte. It only took one coat of this to cover everything! I sprayed everything (cover the electrical parts with painters tape!)
The beads were a bit tricky to get all sides – so if I had to do it over again, I would hang the light fixture outside and spray it – this would be easier to get all angles. I took the harder route, but it still worked out for me!
Once the paint was 100% dry (I waited 24 hours so it wasn’t tacky) I used jewelry twine and wrapped the rim and stem of the pendant. I have no idea if that’s the technical term – but you can see my the picture’s that it is pretty self explanatory where I wrapped it.
With a tiny bit of hot glue to secure the ends of the twine, the chandelier was then finished and ready for install!
Finished DIY Beaded Chandelier

All in – I spent $80 on this entire project.
That’s a $219 savings from my inspiration chandelier, which is a #DIY-win in my book!
Check back for my full entryway reveal in a few weeks!! ♥
Like this DIY – Pin it for later!!
DIY Wood Desk
At I sit here, writing my blog post at my newly built DIY wood desk, I’m so excited! Maybe it’s the fact that I worked from home from a 30″ child’s desk for 2 years or the fact that this crate desk turned out better than I ever expected it too!
Sometimes I go into DIY projects just hoping for the best, because i’ll be honest, as many DIY wins i’ve had equals how many DIY fails I’ve had too. Live and learn baby, right? I am the kind of person who spreads out all my papers, has about 10 mugs on my desk, and two monitors going at all times, so I need a desk that was long. I scoured the stores and online sites, only finding cheap looking computer desks that spanned over 60″ OR desks ranging in the $3 – 5k range – so I knew I had to get crafty.

Crates & Old Wood?
I’ve always loved reclaimed wood, crates, vintage wooden items, industrial things, etc. You get it! One day as I was mindlessly shopping at Michaels Craft Store (so just another Monday) I came across their crates, $10 a pop, and thought, those would make great shelves. A few more trips to the thrift door and salvage yard, and I had enough crates, lumbar and hardware to craft a desk that would work for me. The way I constructed the DIY wood desk was all through trial and error, but now that it’s been in my pace for a little other 6 weeks, it’s worked perfectly for my needs and I wanted to share it so you can built it too!
material list & price
- 6 crates (I bought mine from Michaels for $10 each)
- 2X 8″ x 2″ lumbar planks (got mine from a lumbar salvage yard for $3/8ft)
- 4″x4″ lumbar piece – 6″ ($7 at Home Depot)
- 8X 2″ screws
- 32X 1/2″ screws
- 2 metal L-brackets
- 2 Straight Mending Plates
I built the entire desk in one afternoon for roughly $80!
Step by Step Guide for my DIY Wood Desk:
I had two 8′ lumbar planks and I cut them to 7′ each – this was how long I wanted the desk to be – [you can customize the size for your needs!]

I got the 4×4 lumbar planks cut at Home Depot into 15″ sections. These are what the crates are resting on – acting as feet.
They add stabilization and height – without them the desk wouldn’t be height enough (34 inches in height)
Add the 15″ planks on each end of the bottom crate, and screw it in from inside the crate with the 2: screws(1 on each inside corner). There will be excess wood – which is what stabilizes the desk from tipping – and this will be in the back of the crates.


Once you’ve done that to both bottom crates – you will attach the other crate on top of the bottom crate. Line it up so everything is symmetrical and use the 1/2″ screws to attach them. You want them to be secure because this is what will be hold the desk up.
After this is done on both sides, I attached the top of the desk. This was the tricky part. Because the pieces were from a salvage yard, they were slightly warped. I lined them up on the floor – bottom side up. I used two mending ties to secure them together, making sure that the ties were not where the crate stacks would be attaching.
Then I attached the crates – I flipped them upside down and put them towards the end – with a 2in overlap in the front and on the sides. This gave the desk a balanced look and physically make it stand without tipping (it’s a heavy desk!) Using the 1/2″ screws again, I attached the crates to the planks which would make the desk-top at 4 interior corners.

I would suggest construction this in the space it will end up in – it’s pretty challenging to move a desk this size. Once is was constructed and sturdy, I flipped it back over and placed it on the wall where I want. I used the two L-brackets to attach the back of the desk top to the wall. This is just an extra precaution I wanted to take because I would make a lot of heavy items on it, and without securing the back plank to the wall – it seemed a bit weak.
Then I stacked the 2 remaining crates on top! In the future if I need more storage, I will just stack another crate.
The wood is different colors, and I thought about staining it all to match, but I really like the character the salvaged wood has. You could use salvaged crates for this project to make it all uniform – just make sure they are in good condition.
Final Product!


Like this project? Pin it for later! And follow me on Pinterest & Instagram for more office space & DIY inspiration!
Want to know where I bought the accessories and artwork for my office space? Click here for the shopping list!
Why trendy has never been in my vocabulary.
I truly believe everyone has there own style. I have a very unique style, and when I first started my Instagram and blog, I was worried. I didn’t fit into farmhouse stye, or traditional, or classic, or Scandi-boho or any of the trendy styles.
Then I realized, my house tells the story of who I am, and that’s more powerful that appealing to the masses.
I started posting pictures of my house and my tutorials, and realized it wasn’t about if my style was trendy or “in”. Maybe i’d have more followers and more likes and yada yada, all the superficial things if I was just like everyone else. However, my message for everyone isn’t to fit-in. Sure you could go to Home Goods and buy the entire display, set it up just like that, and your house will look great. (By the way i’m not knocking Home Goods at all – i’ve bought plenty there! I’m just saying, I never want anyone to feel like their home isn’t good enough because it doesn’t look like it was bought from a home decor magazine)
But i’m not a cookie cutter girl, and I never have been. And I’m not looking to help anyone create a cookie-cutter home. You’ll definitely never find another space online that looks like my house, which is what I want. I don’t care if everyone loves it, if it gets a million reposts, what I care about is helping everyone find their personal style – and tell their story within their walls.
I want to help those who desire to have a cozy home that embraces who they are. I want to help my followers create, and find that creative spark they might have not known they had. I could preach on and on about my mission and my goal for this little blog, but hey, you don’t have all day to read this.
What influences my style?
I have to admit, I fell into the trap of what looks good to everyone else for a while. It was very short-lived however. First I don’t have the money to always buy the new trendy home decor items, and I don’t always like them.
I may have grown up in the 90’s and 2000’s but my soul is definitely in the 60’s and 70’s. I am a product of hippie parents, and I’ve always been drawn to nature and brining it inside. I rarely frequent home good stores if I’m being honest. I can count the amount of times i’ve been in one in the last year. Now thrift stores – more times than I can remember.
I love finding treasures in the rough and restoring items into a new life. Maybe it’s the tree-hugger in me or maybe it’s the fact that my budget is tiny and I love a good challenge. I love showing others how they can take old, or ordinary, or even “trash” items and making them into something beautiful and functional for their home.
Music.
This may sound crazy, but when I’m designing my home, I think of music. I have music playing from the time I get up up until the time I wind down for the night. I couldn’t tell you the latest songs on the radio, because I carefully select what I listen to. Every time I walk into a room in my house, it makes me feel a certain way. For instance, my emerald green dining room has a glamorous yet bohemian feel that makes me feel like i’m in an upscale hotel lobby listening to jazz – okay now I’m pretty sure you all think i’m insane.
I love Lana Del Rey, she very much has a vintage vibe and soulful sound. I listen to her a lot while i’m working and writing, because I feel like it helps me get in tune with myself.
When i’m thrifting – it’s Fleetwood Mac. When I’m arranging items in a space – it’s the Lumineers. Sometimes it’s 90’s rap when i’m painting because I need a jolt of energy.
Isn’t there “bad” design?
I get this question a lot – and there isn’t an answer that’s cut and dry. I’ve helped countless people with their styles that I definitely didn’t find appealing personally, but that didn’t stop me from creating beautiful spaces for them. Style is subjective. Just because things are “in” doesn’t mean you have to love them. And if you do – more power to you – but don’t go for something just because it’s trendy.
I’ve always classified my style as eclectic because that’s a mash up of many styles – and it’s always felt true to myself. I am an artist first, and a designer second (even though my degree would say the opposite). There are definitely style “rules” to follow – like scale and proportion rules that make things flow better. There are colors that look better together than others, and there are ways to lay out a space that just scientifically works better. But when it comes to your home, the best ones are the ones that break the rules.
Anyway, the whole point is – i’m an untraditional designer. I love the icons, like Frank Lloyd Wright and Kelly Wearstler because they aren’t a dime-a-dozen. They broke all the rules, and here they are, still dictating the design world. So when you want to do something nuts in your house – remember that no one appreciates great things at first.

Here is to the design rebels.
xo
Katherine


