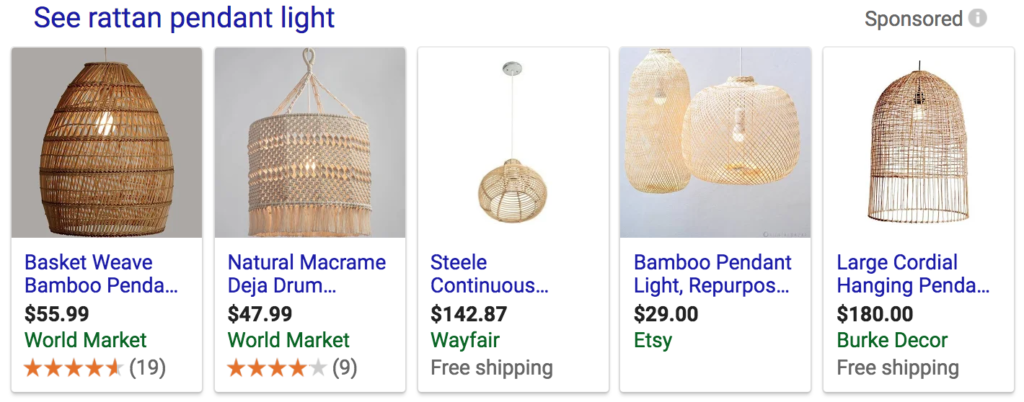
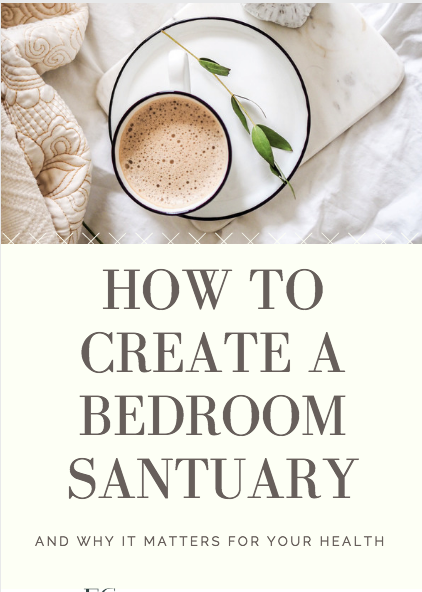
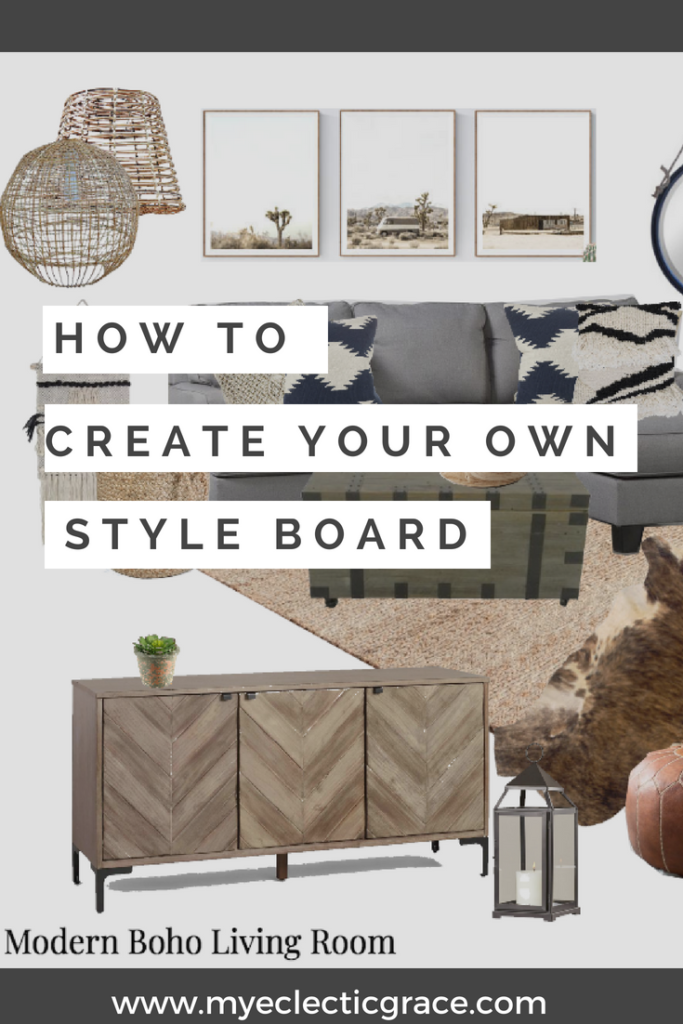
How to Create a Weathered Oak Finish
So maybe you remember me bragging about this amazing solid oak dining table I found on Facebook Marketplace a few weeks back. I went to pick it up – and drove 30 minutes down the highway with my SUV trunk open to haul this beast home.
This table is solid, through and through. And it had that oak-y orange-y polyurethane glow that just made me want to sand it right away! However the table came from a smoking residence, so it smelled strongly of cigarettes. The minute it entered my house, I doused it in vinegar, and once that was dry, I covered the entire table in baking sofa…and left it like that for 3 days. I was not playing around!
Those two tricks worked and removed the smoke smell completely! I was finally ready to get to work on this diamond in the rough. Check out the table below! (Before)

I had not given much thought to what kind of dining table I wanted – to be honest I was just excited to have a table. Brian and I had been dining off a small 36″ round glass table for the last two years, and I was over the moon when I found this one for $50 online. Not only could I know have family over for dinner, play games, and finish my dining room, but I could make it over however I wanted.
I’ve been a lover of barn wood, driftwood, and all things weathered, as you know! So once I had it in my head that this was the look I wanted to go for, I researched the heck out of how to get an oak table to look like weather grey wood. Lime-washing come up a lot, but it was overly complicated for me (I’m a girl of simplicity) so I decided I would just find a stain that emulates weather wood.
I found Rust-oleum’s weathered grey finish stain + sealant all in one at the hardware store and I was so excited. You can find it at Home Depot and Walmart.
WHAT YOU NEED:
- Quality stain brushes
(Amazon has great deals!)
- Rust-oleum Weathered grey stain + poly
- Electrical Sander (I swear by this Mouse Detail Sander
for $25)
- Lint Free Rags (I get mine in bulk here
)
- Eye protection and dust mask
Here are the steps I followed:
Clean it: After scrubbing the table with vinegar, it was pretty clean, but before you start sanding, you want to make sure there is nothing like sticky residue or anything like that on the surface.
Sanding: I decided to start sanding the table on my deck on a day that it hit 92 degrees outside. In North Carolina. Needless to say, it was a bit rough (but so worth it!) It took about 3 hours to sand the entire table with my electric sander, while Brain used sheets of sand paper to sand the legs (which were all curves!)
I sanded the table until the gloss was completely gone and the orange oak color was muted. You want the surface to be even, especially if your table is older like mine, there are things that need smoothed out (like the edges and sides)


Clean again: I wiped the table down again after I felt I had sanded enough. This allowed me to see some spots that still needed sanded, and got it ready for the stain!
I was really nervous when I first opened the Rust-oleum stain because it had a purple tint to it, which was not what I wanted. I started to apply it with the medium-sized stain brush, going with the grain. This stain dries pretty fast, so I had to work quickly to avoid streaks.

At first, I was being very sparring with the stain, but the table was absorbing a lot of it, so I started to lay the stain on thick – which is when I started to see the color I wanted (seen below). What you want to avoid is puddling of stain, because this isn’t the kind that you wipe up, once its on, you have to sand it out. I only did one coat of stain (but thick) and waited for it to dry.

I repeated the stain process with the legs – which I have to admit, I did sloppily. Maybe it was because I had been on my deck doing this for 6 hours, or because it was 92 degrees out, but luckily the legs didn’t turn out too bad.

The table was completely dry and ready to reassemble after 2 hours (I added an hour because it’s very humid where I live). Once I got the table inside and set up, I was thrilled with the color. Not only did it look like a new table, but the table looked aged! It looked like the weathered oak table that I had drooled over when window shopping at Restoration Hardware.
And for $50 (table) + $10 (stain) – you can’t beat it!
The best part about this makeover was it was able to be done in one afternoon, and there was no extra steps. I didn’t have to seal the table or prime it, it was ready to be eaten on and cleaned in one simple step! The picture’s don’t do the table justice – there will be better ones once the dining room is complete, so stay tuned and check back!


Let me know what you think and tag @myeclecticgrace on Instagram if you redo a space because I love to see my budget DIY-ers work!
Best things to buy at IKEA
How do I know what are the best things to buy at IKEA? Well if you’ve been keeping up with me on Instagram, you know I’ve got a lot of love for IKEA. Many people think of IKEA as a starter store – people shop for dorm furniture, first apartment stuff, “cheap” goods for the house. Let me tell you a little secret, half of my designer friends who have plenty of money to go elsewhere still swear by IKEA.
Why is that? Well the potential is endless! Not only does walking through the store ignite your imagination for how to use their items in your own home, but their items rarely have just one use.
They are affordable, and their furniture is very customizable! From painting, to completely over hauling stuff, there are about a million posts out there on how to customize IKEA furniture – they are dubbed “IKEA HACKS”. But that’s for another day!
I’m here today to tell you WHAT to buy from IKEA – where you will get the most bang for your buck, because let’s be honest, when you’re walking through the ginormous home goods store with your big yellow IKEA bag, and things are labeled $1.99 or $5.99, you end up wanting it all. So I’m going to give you a list of my favorite tried and true items that are truly worth getting on your next IKEA trip.
Low on storage space? You MUST buy a Wardrobe!
This is something I always overlooked every time I went to IKEA, because they seemed big and unnecessary; sure, in Europe apartments don’t have closets, so these are practical, but every place I lived in in the states had closets, so I ignored them.
Then I moved into an apartment with no closets, and there I was..buying myself some Brimnes wardrobes!
I created a wall of them in my dining room. And folks – these aren’t just for clothes. I used one for cleaning supplies – everything from buckets and brooms, to all my rags, went into one wardrobe. The other one was for coats and boats since we lacked a coat closet. The third one? Well it had shelving and hanging room, so I made it into a kitchen pantry!
These wardrobes were a life saver! Now that we live in a house with plenty of storage, well I still use them! They sit in my office, and hide all my ugly office supplies, like files and papers. I swear by them – one of my most valuable IKEA purchases to date.
Find them here.

Tarva Dresser & Nightstands
When I was looking for an unfinished dresser, I couldn’t find one for under $300, but then I found the TARVA series from IKEA and was smitten. They have dressers, nightstands, and a bed all in unfinished pine. Your creativity is endless here – I painted mine and switched out the hardware, and for under $200 I had made the exact dresser I wanted.
If you type “Tarva Ikea hacks” in Pinterest, you will be flooded with ideas on how to customize this line, whatever your decor style is.
Find them here.

Pendants
I’ve spent a lot of time looking for affordable lighting..and I mean a lot. On my most recent trip to IKEA I found so many woven pendant lights that I was floored! I had been seeing a lot of them online for $100-600 and I got mine at IKEA for $29. So I’ll call that a win.
The best thing about IKEA’s lighting is like the rest of their items, it’s simple. You assemble it and can install it in a few minutes.
Check out the Industriell Pendant I bought here.

Dinnerware
IKEA’s dinnerware is my favorite. I recently bought wine glasses and a whole dish set for under $30. Tell me where else you can do that and get trendy & quality pieces?
Wether you need just a few bowls, or want to feel like a grown-up with all new matching plates and glasses – IKEA is the place for this.
While you’re at it – check out their placemats and trays. These are also incredible!

Bedding
Did you know IKEA sells bedding? And when I say bedding, I mean everything from throw pillows to mattress toppers. I recently purchased new bedding and was so happy with the prices after looking at other places prior. For example, I bought a new winter comforter for my bed – queen sized for $29. I found one similar at another home goods store for close to $150. Holy savings!
I’ve been an IKEA bedding lover all my life, even my childhood bedding was from IKEA. It’s simple, but always adorable. Whether you want simple, or you want to create a layered bed look, it’s possible – and possible on a budget!

What are your favorite IKEA pieces? Let me know! And remember, sharing it caring, so pin this post to your favorite Pinterest board for future reference!
DIY rattan pendant light
When I told my mom I was making a DIY rattan pendant light, she laughed. Not because she thought it was stupid..but because she grew up in the 70’s and thinks it’s hysterical that I spend my time looking for rattan chairs, macrame and crafting while I blast Fleetwood Mac. What can I say, I was born in the wrong decade,
I’ve thrifted and DIY’ed most of my house, other than things I can’t, like bedding and rugs. See..my loom is broken. Just kidding, I just really can’t make things out of fabric, I do not have the patience for that. Bless those who can!
So I just assumed lighting was up there with things I could not make. I mean, sure I can spray paint a light fixture and wrap some sisal rope around an existing lamp, but when it comes to pendant lighting, I decided I would just get my check book out (my credit card because it’s 2018 and I never even owned a check book) and just buy a light for my basement.
So there I go..Googling my life away like everyone else and these are the results I get when I search for a rattan pendant light.

The prices are not horrible, but I also could not find the type I really wanted. Discouraged, I just pushed it out of my head.
Later that day, Brian (the boyfriend/handyman/super human) and I went shopping, and I found this at Five Below. All it is is a basic pendant light with a wire frame, and as I was looking at it (and loving the $5 price) I decided I could make my own rattan pendant.

So I purchased it, brought it home and looked around for something to spark an idea. It wasn’t too long after I saw some baskets I purchased at the thrift store earlier that week. If you know nothing about me, you should know I have a basket addiction. I have more baskets in my house from thrift-stores than I have things to put in them. So sparing this basket wasn’t going to hurt anyone.

This basket was meant to be used for plants..or trash..i’m actually still not sure, but it has a plastic liner in it and plastic around the edge. Not only did that not look too great, but I didn’t want to create a fire hazard with melty plastic, so I carefully cut it out.
I was left with a basket that was pretty pliable, fit perfectly over my existing light fixture from Five Below, so I simple pushed the weaving apart on the bottom of the basket and stuck the cord through it. 
If you have a thicker basket, you may have to cut it a bit. I didn’t have to – I don’t suggest using anything too heavy either. This basket weighed about the weight of a Jolly Rancher (that is literally the first thing that popped into my head, so we are going with it.)
Here we go! My adorable DIY rattan pendant.
All in all this cost me a whopping $5.50. The interior structure of the pendant was $5 and the basket from the thrift store was $0.50.
You literally can’t beat it! I hung this little guy up with a single screw in hook above my reading chair in my basement family room, and it surprised me. It casted the most amazing light through the basket, and it really looks magical in the evening!

What do you think? Tell me your thoughts in the comments below!
My DIY gallery wall hack: Modern Boho
When I started to makeover my basement living room, I knew I wanted to keep my modern boho style going down there, which meant keeping things light and airy. I love gallery walls as much as the next home decor enthusiast, but I was also wanted to see something new above my sofa; a simplified version of a gallery wall.
The walls in my basement living room were dark wood paneling when we moved in. They were dark, had a tiny of orange, and were oddly shiny (Why did anyone think this was okay to ever put in a house?!) Needless to say, the first thing I did after getting keys was slather the walls with as much primer as I could manage to put up until the paneling was out of sight!
After I put my furniture in the space, it still felt like it was missing something. I still need to change out the light fixture, and have future plans to add hardwood flooring, but until those items are done, I continue to decorate with smaller and budget friendly tricks that make the space feel cozy.
This brings me to my modern boho gallery wall. I wanted to keep it simple and use muted colors. I’ve been drooling over cactus art, and photography of Joshua tree that is currently sweeping the modern boho decor scene (that IS a thing). But there are two issues there; I’ve never been to Joshua Tree National Park, and the photography I do have of the desert are also featuring 18-year-old me making the peace sign (no judgement!). So I knew I had to search farther!
Unsplash.
The other issue was the art or prints I did find were out of my price range. Wanting prints in a minimum size of 16″x20″, I knew I was looking at $200+ (and that’s just for the prints, not the frame.)
I had the idea to start perusing my favorite photography site called Unsplash. On their site it says “Over 550,000 free (do-whatever-you-want) high-resolution photos brought to you by the world’s most generous community of photographers.” That’s no joke. There are so many free and stunning pictures, which have extremely high resolution. You don’t need to sign up, put your email in, or anything. Simply enjoy the generosity of artists contributing to the free site. I searched for what I was looking for – cactus/desert art and found over 20 photographs that I was in love with.
I downloaded them to my computer and arranged them on the screen to pick the three that I loved most. Then to make them more personable and perfect for my neutral schemed living room, I edited all three of them with the same filter.
Inexpensive…not cheap.
The cost for three stunning prints for my living room – $0.
I of course paid to get them printed (1 hour pick up at Walmart) at a size of 16×20. I was nervous the resolution was going to turn out fuzzy, but they look like million dollar prints. Printing three of these in size 16×20 (matte sheen) costs me $36. So far, I’d customized and printed three pieces of art for my living room for less than what one of them would’ve costed me at a store or even online retailer.
While I waited for the prints to me completed, I picked up three simple black frames. I wanted the photographs to be the focal point, not the frame, so I purchased ones that looked almost seamless. These frames were less than $7 each..that’s a total of $21 for frames. My local store actually only had one frame, so I had to order the other two. You can find them here too!
I found inspiration from a collection of artwork that I loved, but was way out of budget at $600 for the set. I wanted to create this look for as little as I possibly could [ check out the Modern Boho gallery wall I was inspired by from Minted. ]
And here is my $57 gallery wall!


You can do this with almost any gallery wall you want; not just modern boho style! If you want scenery or photography, but you don’t have actual photographs, it’s not the end of the world. You can find copyright-free and high-quality prints, and ultimately make it your own. There is just something about photographs blown up large that makes such an impact in a space! Unlike buying pre-framed art at a store like Home Goods or Hobby Lobby, with this option you can chose your size, frame, and even though you didn’t take the picture yourself, it is still more original than mass produced art.
Sources:
Unsplash
Walmart
Amazon
*Disclosure: This post contains some affiliate links, meaning at no additional cost to you, if you click through and make a purchase, I will earn a small commission. The opinions are completely my own, and I only refer to products that I absolutely love and have tested*
Creating a Bedroom Sanctuary: why it matters for your health
bedroom:
noun
1. a room furnished, primarily for sleeping
sanctuary:
7. any place of refuge; asylum.

When I moved into my new house, I focused on the rooms I felt needed the most TLC. My outdated kitchen and boring bathroom to name two. They did in-fact need a lot of love from me, and I poured all my energy into them, but I abandoned the most important room in my house; my bedroom. Creating a bedroom sanctuary and why it matters for my health never crossed my mind; I have to work on practicing what I preach!
I’ll start by saying it doesn’t matter what your style is. It doesn’t matter what your budget is, the size of your home, your marital status, if you have kids, if you pet is your child, your occupation, your gender, race, or age. It doesn’t matter, because everybody in the world sleeps. We all understand that concrete concept right?
But do you understand what your bedroom does for you?
A bedroom should be a safe space. For kids it’s their own space, regardless if they share it with a sibling or two. Have you ever met a child who was so excited to show you their room and so proud of everything in it, because to them it’s their safe space, it’s catered to them. A child’s room is fun, it’s bright, it’s full of toys, cozy bedding, child-sized furniture. It’s adorned in things that make the child happy.
Fast forwards – teenagers rooms. They are always evolving. Posters on the wall, trendy decor, clothes everywhere. Or the opposite, but that doesn’t matter. A teenagers room reflects their adolescent. You walk into a 15-year old boys room and you know who it belongs to.
Now let’s fast forward to adults. Maybe we buy a nice sofa, we buy that larger dining table for our expanding families, or we invest in a kitchen update so we can entrain more. Maybe we are single professionals and we spend money every weekend with our friends at the trendy new spot in town. But we ALL return at night to sleep in our bed. We all end the night in our bedroom.
Maybe for (so many of us) our bedroom is a catch all. Oh my gosh am I guilty of this. My clothes are everywhere except where they are supposed to be. Like why did I even buy a dresser? My dog, Wilbur, has totally taken over the floor space with his bed, array of blankets and toys, and I never did anything about it. I also never make my bed..my beautiful throw pillows and blankets sit on the floor next to my bed, so why did I even buy them? Does this sound familiar to you? I’m guessing it’s a yes!
Do we not feel we deserve a sanctuary to sleep in, to wake up in, to heal in?
Not to mention, romance is where the bedroom lives, but how sexy is piled up laundry, old bedding, no headboard, and a bright ceiling-fan light? Got you thinking, didn’t I!
So let me say this: You deserve a bedroom sanctuary space. You know you do. You see bedrooms on Pinterest and imagine jumping into that picture and escaping for a little while. You want to dive into the beautiful beds at the home store (not just me, right?) You want a place to retreat to after a long night of studying, after a night out with friends, after putting the kids to bed…it’s essential. No way around that.
Maybe you’re saying, okay that’s a nice thought and I understand, but I can’t afford that. Well let me tell you something. Can you afford the stress, more sleepless nights, the endless thoughts of wanting to have a space that’s yours? Imagine what it would be like to have a bedroom, a dream bedroom. Feels good right? Indulge. Treat yourself. You deserve it. You work hard; you need a beautiful and serene place to recharge.
Waking up in a space that inspires you, and puts you on the right path can literally change your mood, day, and life.
It’s a total wake up call to me, how my bedroom effects me. Which is why it’s on my list now..not my entry way, not my kitchen, living room..all those spaces are important but my bedroom is mine. It’s a safe space, a place to refuel, and it’s time to make my bedroom be part of my self-care regiment.
Here are a few tips I can give you to start making your bedroom sanctuary a reality:
- Put items away that don’t belong in the bedroom. If your room is catch-all, start by cleaning up; and that includes putting clothes away!
- Open the blinds: let all the natural light in that you can. Of course when you need privacy, keep them shut, but let natural light flood your space – this does wonders for your mood
- Make your bed. Even if you have the rattiest and oldest bedding, make your bed, tuck in your sheets, fluff your pillows. It will make all the difference in the world when you start taking care of your bedroom.
- Declutter and simplify. Remove things that no longer serve you joy – outdated decor, artwork, photographs. Put it in a box and remove it from the space. Don’t fill up your space just to fill it up – the bedroom should be simple and joyful.
- Change your lighting. Add lamps to your nightstand, put string lights on your headboard; ad some type of light that isn’t a harsh over head light. This will help in many ways, as lighting has a direct effect on your mind.
- Keep it neutral. I am all about bold colors and boho vibes and eclectic mixes as you know – but a bedroom should be calm and peaceful. It’s a place for a simpler color palette and colors that evoke peace, not energy. IE no red walls or loud & crazy bedspreads. Simplicity and softness are the answer here!
- Remove technology. Now not everyone will agree with me here, but I keep technology out of the bedroom. That means my laptop never enters, there are no TV’s ever, and my cell phone charges elsewhere. Even if you just eliminate the TV, you’ll be shocked as to how immediately serene your space will become.
(Having trouble creating your dream bedroom sanctuary? Ask me for help. I have design services starting at just $197)
How to create a style board for your space
When I moved into my house – it was a blank slate. It was a 1970’s house that had been pretty much untouched since it was built, so when I saw blank slate..I mean wood paneling, white walls, and standard lighting, I was a excited. There wasn’t anything crazy going on, which made my work easier, but blank slates can also be very daunting!
Even as a designer, I was perplexed with my family room. It’s so uninspired and just BLAH. I painted the wood paneling a beautiful boho white, and after that, I was stuck. It took about 2 months until it hit me, I needed a vision. I don’t mean I was going to space out and it was going to come to me in a vision what to do in this room…I mean I needed to visually see it instead of thinking about it! So I did what I do for all my clients; I created a style board!
This is my style board below.
It has all the elements I want to see in my space, the color palette I want to carry throughout, and has some of my existing furniture pieces I’m working with. Now i’m going to break it down for you, so you can learn how to make your own for your space!

First I will say, style boards are like dream boards. They are meant to inspire and reference – so when you’re mindlessly walking through Home Goods and you have the itch to buy something for your house – think back to your style board (or be a wierdo like me who prints it out and brings it with her to the store) and see if the piece aligns with your overall look. This will keep your from just buying pointless things. BUT, just because I chose a specific pillow for my style board, doesn’t mean that that IS the pillow I will buy; it’s just the look and colors I like, and I want to find something similar. Make sense?
Okay – now follow along y’all.
Step 1: Existing Pieces
This is the first thing you need to do when creating a style board – identify what is staying in the space. Now you’ll notice, I didn’t include flooring or walls in this – those are structural and i’m not changing the flooring or wall color at the moment. If you want to include it in yours, that is totally fine, I just like to keep mine simple, so I didn’t include it. I am keeping my sectional sofa and trunk coffee table, so those are the first things I added to the style board.
Whether you are keeping a lot or just one thing, this is always the first step. Gotta work with what you got! And if you are starting from scratch, you can just skip this step.
Step 2: Color Palette
Now that you know what you’re working with, you can establish a color scheme. It can be simple, like black, white and one accent color, or you can do something more complex like I did in mine. I wouldn’t go above 6 colors however, because you’re going to overwhelm yourself at first. Pull colors from your existing colors OR a color you KNOW you are using. For instance, I have white walls, and I know I am going to use this color in my space, so I added white first. I also love green and wanted to use green in my space, so I pulled that in. Seeing the green next to my existing sofa helped me figure out the hue and amount of color to use in the space. Play around with this step until you figure out what you like – and if all else fails – visit Pinterest and search for color palettes in your style. IE: “Farmhouse living room colors”. Feel free to check out some of my favorite spaces for inspiration too!
Step 3: Foundation Pieces
Foundation pieces are an important step. A foundation piece is a large piece of furniture that the room centers around. For instance in my living room, the TV console was the next big item I needed. If I wouldn’t have already had the sofa and coffee table, then identifying that would be included here. Foundation pieces ALSO include area rugs – especially large ones that cover a majority of the floor space. Small accent rugs are not in this step! So for my style board, I identified a jute rug, TV console, and side chair.
Pro tip: Foundation pieces should be in-scale to the room and be cohesive with existing elements. Foundation pieces also are exactly what they sound like – they are the building blocks of the room, so this is where you need to make sure your needs are met [storage, size, quality, comfort, budget, etc].
Step 4: Accent Furniture
This step can be the hardest for most people! Accent furniture is all the little pieces that make the space what it is. Foundation pieces will be pretty neutral and transitional for most people – but accent furniture is where the style really shines! The accent pieces in my style board are the driftwood side tables, leather ottoman pouf, faux-hide accent rug, and rattan lighting pendants. So lighting, small furniture, and accent rugs are included in this step. Think about this step as the frosting on the cake – it’s the most obvious thing, but it’s not the entire dessert.
Step 5: Accessories & Art
Step 5 is also another area people get tripped up on. I get it, artwork can be totally daunting. Have you ever tried to design and hang entire gallery wall by yourself? *I have* But let me tell you – once you have steps 1-4 complete, you are going to breeze through this! I like to reference my color palette – and once I have my furniture in mind, I know generally where my art can go. For my living room, I liked the muted neutrals and boho vibe, so I chose modern desert photography and wall macrame for my wall decor. I also chose a mirror to go above the fireplace. This is where you can throw flowers, vases, lamps & small lighting features onto your board. Remember – you don’t need to include every small detail. Just doing as much as I did is a start that will keep you going on a clear design path!
Step 6: Complete & Implement
Love it! Print it! Share it! yYou can even keep it with you on your phone. You can use this as a reference when you shop, or to plan out your dream space! It’s okay to go back and change things, it’s your style board after all!
These steps are all building blocks – when you first look at a board, it can be over whelming to know where to begin. However, hen you break it down, you can dive deeper into what you truly want, and build your room from the ground up (no pun intended!)
where & how to make a style board:
If you want to make one just like mine for free – you can use Google Sheets, Powerpoint, or Adobe Photoshop! Simply just drag pictures you find online or pictures of your existing space onto the digital sheet. There is no right or wrong way to style it! Keeping it clean and simple is easiest, and if you feel you can’t fit it all on one “board”, then create separate sheets for furniture, color and accessories.
If you create a style board, show me! Tag me on Instagram or Facebook, I’d love to see what you created!
And remember, if you love this blog post, share it or Pin it ♥
7 ways to create a positive environment!
Have you ever been in a space that just felt good? Soothed your soul? Made you feel at ease? If you think i’m a hippie freak, you’re not that far off.
At a young age, i’d say 12, I realized that my environment had an effect on my mood. That’s also when I became serious about my love for all things interior design. I was in love with how changing a room up could actually change the way I felt. I would rearrange my bedroom countless times, and be so happy with how I felt in the space afterwards. It’s an instant gratification!
Fast forward, and here I am. Still loving how interiors have that effect on people – whether they realize it or not. But if you’re reading this, then you probably love home decor and interiors too, and know that a well designed space can totally alter your day to day mood and life. This isn’t that foreign a concept folks!
I meet a lot of people who tell me they just want their space to feel good. Now if you walk into a furniture store and tell the worker that, they probably will just try to sell you expensive furniture. Feeling good in your space is not about the furniture price, style or even set up. It’s more about what elements are in the space..or not in it.
I created a simple 7 step guide to adding the good vibes back in.
Whether it’s your whole house or just one room – implementing these tips can make a space have a calming effect, feel more put together, and just “feel good”.
1] Rug Life
Rugs are kind of a big deal folks. I am a rug-obsessor…for good reason.
First, they absorb noise. Baby in the room next door, noisy neighbors in an apartment, or an 80lb dog that runs around upstairs? Get yourself a rug. They will keep your home cozy and quiet(er).
Second, they add a sense of comfort while being practical. When you step out of bed in the morning, your feet should land on something plush, not just the blah carpet or cold hardwood floors.
Rugs can be layered, they can go over everything; indoors, outdoors, bathrooms, kitchens, everywhere. Rugs aren’t just for hard surface floors either, you can totally transform a space with adding a rug over carpet. Think of adding a rug as an instant facelift to your home.

2] Aroma Therapy
I’m going to be that candle-pushing girl here, get yourself some amazing smelling candles. Let me tell you why.
Candles not only create a beautiful ambiance when lit, and create a calming (and romantic!) setting, but scent is very important in environments.
Maybe your office smells like stale air, or you ride public transportation home…which we all know doesn’t smell like roses. Having your home smell like something you love will instantly trigger a positive reaction in your brain. It can make you relax when you walk in the door!
Fresh flowers, pine, scented cones, and incense will all have the same effect if you aren’t a candle fan!

3] Light the Way.
Lighting is huge. It can literally make or break a space. Did you know there are designer who specialize just in lighting design? Point is – take your lighting seriously if you want some good vibes in your home!
My favorite way to do this is to have a variety of lighting sources. I despise overhead lights, but I know most homes come with them, and if you’re in a rental, you really can’t change that. However, no matter where I’ve lived, I always add table lamps, floor lamps, hanging lights, candles..and my favorite; string lights.
I’m not talking Christmas lights y’all. There are so many beautiful string lights, it just takes some searching. Personally, I have these stunning moroccan string lights strung on my headboard, and they add a glow to my bedroom that truly soothes me to sleep. [Check them my favorite String Lights here]
Try adding lamps to your space, and then using them and not your overhead light (unless necessary of course) and ALWAYS utilize all the natural light you can.

4] Green Thumb.
I do not have a green thumb..I have literally the opposite. Every plant I buy dies, but I continue to buy succulents! (much to the dismay of my bank account)
I am a firm believer in plants in the house. Even if they are fake (I won’t tell if you don’t).
Plants make you feel grounded because they are other living organisms in the room – and they provide benefits as well. Plants are proven to reduce stress, fatigue, and purify the air quality. What other ‘accessory’ can do this? None.
There are plants for any home and style – from adorable mini succulents to large indoor fiddle trees. Even putting fresh flowers on your dining table every week will keep the good vibes flowing!

5] Keep It Clean
Did I throw you off with this one?
It’s obvious however – you can not have a home with good vibes and have a cluttered mess. I’m an artist, I live in my “artistic clutter” but even I have a organization system and a clutter-free rule.
Kitchens and bedrooms are the most important place to keep clean. Kitchen for obvious reasons, but the bedroom is where you recharge and refuel. Keeping it tidy, and clutter-free is imperative.
This is a sure way to create a serene environment. And if you’re like me and collect a lot of “stuff”, then buy stylish storage items, like boxes and bins that double as decor!

6] Where is the wood?
Think of wood as a neutral in your house’s color palette.
Wood adds a sense of tranquility and brings you back to nature in your home. Whether it be hardwood floors, a vintage wood desk, wooden accessories, or wooden shelves, they will have this affect.
Wood goes with every style, and is essential to creating that grounded, good-vibes feel and look.
Tip: Think outside the box – add a wooden frame mirror, live edge coffee table, or wood headboard for a subtle look.

7] Personalize it.
Sterile environments that look like furniture store showrooms make me CRINGE. I’m all about real homes, real people, and that means adding personal touches.
It’s okay to take down kids artwork or remove every trinket you got from the beach off your shelf, but don’t forget to add personal touches back in when revamping a space.
If your home doesn’t feel like home, or just feels off, add something sentimental. Who cares if it’s personal, it’s your home. Let your personality and story shine through the walls that house you.

*Disclosure: This post contains some affiliate links, meaning at no additional cost to you, if you click through and make a purchase, I will earn a small commission. The opinions are completely my own, and I only refer to products that I absolutely love and have tested*
For more tips and inspiration on how to implement these even further, check the blog weekly for updates and be sure to follow me on Instagram @myeclecticgrace
Modern Boho Budget Bathroom Makeover
I’ve been teasing you all about a bathroom makeover since I moved into my 1970’s house. The vanilla color on the walls..cabinets, countertops..paired with the grey floors made for a horrific sight. Plus the faded green curtain on the rusty metal rod? So cute, right? I know, I know, it could’ve been worse. I wasn’t dealing with yellow or pink tile or some horrific peeling wallpaper, but still, it was uninspired for lack of a better word.
Last week I shared my inspiration for my bathroom and the elements I loved from each picture. You can check that post out here.
There were elements I knew I wanted in my bathroom, like brushed gold (DUH) and high contrast design. I also always loved the idea of a Vintage/Persian style rug in a bathroom space, so I made it my mission to find one. Just like my thrifty kitchen makeover [if you haven’t checked that out yet, you don’t want to miss it] I didn’t want to spend an arm and a leg – I capped my budget at $200, and ended up spending $170! I love budget makeovers, especially when I surprise myself and come in under budget.
A lot of the items I already owned, like the soap holder, tray, plants and some of the baskets. What I really was searching for were the big impact elements, and I was on the hunt for deals!
Before I show you the after, let me show you what I was working with.


There was nothing special about this bathroom, and the only thing that wasn’t older than me was the floor and light fixture, which were kept (for now) . It does get great natural light and is relatively spacious, so there were some positive aspects here folks.
160 dollars and 48 hours later, we have this…

I am so happy with how it all turned out! I painted my back wall and the wall above the tub black – specifically Onyx Black from Valspar [links at end of post]. I was super nervous about this, but i’ve been talking about painting a wall black in my house since I moved in. My boyfriend..and frankly everyone including the lady mixing my paint, thought I was insane. A black wall? And a black wall in a small bathroom? SO.MUCH.YES. It came out incredible – i’m biased I know, but the high contrast of the black wall to the white cabinet and marble counters just makes this bathroom look rich.


All in the details..
The Countertop Makeover
I love using contact paper. I had used it before in a bathroom wayyyy back in college for a bathroom makeover and was so floored by the results, that I decided to try it again in this bathroom. I love marble…real marble. But since my budget was capped at $200 and my timeline was 48 hours, obviously that was out of the question. Now this isn’t real, or even close, I mean it’s paper people, but it covers my chippy 1970’s countertops and adds a bright touch. You can buy this on Amazon (only place I’ve found this one) for less than $10. Pretty amazing! It’s easy to apply, and one roll covered my entire 3 foot counter, with some to spare! Check out the Marble Gloss Vinyl Film here!
Plant Lady
When planning my boho bathroom, I knew plants had to be in the mix. I also can’t keep plants alive. Well most plants. So I bought an air-plant (from Aldi’s) because I heard they were extremely low maintenance, and figured he’d be a cute touch! I also have two existing plants I added to the space. It’s really a nice touch to add some living greenery to the bathroom, and I plan on adding a few more in the future.
Boho Shower Curtain
I’ve also had a million questions on where I bought my shower curtain. I love it, and I think it’s my favorite thing in this entire makeover! It’s stunning, and the first thing I bought for my space (I actually bought this a month before I even got keys to my new house. It was love at first site.) I found it at Target for $24.99 – it’s from their new Opalhouse brand, which is swoon-worthy if you don’t already know that. You can buy it too – here.
My $10 Steal
I almost gave up the search for my vintage rug. The weekend was coming to an end..and I didn’t want to buy a new one online because to me that feels like cheating. It just so happens, as I was letting the paint dry, I was perusing Facebook Marketplace and a neighbor of mine listed a 3’x5′ 100% wool vintage Persian rug for sale. For $10. I literally leapt off the sofa and screamed my talk-to-text to her! Needless to say, I love my rug. It was the finishing touch in my bathroom..and not only do I enjoy it, but someone else in the household thinks it was MADE for him…


I found some artwork at Big Lots that had a tropical feel, but also pulled the wood element in from the shelves. All about balance.

I needed extra storage, so I found these amazing shelves on Amazon and put them above the toilet for some open storage! Well, my boyfriend put them up, but I styled them, and I love them. I have been on the search for good shelves, but didn’t want laminated ones or cheap looking shelves,which was all I could find. When I found these sturdy real-wood ones that were not only affordable, but were Amazon Prime, I ordered them immediately. You can buy my Floating Wall Shelves here.

More Pictures
I love breaking down the costs for you, so you can understand how to achieve a makeover on a tight budget!
- Valspar Black Onyx Paint $8
- Floating Wall Shelves
$60
- Opalhouse Shower Curtain $25
- Vintage Rug $10
- Marble Gloss Vinyl Film
(counter top) $8
- Air-plant $3
- Project 62 mirror $40
- Artwork $16
Total: $170
Sharing is caring! Pin it, or share it for future reference! xx
*Disclosure: This post contains some affiliate links, meaning at no additional cost to you, if you click through and make a purchase, I will earn a small commission. The opinions are completely my own, and I only refer to products that I absolutely love and have tested*
How to achieve a modern-boho look without breaking the bank
I’ve always been a fan of the easy and free-spirited bohemian look, from fashion to home decor, it’s me, through and through. It seems just recently however that it’s become trendy, which is actually amazing for you all who are trying to achieve this look in your own digs. You can find boho decor items online [especially Etsy, and even Amazon!], in big box stores, and most definitely at your local thrift shop.
To be honest, creating a bohemian & eclectic home isn’t about buying mainstream items. You can’t achieve this look by going into a retail store and buying everything from one showroom..eclectic boho is a “collected” look. Pieces form different eras, unique trinkets, and a sense of blurred boundaries between indoor and outdoor. Promise it’s not tricky to create this effortless look..and I’m going to show you how to do it on a budget too!
What’s eclectic & boho style you may ask…this sums it up perfectly.
“Overall the style portrays an organic sense..like it came together over a period of time rather than all at once. It is a representation of the dweller’s life, experiences, and personality.”
Here are a few ways to achieve it..simply and on a budget!
Matching
I’m going to start this off with the #1 rule here. Throw your matchy-match and symmetrical beliefs out the window. If you can’t live without this..then boho style is not going to be your cup of tea!
Mixing up elements and letting each piece be it’s own star is the way of the game. This goes for nightstands, lamps, and pillows. Your sofa should be an array of different pillows [fabrics, textures, colors, and size]. Don’t go overboard with items that don’t match in the slightest – you want to keep things cohesively organic and boho.
Your rug doesn’t have to match your sofa, and your four chairs at the dining table don’t need to be the same either. This rule of thumb only aids in the budget department. How many times have you found the perfect lamp, or chair, but it’s just a single lonely little thing? Now you know to buy it, bring it to your home, and love it. Because it’s going to work in your space with this style!
Check out my favorite inspiration images for an eclectic boho haven.


Plants
Plants are essential to creating this look. You may be like me (serial plant murderer); I can not even keep succulents alive, and those things survive in harsh deserts. But if you have any amount of plant knowledge, I say go all out sister! Buy the whole dang nursery and fill your home.
Best thing about plants – other than keeping your air clean and being natural mood boosters – they make the most adorable accessories.
Pop a little plant on your bookcase, your window seal, your coffee table, even try hanging them in your bathroom. They will instantly transform your room into a boho-haven!
If you can’t keep them alive or for some other reason can’t have real plants, faux is okay! Just make sure they are quality and don’t look to cheap.
Plants are versatile and add a gorgeous pop of color in the most organic and natural way, so money is well spent every time you add one to your home.


Layer up
Whenever someone used to tell me to layer my space, I had no idea what they meant. Layered interiors? Sounds complicated, but it’s really not y’all.
Layering your interiors is exactly what it sounds like – it’s the opposite of minimal. It can be as simple as putting two rugs down, a jute over a vintage classic, pillows layered on the sofa so it’s not just a few sparse ones, and walls with tapestries, hanging plants, macrame, artwork, etc.
Layering on bookcases means filling in bookcases and shelves so things don’t look empty. A big fail I see here is people layering heavily on one side of the room or in one element. For example, just doing one gallery wall, but leaving the sofa bare in the a living room, or creating a heavy looking bookcase but not having much else in the room for balance.
The key to doing this on a budget is by buying used and reusing items in a new way. You can use old scarves that can be hung as tapestries, or throw down a few rugs you already have in a layered pattern, instead of purchasing a large new expensive rug.


Rugs
Rugs are a beautiful way to add comfort and style to your space. They can be simple, like my favorite nuLOOM jute rug, or they can be a statement! Rug styles you’ll want to look for for a boho look include kilim, patchwork, Monaco, Turkish, Persian, and jute.
Boho style is pretty neutral, with earth tones and natural materials, but rugs are the exception. They can be the pop of color in a space, and many rugs are the focal point.


Materials and Colors
There isn’t really a rule of what to use and not to use, but bohemian style is all about nature, organic materials and colors, and has a collected look. I like to consider my style eclectic bohemian, because I mix vintage elements along with some rustic touches to create a look that’s all my own. That’s what eclectic is all about – collected interiors that are an outwards expression of who you are.
Boho style can be neutrals, think drift wood, white macrame, woven jute and different shades of white and grey thrown in. Boho can always be a little louder with natural materials rooting the design, but bold jewel tones, like green and gold being present in the space.

It’s all about what you love. You do you ♥
Additional budget tips:
- Wait for sales, whether that be holidays or for coupons, buying items at a discount takes some pre-planning but is always smart.
- Thrift is up. Some be afraid to scrounge your local Restore and Goodwill. Hidden treasures are sure to arise!
- Flea markets and Estate sales are the way to go for vintage pieces. Pieces with a story all a staple for a true boho look.
- Reuse items in your own home – an old chipped mug might be the perfect new pot for a plant
- Things don’t need to be perfect – worn and weathered are actually strived for.
Want to get started NOW? Click on my links to my favorite boho Amazon products that are tested (by me!) and affordable!
*Disclosure: This post contains some affiliate links, meaning at no additional cost to you if you click through and make a purchase, I will earn commission. The opinions are completely my own, and I only refer to products that I absolutely love and have tested*
My Boho Bathroom (Progress) & Inspiration
Lately I’ve been showcasing my bathroom on my Instagram stories (peep them here!) The hallway bathroom in my 1970’s split-level home was a blank canvas when I moved in a few months ago. Blank = boring as hell! Not only are the walls a creamy white, but the trim and vanity are painted the same..it’s like they just threw a bucket of paint in this bathroom and that was that. I guess the 70’s were an odd time…
I love bathrooms. Is that a weird thing to say? I always find myself snapping a quick photo of them at restaurants and hotels (I got over the awkwardness of this years ago. My excuse? “Oh I’m a designer..”) I love tile, lighting, and the bold design choices that are nestled into one space! So when it came to my bathroom in my new house, I knew I wanted it to be my little sanctuary, because i’m a glass of wine and bubble bath kinda gal.
So far, I’ve added a new shower curtain, hung shelfs above the toilet, and changed the mirror out. Once this space is complete, I am going to do a feature blog post, listing all the items I used and such, but for now i’m just going to showcase what we started with (brace yourself) and show you some of my FAVORITE bathrooms I found on Pinterest.
1974 called..and they want their bathroom back.
As you already know, I love to challenge myself and create the most bang for my buck. In order to do this – I spend a few weeks or more gathering items. I seek out sales, flea market and thrift finds, and lots of DIY. My goal is to have a bathroom where I can unwind in the tub, and ultimately enjoy getting ready in. This bathroom is also the only guest bathroom, and is located in the hallway off the entry way, so I want it to be appealing to guests as well! Let me show you where I’m pulling some inspiration from!
Bathrooms I have major crushes on…

This bathroom hits me right in the heart. I love the simple 1920’s touches, like the penny tiles floors, claw foot tub (that black touch is so edgy!) and can we talk about how dreamy is that window with the sheer curtain?

Here is another classic bathroom with updated touches – like the seamless shower doors and sleek subway tiles. I also an IN LOVE with this vanity. They reused a Mid-Century Modern dresser as the vanity, and it makes me swoon! I love the contrast of the black and white materials with the raw beauty of the vanity. This bathroom is also a great example of tastefully mixing metals – which is something I am doing in my own bathroom.

Where to start!!! I love the green wall in this bathroom. Bathroom wall colors are so underrated, as is artwork. I’m a lover of maps, especially vintage maps, so this bathroom is a favorite in my book. I don’t have the room for something like this in mine, but the color is definitely something I am considering.

I just recently started to really like the idea of plants in the bathroom. Not only do they freshen the air and keep spiders away (some of them), but they are natural decor. I love the claw foot tub here too..but I have to work with my tub/shower combo for the time being!

Are you starting to see a trend here? Beautiful rugs, round mirrors, and a bold accent wall. These are the things I KNOW I want in my bathroom. The high contrast in this bathroom gives it a rich feeling, while the southwestern rug adds an eclectic flair.
[wpforms id=”57″ title=”true”]
Stay in the loop.
Want to follow along with the progress? Follow me on Instagram !
Tell me your thoughts on bathroom makeovers! Must haves, wins/fails in your own experience, etc!
xo
Katherine


